How I Use LLMs like ChatGPT And Tips For Getting Started

You’ve probably heard about new AI (artificial intelligence) tools like ChatGPT, Bard, Midjourney, DALL-E and others. But, what are they good for?

Last fall I started experimenting with them. I looked at AI art tools and found them to be challenging, at the time, for one of my purposes, which was creating characters and illustrating a storyline with consistent characters for some of my children’s books. I also tested GPT-3 (meaning version 3.0 of GPT). It wasn’t that great, to be honest. But later, GPT-3.5 was released, along with the ChatGPT chat interface to it, which WAS a big improvement for a lot of my use cases. (And now, GPT-4 is out and is an even bigger improvement, although it costs more to use. More on the cost differences below)

So what am I using these AI tools for? And how might YOU use some of these AI tools? And what are the limitations? This is what I’ve learned:

  1. The most frequent way I use these AI tools is for getting started on a project, especially those related to writing.

You know the feeling of staring at a blank page and not knowing where to start? Maybe it’s the blank page of a cold email; the blank page of an essay or paper you need to write; the blank page of the outline for a presentation. Starting is hard!

Even for this blog post, I had a list of bulleted notes of things I wanted to remember to include. But I wasn’t sure how I wanted to start the blog post or incorporate them. I stuck the notes in ChatGPT and asked it to expand the notes.

What did it do? It wrote a few paragraph summary. Which isn’t what I wanted, so I asked it again to use the notes and this time “expand each bullet into a few sentences, rather than summarizing”. With these clear directions, it did, and I was able to look at this content and decide what I wanted to edit, include, or remove.

Sometimes I’m stuck on a particular writing task, and I use ChatGPT to break it down. In addition to kick-starting any type of writing overall, I’ve asked it to:

  • Take an outline of notes and summarize them into an introduction; limitations section; discussion section; conclusion; one paragraph summary; etc.
  • Take a bullet point list of notes and write full, complete sentences.
  • Take a long list of notes I’ve written about data I’ve extracted from a systematic review I was working on, and ask it about recurring themes or outlier concepts. Especially when I had 20 pages (!) of hand-written notes in bullets with some loose organization by section, I could feed in chunks of content and get help getting the big picture from that 20 pages of content I had created. It can highlight themes in the data based on the written narratives around the data.

A lot of times, the best thing it does is it prompts my brain to say “that’s not correct! It should be talking about…” and I’m able to more easily write the content that was in the back of my brain all along. I probably use 5% of what it’s written, and more frequently use it as a springboard for my writing. That might be unique to how I’m using it, though, and other simple use cases such as writing an email to someone or other simplistic content tasks may mean you can keep 90% or more of the content to use.

2. It can also help analyze data (caution alert!) if you understand how the tools work.

Huge learning moment here: these tools are called LLMs (large language models). They are trained on large amounts of language. They’re essentially designed so that, based on all of those words (language) it’s taken in previously, to predict content that “sounds” like what would come after a given prompt. So if you ask it to write a song or a haiku, it “knows” what a song or a haiku “looks” like, and can generate words to match those patterns.

It’s essentially a PATTERN MATCHER on WORDS. Yeah, I’m yelling in all caps here because this is the biggest confusion I see. ChatGPT or most of these LLMs don’t have access to the internet; they’re not looking up in a search engine for an answer. If you ask it a question about a person, it’s going to give you an answer (because it knows what this type of answer “sounds” like), but depending on the amount of information it “remembers”, some may be accurate and some may be 100% made up.

Why am I explaining this? Remember the above section where I highlighted how it can start to sense themes in the data? It’s not answering solely based on the raw data; it’s not doing analysis of the data, but mostly of the words surrounding the data. For example, you can paste in data (from a spreadsheet) and ask it questions. I did that once, pasting in some data from a pivot table and asking it the same question I had asked myself in analyzing the data. It gave me the same sense of the data that I had based on my own analysis, then pointed out it was only qualitative analysis and that I should also do quantitative statistical analysis. So I asked it if it could do quantitative statistical analysis. It said yes, it could, and spit out some numbers and described the methods of quantitative statistical analysis.

But here’s the thing: those numbers were completely made up!

It can’t actually use (in its current design) the methods it was describing verbally, and instead made up numbers that ‘sounded’ right.

So I asked it to describe how to do that statistical method in Google Sheets. It provided the formula and instructions; I did that analysis myself; and confirmed that the numbers it had given me were 100% made up.

The takeaway here is: it outright said it could do a thing (quantitative statistical analysis) that it can’t do. It’s like a human in some regards: some humans will lie or fudge and make stuff up when you talk to them. It’s helpful to be aware and query whether someone has relevant expertise, what their motivations are, etc. in determining whether or not to use their advice/input on something. The same should go for these AI tools! Knowing this is an LLM and it’s going to pattern match on language helps you pinpoint when it’s going to be prone to making stuff up. Humans are especially likely to make something up that sounds plausible in situations where they’re “expected” to know the answer. LLMs are in that situation all the time: sometimes they actually do know an answer, sometimes they have a good guess, and sometimes they’re just pattern matching and coming up with something that sounds plausible.

In short:

  • LLM’s can expand general concepts and write language about what is generally well known based on its training data.
  • Try to ask it a particular fact, though, and it’s probably going to make stuff up, whether that’s about a person or a concept – you need to fact check it elsewhere.
  • It can’t do math!

But what it can do is teach you or show you how to do the math, the coding, or whatever thing you wish it would do for you. And this gets into one of my favorite use cases for it.

3. You can get an LLM to teach you how to use new tools, solve problems, and lower the barrier to entry (and friction) on using new tools, languages, and software.

One of the first things I did was ask ChatGPT to help me write a script. In fact, that’s what I did to expedite the process of finding tweets where I had used an image in order to get a screenshot to embed on my blog, rather than embedding the tweet.

It’s now so easy to generate code for scripts, regardless of which language you have previous experience with. I used to write all of my code as bash scripts, because that’s the format I was most familiar with. But ChatGPT likes to do things as Python scripts, so I asked it simple questions like “how do I call a python script from the command line” after I asked it to write a script and it generated a python script. Sure, you could search in a search engine or Stack Overflow for similar questions and get the same information. But one nice thing is that if you have it generate a script and then ask it step by step how to run a script, it gives you step by step instructions in context of what you were doing. So instead of saying “to run a script, type `python script.py’”, using placeholder names, it’ll say “to run the script, use ‘python actual-name-of-the-script-it-built-you.py’ “ and you can click the button to copy that, paste it in, and hit enter. It saves a lot of time for figuring out how to take placeholder information (which you would get from a traditional search engine result or Stack Overflow, where people are fond of things like saying FOOBAR and you have no idea if that means something or is meant to be a placeholder). Careful observers will notice that the latest scripts I’ve added to my Open Humans Data Tools repository (which is packed with a bunch of scripts to help work with big datasets!) are now in Python rather than bash; such as when I was adding new scripts for fellow researchers looking to check for updates in big datasets (such as the OpenAPS Data Commons). This is because I used GPT to help with those scripts!

It’s really easy now to go from an idea to a script. If you’re able to describe it logically, you can ask it to write a script, tell you how to run it, and help you debug it. Sometimes you can start by asking it a question, such as “Is it possible to do Y?” and it describes a method. You need to test the method or check for it elsewhere, but things like uploading a list of DOIs to Mendeley to save me hundreds of clicks? I didn’t realize Mendeley had an API or that I could write a script that would do that! ChatGPT helped me write the script, figure out how to create a developer account and app access information for Mendeley, and debug along the way so I ended up within an hour and a half of having a tool that easily saved me 3 hours on the very first project that I used it with.

I’m gushing about this because there’s probably a lot of ideas you have that you immediately throw out as being too hard, or you don’t know how to do it. It takes time, but I’m learning to remember to think “I should ask the LLM this” and ask it questions such as:

  • Is it possible to do X?
  • Write a script to do X.
  • I have X data. Pretend I am someone who doesn’t know how to use Y software and explain how I should do Z.

Another thing I’ve done frequently is ask it to help me quickly write a complex formula to use in a spreadsheet. Such as “write a formula that can be used in Google Sheets to take an average of the values in M3:M84 if they are greater than zero”.

It gives me the formula, and also describes it, and in some cases, gives alternative options.

Other things I’ve done with spreadsheets include:

  • Ask it to write a conditional formatting custom formula, then give me instructions for expanding the conditional formatting to apply to a certain cell range.
  • Asking it to check if a cell is filled with a particular value and then repeating the value in the new cell, in order to create new data series to use in particular charts and graphs I wanted to create from my data.
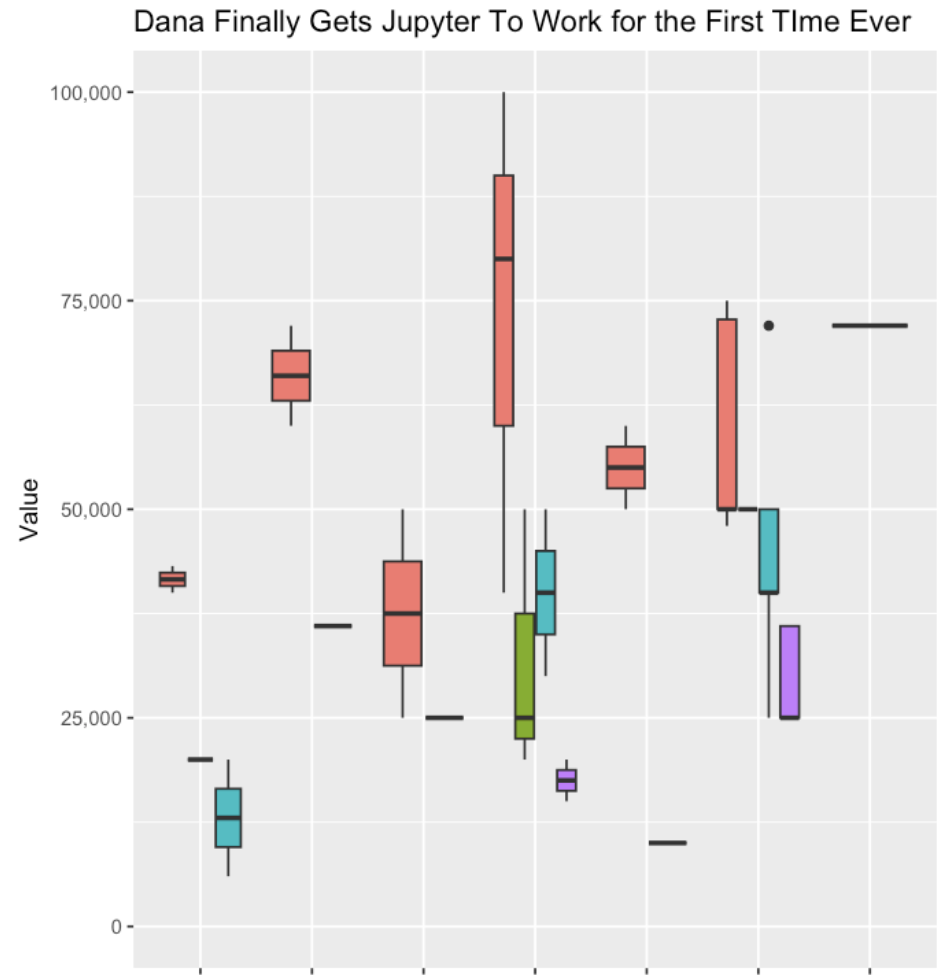
  • Help me transform my data so I could generate a box and whisker plot.
  • Ask it for other visuals that might be effective ways to illustrate and visualize the same dataset.
  • Explain the difference between two similar formulas (e.g. COUNT and COUNTA or when to use IF and IFS).

This has been incredibly helpful especially with some of my self-tracked datasets (particularly around thyroid-related symptom data) where I’m still trying to figure out the relationship between thyroid levels, thyroid antibody levels, and symptom data (and things like menstrual cycle timing). I’ve used it for creating the formulas and solutions I’ve talked about in projects such as the one where I created a “today” line that dynamically updates in a chart.

It’s also helped me get past the friction of setting up new tools. Case in point, Jupyter notebooks. I’ve used them in the web browser version before, but often had issues running the notebooks people gave me. I debugged and did all kinds of troubleshooting, but have not for years been able to get it successfully installed locally on (multiple of) my computers. I had finally given up on effectively using notebooks and definitely given up on running it locally on my machine.

However, I decided to see if I could get ChatGPT to coax me through the install process.

I told it:

“I have this table with data. Pretend I am someone who has never used R before. Tell me, step by step, how to use a Jupyter notebook to generate a box and whisker plot using this data”

(and I pasted my data that I had copied from a spreadsheet, then hit enter).

It outlined exactly what I needed to do, saying to install Jupyter Notebook locally if I hadn’t, gave me code to do that, installing the R kernel, told me how to do that, then how to start a notebook all the way down to what code to put in the notebook, the data transformed that I could copy/paste, and all the code that generated the plot.

However, remember I have never been able to successfully get Jupyter Notebooks running! For years! I was stuck on step 2, installing R. I said:

“Step 2, explain to me how I enter those commands in R? Do I do this in Terminal?”

It said “Oh apologies, no, you run those commands elsewhere, preferably in Rstudio. Here is how to download RStudio and run the commands”.

So, like humans often do, it glossed over a crucial step. But it went back and explained it to me and kept giving more detailed instructions and helping me debug various errors. After 5-6 more troubleshooting steps, it worked! And I was able to open Jupyter Notebooks locally and get it working!

All along, most of the tutorials I had been reading had skipped or glossed over that I needed to do something with R, and where that was. Probably because most people writing the tutorials are already data scientists who have worked with R and RStudio etc, so they didn’t know those dependencies were baked in! Using ChatGPT helped me be able to put in every error message or every place I got stuck, and it coached me through each spot (with no judgment or impatience). It was great!

I was then able to continue with the other steps of getting my data transformed, into the notebook, running the code, and generating my first ever box and whisker plot with R!

A box and whisker plot, illustrated simply to show that I used R and Jupyter finally successfully!

This is where I really saw the power of these tools, reducing the friction of trying something new (a tool, a piece of software, a new method, a new language, etc.) and helping you troubleshoot patiently step by step.

Does it sometimes skip steps or give you solutions that don’t work? Yes. But it’s still a LOT faster than manually debugging, trying to find someone to help, or spending hours in a search engine or Stack Overflow trying to translate generic code/advice/solutions into something that works on your setup. The beauty of these tools is you can simply paste in the error message and it goes “oh, sorry, try this to solve that error”.

Because the barrier to entry is so low (compared to before), I’ve also asked it to help me with other project ideas where I previously didn’t want to spend the time needed to learn new software and languages and all the nuances of getting from start to end of a project.

Such as, building an iOS app by myself.

I have a ton of projects where I want to temporarily track certain types of data for a short period of time. My fall back is usually a spreadsheet on my phone, but it’s not always easy to quickly enter data on a spreadsheet on your phone, even if you set up a template with a drop down menu like I’ve done in the past (for my DIY macronutrient tool, for example). For example, I want to see if there’s a correlation in my blood pressure at different times and patterns of inflammation in my eyelid and heart rate symptoms (which are symptoms, for me, of thyroid antibodies being out of range, due to Graves’ disease). That means I need to track my symptom data, but also now some blood pressure data. I want to be able to put these datasets together easily, which I can, but the hardest part (so to speak) is finding a way that I am willing to record my blood pressure data. I don’t want to use an existing BP tracking app, and I don’t want a connected BP monitor, and I don’t want to use Apple Health. (Yes, I’m picky!)

I decided to ask ChatGPT to help me accomplish this. I told it:

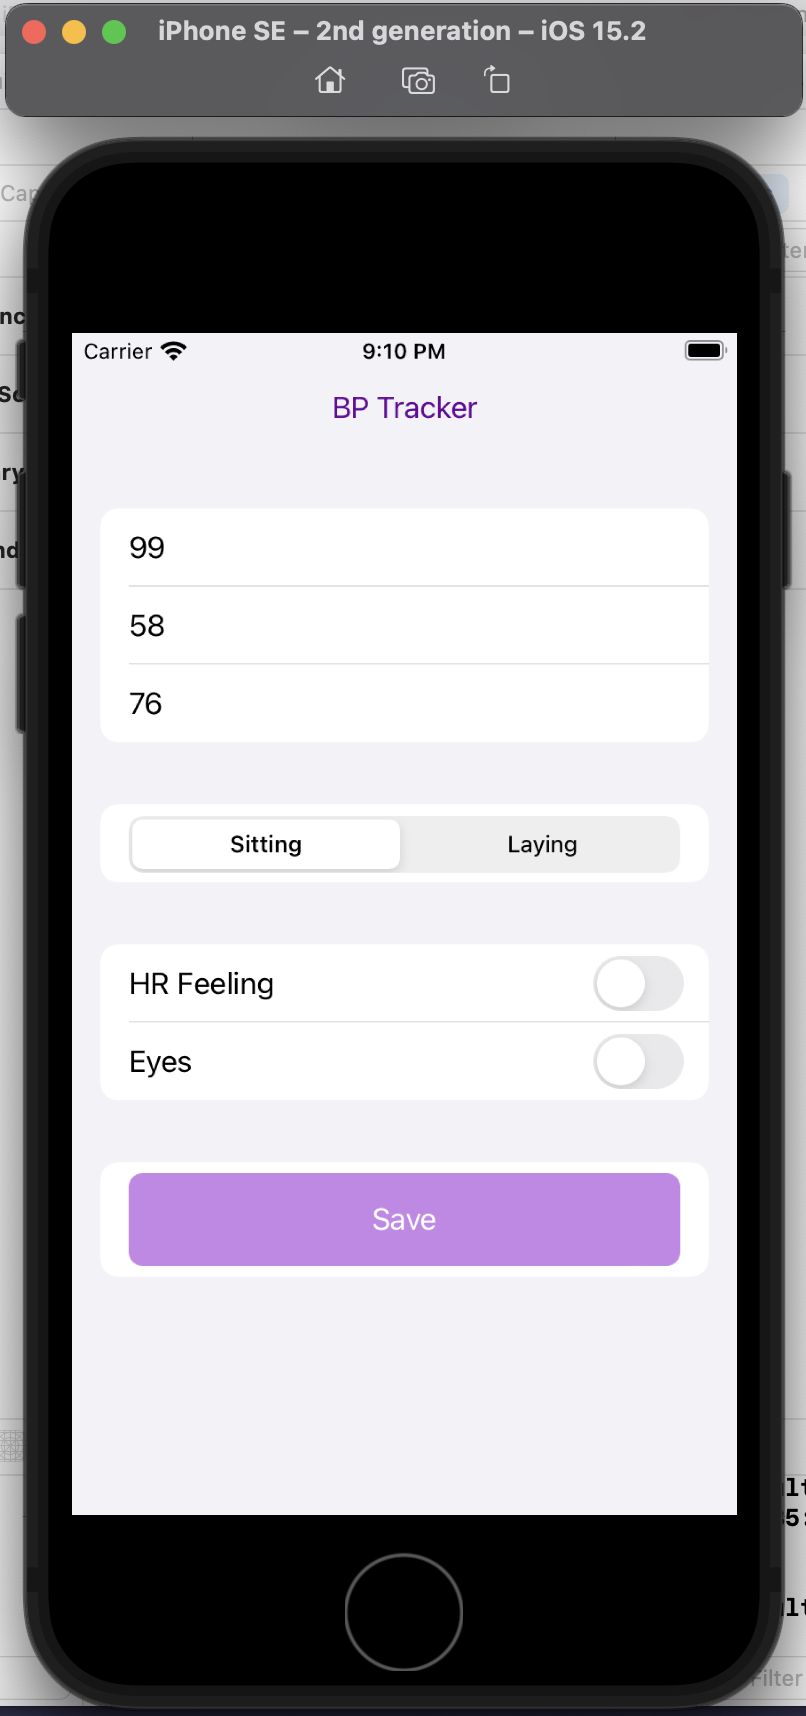
“You’re an AI programming assistant. Help me write a basic iOS app using Swift UI. The goal is a simple blood pressure tracking app. I want the user interface to default to the data entry screen where there should be three boxes to take the systolic, diastolic blood pressure numbers and also the pulse. There should also be selection boxes to indicate whether the BP was taken sitting up or laying down. Also, enable the selection of a section of symptom check boxes that include “HR feeling” and “Eyes”. Once entered on this screen, the data should save to a google spreadsheet.” 

This is a completely custom, DIY, n of 1 app. I don’t care about it working for anyone else, I simply want to be able to enter my blood pressure, pulse, whether I’m sitting or laying down, and the two specific, unique to me symptoms I’m trying to analyze alongside the BP data.

And it helped me build this! It taught me how to set up a new SwiftUI project in XCode, gave me code for the user interface, how to set up an API with Google Sheets, write code to save the data to Sheets, and get the app to run.

(I am still debugging the connection to Google Sheets, so in the interim I changed my mind and had it create another screen to display the stored data then enable it to email me a CSV file, because it’s so easy to write scripts or formulas to take data from two sources and append it together!)

Is it fancy? No. Am I going to try to distribute it? No. It’s meeting a custom need to enable me to collect specific data super easily over a short period of time in a way that my previous tools did not enable.

Here’s a preview of my custom app running in a simulator phone:

Simulator iphone with a basic iOS app that intakes BP, pulse, buttons for indicating whether BP was taken sitting or laying down; and toggles for key symptoms (in my case HR feeling or eyes), and a purple save button.

I did this in a few hours, rather than taking days or weeks. And now, the barrier to entry to creating more custom iOS is reduced, because now I’m more comfortable working with XCode and the file structures and what it takes to build and deploy an app! Sure, again, I could have learned to do this in other ways, but the learning curve is drastically shortened and it takes away most of the ‘getting started’ friction.

That’s the theme across all of these projects:

  • Barriers to entry are lower and it’s easier to get started
  • It’s easier to try things, even if they flop
  • There’s a quicker learning curve on new tools, technologies and languages
  • You get customized support and troubleshooting without having to translate through as many generic placeholders

PS – speaking of iOS apps, based on building this one simple app I had the confidence to try building a really complex, novel app that has never existed in the world before! It’s for people with exocrine pancreatic insufficiency like me who want to log pancreatic enzyme replacement therapy (PERT) dosing and improve their outcomes – check out PERT Pilot and how I built it here.

4. Notes about what these tools cost

I found ChatGPT useful for writing projects in terms of getting started, even though the content wasn’t that great (on GPT-3.5, too). Then they came out with GPT-4 and made a ChatGPT Pro option for $20/month. I didn’t think it was worth it and resisted it. Then I finally decided to try it, because some of the more sophisticated use cases I wanted to use it for required a longer context window, and in addition to a better model it also gave you a longer context window. I paid the first $20 assuming I’d want to cancel it by the end of the month.

Nope.

The $20 has been worth it on every single project that I’ve used it for. I’ve easily saved 5x that on most projects in terms of reducing the energy needed to start a project, whether it was writing or developing code. It has saved 10x that in time cost recouped from debugging new code and tools.

GPT-4 does have caps, though, so even with the $20/month, you can only do 25 messages every 3 hours. I try to be cognizant of which projects I default to using GPT-3.5 on (unlimited) versus saving the more sophisticated projects for my GPT-4 quota.

For example, I saw a new tool someone had built called “AutoResearcher”, downloaded it, and tried to use it. I ran into a bug and pasted the error into GPT-3.5 and got help figuring out where the problem was. Then I decided I wanted to add a feature to output to a text file, and it helped me quickly edit the code to do that, and I PR’ed it back in and it was accepted (woohoo) and now everyone using that tool can use that feature. That was pretty simple and I was able to use GPT-3.5 for that. But sometimes, when I need a larger context window for a more sophisticated or content-heavy project, I start with GPT-4. When I run into the cap, it tells me when my next window opens up (3 hours after I started using it), and I usually have an hour or two until then. I can open a new chat on GPT-3.5 (without the same context) and try to do things there; switch to another project; or come back at the time it says to continue using GPT-4 on that context/setup.

Why the limit? Because it’s a more expensive model. So you have a tradeoff between paying more and having a limit on how much you can use it, because of the cost to the company.

—–

TLDR:

Most important note: LLMs don’t “think” or “know” things the way humans do. They output language they predict you want to see, based on its training and the inputs you give it. It’s like the autocomplete of a sentence in your email, but more words on a wider range of topics!

Also, the LLM can’t do math. But they can write code. Including code to do math.

(Some, but not all, LLMs have access to the internet to look up or incorporate facts; make sure you know which LLM you are using and whether it has this feature or not.)

Ways to get started:

    1. The most frequent way I use these AI tools is for getting started on a project, especially those related to writing.
      • Ask it to help you expand on notes; write summaries of existing content; or write sections of content based on instructions you give it
    2.  It can also help analyze data (caution alert!) if you understand the limitations of the LLM.
      • The most effective way to work with data is to have it tell you how to run things in analytical software, whether that’s how to use R or a spreadsheet or other software for data analysis. Remember the LLM can’t do math, but it can write code so you can then do the math!
    3.  You can get an LLM to teach you how to use new tools, solve problems, and lower the barrier to entry (and friction) on using new tools, languages, and software.
      • Build a new habit of asking it “Can I do X” or “Is it possible to do Y” and when it says it’s possible, give it a try! Tell it to give you step-by-step instructions. Tell it where you get stuck. Give it your error messages or where you get lost and have it coach you through the process. 

What’s been your favorite way to use an LLM? I’d love to know other ways I should be using them, so please drop a comment with your favorite projects/ways of using them!

Personally, the latest project that I built with an LLM has been PERT Pilot!

How I use LLMs (like ChatGPT) and tips for getting started

CGM for primary care doctors: a new article in the BMJ

I was honored last year to be asked to write an article about the basics of continuous glucose monitoring (CGM) for primary care providers by the BMJ, which was released today online.

This, like most of my academic literature article writing, was an unpaid gig. So why did I do it?

Well, most people with diabetes are treated primarily by primary care providers (“GPs” or “PCPs” or “family doctors”, etc). It’s somewhat rare for most people with diabetes to see an endocrinologist! It also varies regionally, even within the same country. And, primary care providers obviously treat a lot of widely varying conditions, from acute to chronic, so they may not have time or energy to stay up to date on all treatment options for all conditions.

This therefore felt like a great opportunity to contribute some information about CGM, an incredibly useful piece of technology for anyone with diabetes who wants it, specifically written and targeted for primary care providers who may not have the exposure to CGM technology that endocrinology providers have had over the years. And, like most things, the technology (thankfully) has changed quite a bit. Accuracy, ease of use, cost, and many other factors have changed dramatically in the last almost two decades since CGMs were introduced on the market!

I sought out two fellow experts in CGM and diabetes technology to co-author the article with me. I asked Ben Wheeler, an excellent pediatric endocrinologist who has done quite a bit of research on “intermittently scanned” CGMs (isCGM); and Tamara Oser, who is the director of the Primary Care Diabetes Lab (and a parent and a spouse of people living with diabetes) and worked to facilitate uptake of CGM in primary care settings.

I’m also appreciative that a parent and teen with newly diagnosed diabetes and new experiences with CGM both reviewed this article when it was drafted and shared their perspective to it; as well as appreciative of valuable input from a friend with many years of experience with diabetes who has used 8 (!) different CGM systems.

We are starting to see a shift in adoption and coverage of CGM, thankfully. Historically, people with diabetes haven’t always had insurance cover CGM. Even if insurance does cover CGM, sometimes we have to fight an uphill battle every year to re-prove that we (still) have diabetes and that we still need CGM. Sometimes good outcomes from using CGM disqualifies us from the next year’s coverage of CGM (in which case we have to appeal our cases for coverage). It’s frustrating! That’s why it’s so nice to see increasing guidelines, recommendations, and even country-specific guidelines encouraging funding and coverage of CGM for people with all types of diabetes. The biggest latest news – as of yesterday (March 2, 2023) – was that in the U.S., Medicare will now be covering CGM for people with type 2 diabetes on insulin. This is a huge group of people who previously didn’t have CGM coverage before!

So here it is, just out today online (March 3, 2023), and projected to be in the March 25, 2023 print edition of the BMJ: an article on continuous glucose monitoring (CGM) for primary providers. I’m hoping it helps pave the way for more providers to feel comfortable prescribing CGM for more people with diabetes; increased their knowledge in working with people with diabetes who have CGM prescribed from other providers; and also reduce unconscious and conscious bias against people with diabetes being offered this important, life-changing and life-saving technology.

P.S. – if you can’t access the article from the link above, as a reminder I always store an accessible author copy of my research articles at DIYPS.org/research!

Looking Back Through 2022 (What You May Have Missed)

I ended up writing a post last year recapping 2021, in part because I felt like I did hardly anything – which wasn’t true. In part, that was based on my body having a number of things going on that I didn’t know at the time. I figured those out in 2022 which made 2022 hard and also provided me with a sense of accomplishment as I tackled some of these new challenges.

For 2022, I have a very different feeling looking back on the entire year, which makes me so happy because it was night and day (different) compared to this time last year.

One major example? Exocrine Pancreatic Insufficiency.

I started taking enzymes (pancreatic enzyme replacement therapy, known as PERT) in early January. And they clearly worked, hooray!

I quickly realized that like insulin, PERT dosing needed to be based on the contents of my meals. I figured out how to effectively titrate for each meal and within a month or two was reliably dosing effectively with everything I was eating and drinking. And, I was writing and sharing my knowledge with others – you can see many of the posts I wrote collected at DIYPS.org/EPI.

I also designed and built an open source web calculator to help others figure out their ratios of lipase and fat and protease and protein to help them improve their dosing.

I even published a peer-reviewed journal article about EPI – submitted within 4 months of confirming that I had it! You can read that paper here with an analysis of glucose data from both before and after starting PERT. It’s a really neat example that I hope will pave the way for answering many questions we all have about how particular medications possibly affect glucose levels (instead of simply being warned that they “may cause hypoglycemia or hyperglycemia” which is vague and unhelpful.)

I also had my eyes opened to having another chronic disease that has very, very expensive medication with no generic medication option available (and OTCs may or may not work well). Here’s some of the math I did on the cost of living with EPI and diabetes (and celiac and Graves) for a year, in case you missed it.

Another other challenge+success was running (again), but with a 6 week forced break (ha) because I massively broke a toe in July 2022.

That was physically painful and frustrating for delaying my ultramarathon training.

I had been successfully figuring out how to run and fuel with enzymes for EPI; I even built a DIY macronutrient tracker and shared a template so others can use it. I ran a 50k with a river crossing in early June and was on track to target my 100 mile run in early fall.

However with the broken toe, I took the time off needed and carefully built back up, put a lot of planning into it, and made my attempt in late October instead.

I succeeded in running ~82 miles in ~25 hours, all in one go!

I am immensely proud of that run for so many reasons, some of which are general pride at the accomplishment and others are specific, including:

  • Doing something I didn’t think I could do which is running all day and all night without stopping
  • Doing this as a solo or “DIY” self-organized ultra
  • Eating every 30 minutes like clockwork, consuming enzymes (more than 92 pills!), which means 50 snacks consumed. No GI issues, either, which is remarkable even for an ultrarunner without EPI!
  • Generally figuring out all the plans and logistics needed to be able to handle such a run, especially when dealing with type 1 diabetes, celiac, EPI, and Graves
  • Not causing any injuries, and in fact recovering remarkably fast which shows how effective my training and ‘race’ strategy were.

On top of this all, I achieved my biggest-ever running year, with more than 1,333 miles run this year. This is 300+ more than my previous best from last year which was the first time I crossed 1,000 miles in a year.

Professionally, I did quite a lot of miscellaneous writing, research, and other activities.

I spent a lot of time doing research. I also peer reviewed more than 24 papers for academic journals. I was asked to join an editorial board for a journal. I served on 2 grant review committees/programs.

I also wrote a lot.

*by ton, I mean way more than the past couple of years combined. Some of that has been due to getting some energy back once I’ve fixed missing enzyme and mis-adjusted hormone levels in my body! I’m up to 40+ blog posts this year.

And personally, the punches felt like they kept coming, because this year we also found out that I have Graves’ disease, taking my chronic disease count up to 4. Argh. (T1D, celiac, EPI, and now Graves’, for those curious about my list.)

My experience with Graves’ has included symptoms of subclinical hyperthyroidism (although my T3 and T4 are in range), and I have chosen to try thyroid medication in order to manage the really bothersome Graves’-related eye symptoms. That’s been an ongoing process and the symptoms of this have been up and down a number of times as I went on medication, reduced medication levels, etc.

What I’ve learned from my experience with both EPI and Graves’ in the same year is that there are some huge gaps in medical knowledge around how these things actually work and how to use real-world data (whether patient-recorded data or wearable-tracked data) to help with diagnosis, treatment (including medication titration), etc. So the upside to this is I have quite a few new projects and articles coming to fruition to help tackle some of the gaps that I fell into or spotted this year.

And that’s why I’m feeling optimistic, and like I accomplished quite a bit more in 2022 than in 2021. Some of it is the satisfaction of knowing the core two reasons why the previous year felt so physically bad; hopefully no more unsolved mysteries or additional chronic diseases will pop up in the next few years. Yet some of it is also the satisfaction of solving problems and creating solutions that I’m uniquely poised, due to my past experiences and skillsets, to solve. That feels good, and it feels good as always to get to channel my experiences and expertise to try to create solutions with words or code or research to help other people.

How To Dose Pancreatic Enzyme Replacement Therapy (PERT) By What You Are Eating – And A Free Web Calculator To Calculate Enzyme Dosing

PS – check out PERT Pilot, the first iOS app for Exocrine Pancreatic Insufficiency! It’s an iOS app that allows you to record as many meals as you want, the PERT dosing and outcomes, to help you visualize and review more of your PERT dosing data!

I’ve had exocrine pancreatic insufficiency (known as EPI or PEI) for a year now. I have had type 1 diabetes for 20+ years and am experienced in adjusting my medication (previously insulin) in response to everything that I eat or drink.

With EPI, though, most people are given a static prescription, such as one saying “take 3 pills with each meal”.

Well, what if every meal is not the same size?

Let’s think about a couple of hypothetical meals.

Meal A: Baked chicken, sweet potato, and broccoli. This meal likely results in ~31 grams of carbohydrates; 7 grams of fat; and ~30 grams of protein.

How would you dose for this meal? Most people do what they are told and dose based on the fat content of the meal. If they typically take 3 pills, they may take all 3 pills or take fewer pills if this is less fat than their typical meal.

Many people post in EPI social media groups post about restaurant dinners that sound like this complaining about side effects they experience with this type of meal. The commonly mentioned theory is that maybe the chicken is cooked in oil. However, the entire meal is so low in fat compared to other meals that it is unlikely to be the fat content causing symptoms if the typical meal dose of PERT is used, even if the chicken is cooked in oil.

Let’s discuss another meal.

Meal B: A bowl of chili topped with cheddar cheese and a piece of cornbread.

This meal results in ~45 grams of carbs; ~30 grams of fat; and ~42 grams of protein.

The fat content between these two meals is quite a bit different (7 grams of fat versus 30 grams of fat). Yet, again, most people are told simply to dose by the amount of fat, so someone might take a lower dose for the chicken meal because it has so little fat relative to other meals.

This could result in symptoms, though. The pancreas actually produces THREE kinds of enzymes. That’s why pancreatic enzyme replacement therapy medicine, called pancrelipase as a common name, has THREE types of enzymes: lipase, to help digest fat; protease, to help digest protein; and amylase, to help digest carbohydrates. A typical PERT pill has different amounts of these three enzymes, although it is usually described by the size/quantity of lipase it has – yet the other enzymes still play an important role in digestion.

I’ve observed that it’s pretty common for people to completely ignore the protein in what they’re eating. But as I mentioned, that seems to be the most obvious thing to try dosing for if “low fat” meals are causing issues. (It could also be sensitivity to carbohydrates, but the above example meal is fairly low carbohydrate.) My personal experience has also been that I am sensitive to fat and protein, and dose my meals based on these macronutrients, but other than eating fruit on an empty stomach (when I would add PERT/enzyme, despite the zero fat and protein in it), I don’t need to dose based on carbohydrates.

But I do need to dose for BOTH fat AND protein in what I’m eating. And I have a theory that a lot of other people with EPI do, too.

So how do you do this?

How do you dose for meals of different sizes, and take into account both fat and protein for these varying meals?

First, you need to figure out what dosing “works” for you and begin to estimate some “ratios” that you can use.

Most people begin experimenting and find a quantity of food that they can eat with the dose that they typically take. This meal size is going to vary person to person; it’ll also vary based on what it is in the meal they’re eating (such as chicken vs chili, from the above examples).

Once you find a dose that “works” and try it out a few times on the same meal, you can use this to determine what your ratios/dosing should be.

How?

Let’s use two examples with different dose sizes and types of PERT.

(PS – did you know there are 6 FDA-approved PERT brands in the US? Sometimes one works for someone where a different brand does not. If you’re struggling with the first type of PERT you’ve been prescribed, and you’ve already ruled out that you’re dosing correctly (see below), make sure to talk to your doctor and ask about trying a different brand.)

First, let’s calculate the ratios of lipase needed per gram of fat.

Let’s say the meal that “works” with your typical dose is 30 grams of fat. If 30 grams of fat is fine on your current dose, I would eat another meal with a slightly higher amount of fat (such as 35 or 40 grams of fat). When you get to an amount that “doesn’t work” – meaning you get symptoms – then you go back to the dose that does “work” to use in the math.

If the meal that “worked” was 30 grams of fat I would do the following math for each of these two examples:

Example A: You need 1 pill of Zenpep 25,000 to cover this meal

Example B: You need 3 pills of Creon 36,000 to cover this meal

Example A: 1 pill of Zenpep 25,000 is 1 multiplied by 25,000, or 25,000 units of lipase. Take that (25,000) and divide it by the grams of fat in the meal that works (30 grams). This would be 25,000/30 = 833. This means you need 833 units of lipase to “cover” 1 gram of fat. You can round up to ~1000 units of lipase to make it easier; your ratio would be 1000 units of lipase for every 1 gram of fat.

Example B: 3 pills of Creon 36,000 is 3 multiplied by 36,000, which is 108,000 units of lipase. Take that number (108,000) and divide it by the grams of fat in the meal that works (30 grams). This would be 108,000/30 = 3,600. This means you need 3,600 units of lipase to “cover” 1 gram of fat.

The next time you wanted to eat a meal, you would look at the grams of fat in a meal.

Let’s say you’re going to eat two bowls of chili and two pieces of cornbread. Let’s assume that is about 64 grams of fat. (Two bowls of chili and two cornbread is 30×2=60, plus a bit of butter for the cornbread so we’re calling it 64 grams of fat).

Example A: Take the meal and multiply it by your ratio. 64 (grams of fat) x 1,000 (how many units of lipase you need to cover 1 grant of fat) = 64,000. A Zenpep 25,000 has 25,000 lipase. Since you need 64,000 (units of lipase needed to cover the meal), you would divide it by your pill/dose size of 25,000. 64,000 divided by 25,000 is 2.56. That means for these ratios and a prescription of Zenpep 25,000 pill size, you need *3* Zenpep 25,000 to cover a meal of 64g of fat. (Remember, you can’t cut a PERT, so you have to round up to the next pill size.)

Example B: Take the meal and multiply it by your ratio. 64 (grams of fat) times 3,600 (how many units of lipase you need to cover 1 grant of fat) = 230,400. A Creon 36,000 has 36,000 lipase. Since you need 230,400 units of lipase to cover the meal, you would divide it by your pill/dose size of 36,000. 230,400 divided by 36,000 is 6.4. This means you need *7* Creon 36,000 to cover a meal of 64g of fat. (Again, you can’t cut a PERT, so you have to round up to 7 from 6.4.)

Another way to think about this and make it easier in the future is to determine how much one pill “covers”.

Example A: A Zenpep 25,000 “covers” 25 grams of fat if my ratio is 1000 units of lipase for every gram of fat (25,000/1000=25).

So if a meal is under 25g of fat? 1 pill. A meal under 50g (25×2)? 2 pills. 75g (25×3)? 3 pills. And so on. Once you know what a pill “covers”, it’s a little easier; you can simply assess whether a meal is above/below your pill size of 1 (25g), 2 (50g), 3 (75g) etc.

Example B: A Creon 36,000 “covers” 10 grams of fat if my ratio is 3,600 units of lipase for every gram of fat (36,000/3600=10).

So if a meal is under 10 grams of fat? 1 pill. 20 grams of fat is 2 pills (10×2); 30 grams of fat is 3 pills (10×3); etc.

When people with EPI share experiences online, they often describe their dose size (such as 1 x 25,000 or 3 x 36,000 like examples A and B above) for most meals, but the meal size and composition is rarely discussed.

Personally, I can eat pretty widely varying amounts of fat in each meal on a day to day basis.

That’s why, instead of a flat dosing that works for everything (because I would be taking a LOT of pills at every meal if I was trying to take enough to cover my highest fat meals every time), I have found it to be more effective to estimate each meal to determine my meal dosing.

Remember that meal estimates aren’t very precise. If you use a nutrition panel on a box serving, the serving size can vary a bit. Restaurants (especially chains) have nutrition information, but the serving size can vary. So recognize that if you are calculating or estimating 59 grams of fat and that means either 2 vs 3 pills or 6 vs 7 pills, that you should use your judgment on whether you want to round up to the next pill number – or not.

Let’s put the hypothetical meals side by side and compare dosing with examples A and B from above:

Example of how much PERT is needed for two different meals based on dose ratios from Examples A and B

Using the previous meal examples with either 7 or 30 grams of fat:

  • With Example A (ratio of 25g of fat for every 1 pill, or 1000 units of lipase to cover 1 gram of fat), we would need 1 pill for the chicken meal and 2 for the chili meal. Why? The chili is >25 grams of fat which means we need to round up to 2 pills.
  • With Example B (ratio of 10 grams of fat for every 1 pill or 3600 units of lipase to cover 1 gram of fat), we would need 1 pill to cover the chicken (because it’s less than 10 grams of fat) and 3 – or more – pills for the chili. Why “or more”? Well, something like chili is likely to be imprecisely counted – and if you’re like me, you’d want a bit of extra cheese, so chances are I would round up to a 4th pill here to take in the imprecision of the measurements of the ingredients.

PERT Dosing for Protein

Wait, didn’t you say something about protein?

Yes, I did. Fat isn’t the only determinant in this math!

I do the same type of math with grams of protein and units of protease. (Remember, PERT has all 3 types of enzymes, even though it is labeled by the amount of lipase. You can look online or on the bottle label to see how much protease is in your PERT.)

For our examples, Zenpep 25,000 contains 85,000 units of protease. Creon 36,000 contains 114,000 units of protease.

For the meal that ‘worked’ of 30 grams of fat, we also want to know the protein that worked. For easy math, let’s also say 30 grams of protein is in this meal.

Following the same math as before:

Example A (Zenpep 25,000): 30 grams of protein divided by 1×85,000 units of protease is ~2,833 units of protease to every 1 gram of protein. Again, I like to think about how much 1 pill “covers” protein-wise. In this case, 1 Zenpep 25,000 “covers” 30 grams of protein.

Example B (Creon 36,000): 30 grams of protein divided into 3 x 114,000 units of protease is 11,400 units of protease per gram of protein. Again, I like to think about how much 1 pill “covers” protein-wise as well. In this case, 1 Creon 36,000 “covers” 10 grams of protein.

Here’s how many pills are needed for protein:

Example of how much PERT is needed for two different meals based on dose ratios from Examples A and B, showing both protein and fat quantities

  • With Example A (ratio of 30g of protein for every 1 pill), we would need 1 pill for the chicken meal and 2 for the chili meal. Why? The chili is 42, which is greater than (30×1) grams of protein which means we need to round up to 2 pills.
  • With Example B (ratio of 10 grams of protein for every 1 pill), we would need 3 or more pills to cover the chicken. Why 3 or more? Again, it’s on the top edge of what 3 pills would cover, so I’d be likely to round up to 4 pills here. For the chili, 5 pills are needed (42 is more than 4 x 10 and is less than 5 x 10).

So how do you decide the number of pills to take for these meals? Let’s go back to our two example meals and compare the amount needed, pill-wise, for both fat and protein for each meal and each example.

Example of how much PERT is needed for two different meals based on dose ratios from Examples A and B and comparing the number of pills for fat and protein

When the pill numbers MATCH (e.g. the same number needed for fat and protein), which is the case for both examples with Zenpep 25,000, it’s easy: take that number of pills total! For Zenpep 25,000, I would take 1 pill for the Chicken (1 fat | 1 protein); and I would take 2 pills for the Chili (2 fat | 2 protein). Remember that PERT pills contain all three enzymes, so the fat and protein are sufficiently *each* covered by the quantities of lipase and protease in this pill type.

When the pill numbers are DIFFERENT between your fat and protein estimates, you use the LARGER number of pills. For Creon 36,000, with the chicken meal the protein quantity is much larger than the fat quantity; I would in this case dose 4 total pills (1 fat | 4 protein), which would then cover the protein in this meal and would also sufficiently cover the amount of fat in this meal. For the chili meal, it is closer: I estimated needing 4 pills for fat and 5 for protein; in this case, I would take 5 total pills which would then successfully cover the protein and the fat in the meal.

If you find the math challenging to do, don’t worry: once you determine your ratios and figure out how much one pill “covers”, it gets a lot easier.

And I made a few tools to help you!

Check out this free enzyme calculator which does the math to determine the ratios on exactly how much one pill “covers” for your successful meal.

(The calculator is for entering one meal at a time, and doesn’t save them, but if you’d like AI to estimate what is in your meal and help you log and save multiple meals, check out PERT Pilot if you have an iPhone.)

Here’s what it looks like using the two examples above:

Example of Part 1 of the EPI Enzyme Calculator using Zenpep 25,000, where 1 pill covers 30 grams of fat and 30 grams of protein. Example of Part 1 of the EPI Enzyme Calculator using Creon 36,000, where 3 pills covers 30 grams of fat and 30 grams of protein.

You can input your meal that “works”, what your dose is that “works” (the number of pills and pill type), and it will share what your ratios are and what one pill “covers”.

You can also use the second part of the calculator to estimate the amount you need for a future meal! Say it’s coming up on a holiday and you’re going to eat a much larger meal than you normally do.

You can input into the calculator that you’ll be eating 90 grams of fat and 75 grams of protein.

Here’s the example with our dose from Example A (Zenpep 25,000):

Example of Part 2 of the EPI Enzyme Calculator using Zenpep 25,000, with a future larger meal of 90 grams of fat and 75 grams of protein.

Here’s the example large meal with our dose from Example B (Creon 36,000):

Example of Part 2 of the EPI Enzyme Calculator using Creon 36,000, with a future larger meal of 90 grams of fat and 75 grams of protein.

You can also hit the button to expand the calculations to see the math it is doing, and how it compares between the fat and protein pill estimates to see what “drives” the total number of pills needed.

You can also hit the button to expand the calculations to see the math it is doing, and how it compares between the fat and protein pill estimates to see what “drives” the total number of pills needed, with the calculation view expanded to show all the details

You can even download a PDF with this math to have on hand. Here’s what the PDF download looks like for Example B (Creon 36,000):

Example of a PDF print view of the same data from previous screenshots with a Creon 36000 example

Switching dose sizes or PERT brand types

This calculator can also be useful if you were originally prescribed a smaller quantity of PERT (e.g. Creon 3000 or Zenpep 3000) and you find yourself taking many numbers of these pills (6 or more) to cover a small meal for you, let alone more pills for a larger meal.

You can input this into the calculator and get your ratios; then in the second part, identify a different pill size, to see how many numbers of pills you’d take on a different dose.

Example switching from one size of PERT pill to another size

You can also use it to help you understand how much you might need if you are switching between brands. Let’s say you were prescribed Zenpep 25,000 and you need to try Creon, either because you don’t think Zenpep works well for you or your insurance is more willing to cover the Creon brand.

You would use the top part of the calculator with your current brand and size (e.g. Zenpep 25,000 of which you take 6 for a standard meal of 30 grams of fat and 30 grams of protein) and then input the new brand and size and the same size meal (e.g. Creon 36,000 and another 30 grams of fat and 30 grams of protein meal) to see that you’d likely need 5 Creon 36,000 to match the 6 Zenpep 25,000 you were taking for a standard size (30 gram of fat and 30 gram of protein) meal.

Example of using the calculator to estimate the different number of pills for a different brand and size of PERT pill

Note: I’m not suggesting 30 grams of fat and protein at each meal is “standard” or the “right” size of the meal – I picked arbitrary numbers here to illustrate these examples, so make sure to include the meal that your PERT dosing successfully covers for YOU!

As a reminder, I’m not a doctor – I’m a person living with EPI. None of this is medical advice. I use this math and this calculator for my own personal use and share it in case it’s helpful to others. If you have questions, please do talk to your doctor. If you’re still experiencing symptoms with your enzyme dosing, you definitely should talk with your doctor. Your prescription size might need updating compared to what you were originally prescribed.

Also, please note that the calculator is open source; you can find the code here, and I welcome contributions (pull requests) and suggestions! You can leave feedback on Github or share feedback in this form. For example, if you’re using a different type of enzyme not listed in the calculator (currently 2/6 of the US FDA-approved versions are listed), please let me know and I can work to add the relevant list.

PS – You can find my other posts about EPI at DIYPS.org/EPI, and you can also check out PERT Pilot, the first iOS app for Exocrine Pancreatic Insufficiency! It’s an iOS app that allows you to record as many meals as you want, the PERT dosing and outcomes, to help you visualize and review more of your PERT dosing data!


You can also contribute to a research study and help us learn more about EPI/PEI – take this anonymous survey to share your experiences with EPI-related symptoms!

More Tools To Help Diabetes Researchers and Other Researchers

A few years ago I made a big deal about a tool I had created, converting someone’s web tool into a command line tool to be able to take complex json data and convert it to csv. Years later, I (and thousands of others, it’s been downloaded 1600+ times!) am still using this tool because there’s nothing better that I’ve found when you have data that you don’t know the data structure for or the data structure varies across files.

I ended up creating a repository on Github to store it with details on running it, and have expanded it over the last (almost) six years as I and others have added additional tools. For example, it’s where Arsalan, one of my frequent collaborators, and I store open source code from some of our recent papers.

Recently, I added two more small scripts. This was motivated to help researchers who have been successfully using the OpenAPS Data Commons and want to update their dataset with a later version of the data. Chances are, they have cleaned and worked with a previous version of the dataset, and instead of having to re-clean all of the data all over again, this set of scripts should help narrow down what the “new” data is that needs to be pulled out, cleaned, and appended to a previously cleaned dataset.

You can check out the full tool repository here (it has several other scripts in addition to the ones mentioned above). The latest are two python scripts that checks the content of an existing folder and lists out the memberID and filenames for each. This is useful to run on an existing, already-cleaned dataset to see what you currently have. It can also be run on the latest/newest/bigger dataset available. Then, the second script can be run to compare the memberIDs and file names in the newer/biggest/larger dataset against the previously cleaned/smaller/older dataset. Those that “match” already exist in the version of the dataset they have; they don’t need to be pulled again. The others don’t exist in the current dataset, and can be popped into a script to pull out just those data files to then be cleaned and appended to the existing dataset.

As a heads up specifically for those working with the OpenAPS Data Commons, it is best practice to name/describe the version of the dataset via the size. For example, you might be working with the n=88 or n=122 version of the dataset. If you used the above method, you would then describe it along the lines of taking and cleaning the n=122 version; selecting new files available from the n=183 version and appending them to the n=122 version; and the resulting dataset is n=(122+number of new files used).

Folks who access the n=183 version of the dataset and haven’t previously used a smaller version of the dataset can reference using the n=183 and clarifying how many files they ended up using, e.g. describing that they followed X method to clean the data starting from the n=183 version and their resulting dataset is n=166, for example.

It is important to clarify which version and size of the dataset is being used.

PS – this method works on other data file types, too! You’d change the variable/column header names in the script to update this for other cases.

We Have Changed the Standards of Care for People With Diabetes

We’ve helped change the standard of care for people with diabetes, with open source automated insulin delivery.

I get citation alerts sometimes when my previous research papers or articles are cited. For the last few years, I get notifications when new consensus guidelines or research comes out that reference or include mention of open source automated insulin delivery (AID). At this time of year, the ADA Standards of Care is released for the following year, and I find out usually via these citation alerts.

Why?

This year, in 2023, there’s a section on open source automated insulin delivery!

A screenshot of the 2023 ADA Standards of Care section under Diabetes Technology (7) that lists DIY closed looping, meaning open source automated insulin delivery

But did you know, that’s not really new? Here’s what the 2022 version said:

A screenshot of the 2022 ADA Standards of Care section under Diabetes Technology (7) that lists DIY closed looping, meaning open source automated insulin delivery

And 2021 also included…

A screenshot of the 2021 ADA Standards of Care section under Diabetes Technology (7) that lists DIY closed looping, meaning open source automated insulin delivery

And 2020? Yup, it was there, too.

A screenshot of the 2020 ADA Standards of Care section under Diabetes Technology (7) that lists DIY closed looping, meaning open source automated insulin delivery

All the way back to 2019!

A screenshot of the 2019 ADA Standards of Care under Diabetes Technology (7) that lists DIY closed looping, meaning open source automated insulin delivery

If you read them in chronological order, you can see quite a shift.

In 2019, it was a single sentence noting their existence under a sub-heading of “Future Systems” under AID. In 2020, the content graduated to a full paragraph at the end of the AID section (that year just called “sensor-augmented pumps”). In 2021, it was the same paragraph under the AID section heading. 2022 was the year it graduated to having its own heading calling it out, with a specific evidence based recommendation! 2023 is basically the same as 2022.

So what does it say?

It points out patients are using open source AID (which they highlight as do-it-yourself closed loop systems). It sort of incorrectly suggests healthcare professionals can’t prescribe these systems (they can, actually – providers can prescribe all kinds of things that are off-label – there’s just not much point of a “prescription” unless it’s needed for a person’s elementary school (or similar) who has a policy to only support “prescribed” devices).

And then, most importantly, it points out that regardless, healthcare providers should assist in diabetes management and support patient choice to ensure the safety of people with diabetes. YAY!

“…it is crucial to keep people with diabetes safe if they are using these methods for automated insulin delivery. Part of this entails ensuring people have a backup plan in case of pump failure. Additionally, in most DIY systems, insulin doses are adjusted based on the pump settings for basal rates, carbohydrate ratios, correction doses, and insulin activity. Therefore, these settings can be evaluated and modified based on the individual’s insulin requirements.”

You’ll notice they call out having a backup plan in case of pump failure.

Well, yeah.

That should be true of *any* AID system or standalone insulin pump. This highlights that the needs of people using open source AID in terms of healthcare support are not that different from people choosing other types of diabetes therapies and technologies.

It is really meaningful that they are specifically calling out supporting people living with diabetes. Regardless of technology choices, people with diabetes should be supported by their healthcare providers. Full stop. This is highlighted and increasingly emphasized, thanks to the movement of individuals using open source automated insulin delivery. But the benefits of this is not limited to those of us using open source automated insulin delivery; this spills over and expands to people using different types of BG meters, CGM, insulin pumps, insulin pens, syringes, etc.

No matter their choice of tools or technologies, people with diabetes SHOULD be supported in THEIR choices. Not choices limited by healthcare providers, who might only suggest specific tools that they (healthcare providers) have been trained on or are familiar with – but the choices of the patient.

In future years, I expect the ADA Standard of Care for 2024 and beyond to evolve, in respect to the section on open source automated insulin delivery.

The evidence grading should increase from “E” (which stands for “Expert consensus or clinical experience”), because there is now a full randomized control trial in the New England Journal of Medicine on open source automated insulin delivery, in addition to the continuation results (24 weeks following the RCT; 48 full weeks of data) accepted for publication (presented at EASD 2022), and a myriad of other studies ranging from retrospective to prospective trials. The evidence is out there, so I expect that this evidence grading and the text of the recommendation text will evolve accordingly to catch up to the evidence that exists. (The standards of care are based on literature available up to the middle of the previous year; much of the things I’ve cited above came out in later 2022, so it matches the methodology to not be included until the following year; these newest articles should be scooped up by searches up to July 2023 for the 2024 edition.)

In the meantime, I wish more people with diabetes were aware of the Standards of Care and could use them in discussion with providers who may not be as happy with their choices. (That’s part of the reason I wrote this post!)

I also wish we patients didn’t have to be aware of this and don’t have to argue our cases for support of our choices from healthcare providers.

But hopefully over time, this paradigm of supporting patient choice will continue to grow in the culture of healthcare providers and truly become the standard of care for everyone, without any personal advocacy required.

Did you know? We helped change the standards of care for people living with diabetes. By Dana M. Lewis from DIYPS.org

New Chapter: Personalizing Research: Involving, Inviting, and Engaging Patient Researchers

TLDR: A new chapter I wrote, invited for a book on Personal Health Informatics, is out! You can read a summary below describing my chapter. You can also find a link to a full pre-print (a copy of my submitted, unedited version) of the article (as well as author copies of all of my articles) on my research page.

In November 2020 I was invited to submit a proposal for a chapter for a pending book on personal health informatics. Like journal articles, you can be invited to submit for a book chapter as part of a larger book topic.

Knowing that book chapters take a long time to come out, I carefully thought about the topic of my article and whether I could write something that would be relevant approximately a year after I wrote it.

The context of the book was:

“high-quality scholarly work that seeks to provide clarity, consistency, and reproducibility, with a shared view of the status-quo of consumer and pervasive health informatics and its relevance to precision medicine and healthcare applications and system design. The book will offer a snapshot of this emerging field, supported by the methodological, practical, and ethical perspectives from researchers and practitioners in the field. In addition to being a research reader, this book will provide pragmatic insights for practitioners in designing, implementing, and evaluating personal health informatics in the healthcare settings.”

They also wanted to include patient perspectives, which is part of the reason I was invited to submit a proposal for a chapter, and asked if I could write about citizen science from the patient perspective.

I decided to write more broadly about patient perspectives in research, and since the audience of this book is likely to be academic researchers and practitioners already in the field, seek to provide some ideas and input as to how they could think about practically inviting and engaging patient partners in research, as well as supporting the burgeoning field of patient researchers who lead their own research.

I submitted my draft article in April 2021; received feedback and submitted the revision in August 2021; and the book was due to be published in “spring 2022”.

::crickets::

The book is now out in November 2022, hooray! It is called Personal Health Informatics and you can find it online here.

Abstract from my chapter:

There are many benefits to engaging and involving patients in traditional, researcher-led research, ranging from improved recruitment and increased enrollment to accelerating and facilitating the implementation of research outcomes. Researchers, however, may not be aware of when and where they can involve patients (people with lived healthcare experience) in research or what the benefits may be of improving patient engagement in the research process or of expanding patient involvement to other research stages. This chapter seeks to highlight the benefits and opportunities of engaging patients in traditional research and provide practical suggestions for inviting or recruiting patients for participation in research, whether or not there is an established patient and public involvement (PPI) program. This includes tips for developing a productive working relationship and culture between researchers and the patients involved in research. There are also many patients themselves conducting research, and often without the benefits, resources, and opportunities made available to traditional researchers. Traditional researchers should identify and recognize researchers who have emerged from non-traditional paths who are driving and engaging in their own research, and provide support and resources where appropriate to foster further patient-driven research. This investment can lead to collaboration opportunities for additional highly relevant and effective research studies with traditional researchers in the future. This chapter provides examples of patient researchers and offers tools to support traditional researchers who want to support patient-led research efforts and improve their ability to successfully engage patient stakeholders in their own research.

Here are some of the highlights and recommendations from my chapter:

  • Invite patients to participate in research, and do it early.
  • Ask patients how they’d like to be involved in research.
  • Relationship building and culture setting is important. Address the power dynamics within your project and team.
  • Set expectations for everyone involved on the team.
  • Consider training and skill-building opportunities for patients who are partnering in research.
  • If you’re looking to support a patient who is already initiating or performing research, first ask: “How can I help?”. This article includes a list of suggestions of how you can help them.

This article also highlights many exceptional researchers who are patients and their work, including:

Note the chapter discusses explicitly how not everyone has a PhD or an MD; this is not a requisite to doing high-quality research!

The chapter concludes with “clinical pearls’’, which are four suggested tips to use in daily practice, and includes some suggested resources like the Opening Pathways Readiness Quiz. It also includes a suggestion of making a “To Don’t” list in collaboration with patient research partners.

The chapter also contains two review questions:

  1. Imagine that you have a research project where you would like to apply for funding, and the funder mandates that you have a patient involved in your research project. At what stage do you involve a patient in your project, and how do you do so?
  2. You are at a scientific conference and observe a patient giving a presentation about their own research or project. They’re not a traditional researcher – they don’t have a PhD or have a day job as a researcher. You want to approach them and offer your help with their research. What do you offer when you approach them?

To see the answers to these review questions, check out the article in full! :)

TLDR: A new chapter I wrote, invited for a book on Personal Health Informatics, is out! You can find a link to a full pre-print (a copy of my submitted, unedited version) of the article (as well as author copies of all of my articles) on my research page.

If you’d like to cite this in one of your articles, note that the DOI for the article is https://doi.org/10.1007/978-3-031-07696-1_17 and an example citation is:

Lewis, D. (2022). Personalizing Research: Involving, Inviting, and Engaging Patient Researchers. In: Hsueh, PY.S., Wetter, T., Zhu, X. (eds) Personal Health Informatics. Cognitive Informatics in Biomedicine and Healthcare. Springer, Cham. https://doi.org/10.1007/978-3-031-07696-1_17

Excerpted tips from the book chapter "Personalizing Research: Involving, Inviting, and Engaging Patient Researchers" by Dana Lewis

Costs, Price and Calculations for Living With Diabetes and Exocrine Pancreatic Insufficiency and Celiac and Graves

Living with diabetes is expensive. However, the cost and price goes beyond the cost of insulin, which you may have heard about lately. In addition to insulin, you need tools and supplies to inject the insulin (e.g. syringes, insulin pens, or an insulin pump). Depending on those methods, you need additional supplies (e.g. pen needles for insulin pens, reservoirs and infusion sets for insulin pumps). You also need blood glucose monitoring supplies, whether that is meter and up to a dozen glucose test strips a day and/or a continuous glucose monitor which is made up of a disposable sensor and a reusable transmitter.

All those costs add up on a daily basis for people living with diabetes, even if you have health insurance.

Understanding the costs of living with chronic illness with health insurance in the US

Every year in the US we have “open enrollment” time when we opt-in or enroll into our choice of health insurance plan for the following year. I am lucky and have access to insurance through my husband’s employer, who covers part of the cost for him and me (as a spouse). We have a high-deductible (HSA-qualified) health plan, so our deductible (the amount we must pay before insurance begins to pay for a portion of the costs) is usually around $1,500-$2,500 USD for me. After that, I might pay either a fixed copay ($10 or $25 or similar) for a doctor’s visit, or a percentage (10% or 20%) while the insurance covers the rest of the cost. Then there is a fixed “out of pocket (OOP) max” cost for the year, which might be something like $3,000 USD total. Sometimes the OOP max is pretty close to the deductible, because we typically choose the ‘high deductible’ plan (with no monthly cost for the insurance plan) over a plan where we have a lower deductible but pay a monthly premium for the insurance.

That’s a very rough summary of how I see my health insurance. Everyone has different health insurers (the company providing the insurance) and different plans (the costs will be different based on whether it’s through a different employer or if it’s an individual plan).

So the costs to people with diabetes can vary quite a bit in the US, depending on whether you have insurance: there is variation in the monthly cost of the plan, the amount of the deductible, and the amount of the out of pocket max.

In order to choose my plan for the following year, I look at the total cost for the year of my health supplies and health care, then look at the plans. Usually, the high deductible plan “feels” more expensive because I might have to reach $2,500 before insurance kicks in; however, the out of pocket cap may only be $500 beyond that, so that I’m going to pay a maximum of $3,000 for the year in insurance-covered costs*. There are other types of plans that are lower deductible, such as insurance kicking in after a $250 deductible. That sounds better, right? Well, those plans come with a monthly cost (premium) of $250. So you need to factor that in ($250×12=$3,000) alongside the deductible and any costs up to the out of pocket max ($2,500). From this, you’d pay the $3,000 total yearly premium plus up to $2,500 OOP, or $5,500. Thus, even though it has a lower deductible and OOP, you’re in total paying much more ($5,500 vs $3,000) if you’re someone like me.

Why? Because I have >$3,000 of health supply costs every year.

This is why every few years (mostly after I forget what I learned the last time), I do the math on how much my supply costs to see if I’m still making the most cost-effective choices for me with my insurance plans.

I wanted to share this math methodology below, also because this year I have new variables, which are two new chronic diseases (exocrine pancreatic insufficiency and Graves) that add additional costs and healthcare needs and require me to want to re-check my math.

* Clarifying that previously and most years I pay out of pocket for minor, relatively low-cost health supplies like vitamins or tape to cover my CGM that I buy and do not get through insurance coverage, so my total costs are usually over that OOP max, but likely not by more than a few hundred dollars.

Note: Do not attempt to use this as an absolute cost of diabetes for anyone else. These numbers are based on my use cases in terms of volume of insulin, insurance coverage, etc. Ditto for trying to use the costs for EPI. Where relevant below, I provide rough estimates of my methodology so that another individual with diabetes or EPI/PEI could use similar methods to calculate their own rough costs, if they wished. However, this cannot be used to determine any average cost to people with diabetes more broadly, so don’t excerpt or cite this in those ways. This is purely n=1 math with conclusions that are unique to this n=1 (aka me) but with methods that can be extended for others.

I’ll cover my estimates for costs of diabetes, celiac, exocrine pancreatic insufficiency (EPI or PEI), and Graves’ disease below. This doesn’t account for visits (e.g. doctor’s appointments), lab tests, or other health costs such as x-rays for breaking bones, because those vary quite a bit year to year and aren’t guaranteed fixed costs. But the supplies I need for diabetes, EPI, etc are fixed costs, which I use to anchor my math. Given that they end up well above my OOP max, the then-variable amount of other costs (doctor’s appointments, lab work, etc) is minor in comparison and irrelevant regardless of how much it varies year to year.

The costs (for me) of daily living with diabetes

(You read the caveat note above, right? This is my math based on my volume of insulin, food intake, personal insulin sensitivity, etc. Lots of variables, all unique to me.)

To calculate the yearly costs of living with diabetes, I make a list of my diabetes supplies.

Primarily for me, those are:

  • Insulin
  • CGM sensors
  • CGM transmitter
  • Pump sites
  • Reservoirs

(Not included: meter/test strips or the cost of a pump or the cost of any hardware I’m using for my open source automated insulin delivery. I’ve not bought a new in-warranty pump in years, and that alone takes care of the OOP max on my insurance plan if I were to buy a pump that year. Anyway, the above list is really my recurring regular costs, but if you were purchasing a pump or on a subscription plan for a pump, you’d calculate that in as well).

First, I calculate the daily cost of insulin. I take the cost of a vial of my insulin and divide it by 1,000, because that’s how many units a vial of insulin has. Then I multiply that by the average number of units I use per day to get the cost per day of insulin, which for me is $4.36. (The yearly cost of insulin would be $1,592.)

Then, I calculate my CGM sensors. I take the total cost for a 3 month order of sensors and divide by the number of sensors; then divide by 10 days (because a sensor lasts about 10 days) to get the cost per day of a CGM sensor: about $11 per day. But, you also have to add in the cost of the re-usable transmitter. Again, factor the cost of a transmitter over the number of days it covers; for me it’s about $2 per day. In total, the cost per day of CGM is about $13 and the yearly cost of CGM is roughly $4,765.

Next is pump sites and reservoirs. You need both to go with your insulin pump: the pump site is the catheter site into your body and the tubing (this cumulatively gets replaced every few days), and the reservoir is disposable and is filled with insulin. The cost per day of pump sites and reservoirs is about $6 ($4.67 for a pump site and $1.17 for a reservoir) and the yearly cost of pump sites and reservoirs is $2,129.

If you add up these supplies (pump sites and reservoirs, CGM sensor and transmitter, insulin), the daily cost of diabetes for me is about $23. The yearly cost of diabetes for me is $8,486.

Give that $8,486 is well over the out of pocket max cost of $3,000, you can see why that for diabetes alone there is reason to pick the high deductible plan and pay a max of $3,000 for these supplies out of pocket.

The daily and yearly costs of living with celiac disease

But I don’t just have type 1 diabetes, so the above are not my only health supply costs.

I also have celiac disease. The treatment is a 100% gluten free diet, and eating gluten free is notoriously more expensive than the standard cost of food, whether that is groceries or eating out.

However, the cost of gluten free food isn’t covered by health insurance, so that doesn’t go in my cost calculation toward pricing the best insurance plan. Yet, it does go into my “how much does it cost every day from my health conditions” mental calculation.

I recently looked at a blog post that summarized the cost of gluten free groceries by state compared to low/medium/high grocery costs for the average person. By extrapolating my state’s numbers from a high-cost grocery budget, plus adding $5 each for eating out twice a week (typically gluten free food has at least a $2-3 surcharge in addition to being at higher cost restaurants, plus the fact that I can’t go eat at most drive-throughs, which is why I use $5/meal to offset the combined cost of the actual surcharge plus my actual options being more expensive).

I ended up estimating about a $3 daily average higher cost of being gluten free, or $1,100 per year cost of eating gluten free for celiac.

That’s probably an underestimate for me, but to give a ballpark, that’s another $1,000 or more I’m paying out of pocket in addition to healthcare costs through insurance.

The daily and yearly cost of living with exocrine pancreatic insufficiency and the daily and yearly cost of pancreatic enzyme replacement therapy

I spent a pleasant (so to speak) dozen or so years when “all” I had to pay for was diabetes supplies and gluten free food. However, in 2022, I was diagnosed with exocrine pancreatic insufficiency (and more recently also Graves’ disease, more on that cost below) and because I have spent ~20 years paying for diabetes, I wasn’t super surprised at the costs of EPI/PEI. However, most people get extreme sticker shock (so to speak) when they learn about the costs of pancreatic enzyme replacement therapy (PERT).

In summary, since most people don’t know about it: exocrine pancreatic insufficiency occurs for a variety of reasons, but is highly correlated with all types of diabetes, celiac, and other pancreatic conditions. When you have EPI, you need to take enzymes every time you eat food to help your body digest fat, protein, and carbohydrates, because in EPI your pancreas is not producing enough enzymes to successfully break down the food on its own. (Read a lot more about EPI here.)

Like diabetes, where different people may use very different amounts of insulin, in EPI people may need very different amounts of enzymes. This, like insulin, can be influenced by their body’s makeup, and also by the composition of what they are eating.

I use PERT (pancreatic enzyme replacement therapy) to also describe the prescription enzyme pills used for EPI. There are 6 different brands approved by the FDA in the US. They also come in different sizes; e.g. Brand A has 3,000, 6,000, 12,000, 24,000, 36,000 size pills. Those size refer to the units of lipase. Brand B has 3,000, 5,000, 10,000, 15,000, 20,000, 25,000, 40,000. Brands C, D, E and F have similar variety of sizes. The point is that when people compare amounts of enzymes you need to take into account 1) how many pills are they taking and 2) how much lipase (and protease and amylase) each of those pills are.

There is no generic for PERT. PERT is made from ground up pig pancreas. It’s expensive.

There are over the counter (OTC) enzymes made from alternative (plant etc) sources. However, there are ZERO studies looking at safety and efficacy of them. They typically contain much less lipase per pill; for example, one OTC brand pill contains 4,000 units of lipase per pill, or another contains 17,500 units of lipase per pill.

You also need to factor in the reliability of these non-approved pills. The quality of production can vary drastically. I had one bottle of OTC pills that was fine; then the next bottle of OTC pills I started to find empty capsules and eventually dumped them all out of the bottle and actually used a colander to filter out all of the enzyme powder from the broken capsules. There were more than 30 dud pill capsules that I found in that batch; in a bottle of 250 that means around 12% of them were unusable. That makes the reliability of the other ones suspect as well.

A pile of powder in the sink next to a colander where a bunch of pills sit. The colander was used to filter out the loose powder. On the right of the image is a baggie with empty pill capsules, illustrating where this loose powder came from. This shows the unreliability of over the counter (OTC) enzymes.

If the reliability of these pills even making it to you without breaking can be sketchy, then you need to assume that the counts of how much lipase (and protease and amylase) may not be precisely what the label is reporting. Again, there have been no tests for efficacy of these pills, so anyone with EPI or PEI needs to use these carefully and be aware of these limitations.

This unreliability isn’t necessarily true of all brands, however, or all types of OTC enzymes. That was a common brand of pancrelipase (aka contains lipase, protease, and amylase). I’ve had more success with the reliability of a lipase-only pill that contains about 6,000 units of lipase. However, it’s more expensive per pill (and doesn’t contain any of the other enzymes). I’ve used it to “top off” a meal with my prescription PERT when my meal contains a little bit more fat than what one PERT pill would “cover” on its own.

This combination of OTC and prescription PERT is where the math starts to get complicated for determining the daily cost and yearly cost of pancreatic enzyme replacement therapy.

Let’s say that I take 6-8 prescription PERT pills every day to cover what I eat. It varies because I don’t always eat the same type or amount of food; I adjust based on what I am eating.

The cost with my insurance and a 90 day supply is $8.34 for one PERT pill.

Depending on whether I am eating less fat and protein on a particular day and only need 6 PERT, the cost per day of enzymes for EPI might be $50.04, whereas if I eat a little more and need 8 PERT, the cost per day of enzymes for EPI could be up to $66.72.

The costs per year of PERT for EPI then would range from $18,000 (~6 per day) to $24,000 (~8 per day).

Please let that sink in.

Eighteen to twenty four thousand dollars to be able to successfully digest my food for a single year, not taking into account the cost of food itself or anything else.

(See why people new to EPI get sticker shock?!)

Even though I’m used to ‘high’ healthcare costs (see above estimates of $8,000 or more per year of diabetes costs), this is a lot of money. Knowing every time that I eat it “costs” at least one $8.34 pill is stressful. Eating a bigger portion of food and needing two or three pills? It really takes a mental toll in addition to a financial cost to think about your meal costing $25.02 (for 3 pills) on top of the cost of the food itself.

This is why OTC pills are interesting, because they are drastically differently priced. The 4,000 unit of lipase multi-enzyme pill that I described costs $0.09 per pill, which is about $0.02 per 1000 units of lipase. Compared to my prescription PERT which is $0.33 per 1000 units of lipase, it’s a lot cheaper.

But again, check out those pictures above of the 4,000 units of lipase OTC pills. Can you rely on those?

Not in the same way you can with the prescription PERT.

In the course of taking 1,254 prescription PERT pills this year (so far), I have not had a single issue with one of those pills. So in part the high cost is to ensure the safety and efficacy. Compare that to 12% (or more) of the OTC pills being complete duds (empty pill capsules that have emptied their powder into the bottle) and some % of unreliability even with a not-broken capsule.

Therefore it’s not feasible to me to completely replace prescription PERT with OTC pills, although it’s tempting purely on price.

I previously wrote at a high level about the cost calculations of PERT, but given my desire to look at the annual cost for estimating my insurance plan (plus many more months of data), I went deeper into the math.

I need to take anywhere from 2-6 OTC pills (depending on the brand and size) to “match” the size of one PERT. I found a new type (to me) of OTC pills that are more units of lipase (so I need 2 to match one PERT) instead of the two other kinds (which took either 4 or 6 to match one PERT), which would enable me to cut down on the number of pills swallowed.

The number of pills swallowed matters.

So far (as of mid-November, after starting PERT in early January), I have swallowed at least 1,254 prescription PERT enzyme pills. I don’t have as much precision of numbers on my OTC pills because I don’t always log them (there’s probably a few dozen I haven’t written down, but I probably have logged 95% of them in my enzyme tracking spreadsheet that I use to help calculate the amount needed for each meal/snack and also to look at trends.), but it’s about 2,100 OTC enzyme pills swallowed.

This means cumulatively this year (which is not over), I have swallowed over 3,300 enzyme pills. That’s about 10 enzyme pills swallowed every day!

That’s a lot of swallowing.

That’s why switching to a brand that is more units of lipase per pill, where 2 of these new OTC kind matches one PERT instead of 4-6, is also significant. While it is also slightly cheaper than the combination of the two I was using previously (a lipase-only and a multi-enzyme version), it is fewer pills to achieve the same amount.

If I had taken prescription PERT instead of the OTCs, it would have saved me over 1,600 pills to swallow so far this year.

You might be thinking: take the prescription PERT! Don’t worry about the OTC pills! OMG that’s a lot of pills.

(OMG, it *is* a lot of pills: I think that as well now that I’m adding up all of these numbers.)

Thankfully, so far I am not having issues with swallowing these pills. As I get older, that might change and be a bigger factor in determining my strategy for how I dose enzymes; but right now, that’s not the biggest factor. Instead, I’m looking at efficacy (getting the right amount of enzymes to match my food), the cost (in terms of price), and then optimizing and reducing the total number of pills if I can. But the price is such a big variable that it is playing the largest role in determining my strategy.

How should we collectively pay for this?

You see, I don’t have EPI in a vacuum.

As I described at the top of the post, I already have $8,000+ of yearly diabetes costs. The $18,000 (or $24,000 or more) yearly enzyme costs are a lot. Cumulatively, just these two alone mean my supply costs are $26-32,000 (or more), excluding other healthcare costs. Thankfully, I do have insurance to cover costs after I hit my out of pocket max, but the bigger question is: who should be paying for this?

If my insurer pays more, then the employer pays more, which means employees get worse coverage on our pooled insurance plan. Premiums go up and/or the plans cover less, and the out of pocket costs to everyone goes up.

So while it is tempting to try to “stuff” all of my supply needs into insurance-covered supplies, in order to reduce my personal out of pocket costs in the short run, that raises costs for everyone in the long run.

This year, for all of those (remember I estimated 2,100 OTC pills swallowed to date) OTC pills I bought, it cost me $515. Out of pocket. Not billed through insurance; they know nothing about it.

It feels like a lot of money. However, if you calculate how many PERT it replaced and the cost per PERT pill, I saved $4,036 by swallowing 1,652 extra pills.

Is paying $500 to save everyone else $4000 worth it?

I think so.

Again, the “price” question gets interesting.

The raw costs of yearly supplies I don’t pay completely; remember with health insurance I am capped at $3,000 out of pocket for supplies I get through insurance. However, again, it’s worth considering that additional costs do not cost me but they cost the insurer, and therefore the employer and our pool of people in this insurance plan and influences future costs for everyone on insurance. So if I can afford (although I don’t like it) $500-ish out of pocket and save everyone $4,000 – that’s worth doing.

Although, I think I can improve on that math for next year.

I was taking the two OTC kinds that I had mentioned: one that was lipase-only and very reliable, but $0.28/pill or $0.04 per 1000 units of lipase (and contains ~6000 units of lipase). The less reliable multi-enzyme pill was cheaper ($.09) per pill but only contains 4000 units of lipase, and was $.02 per 1000 units of lipase. That doesn’t factor in the duds and the way I had to increase the number of pills to account for the lack of faith I had in the 4000 units of lipase always being 4000 units of lipase.

The new OTC pill I mentioned above is $0.39 per pill, which is fairly equivalent price to a combined lipase-only and multi-enzyme pill. In fact, I often would take 1+1 for snacks that had a few grams of protein and more than a few grams of lipase. So one new pill will cover 17,000 units of lipase (instead of 10,000, made up of 6000+4000) at a similar cost: $0.39 instead of $0.36 (for the two combined). And, it also has a LOT more protease per pill, too. It has >2x the amount of protease as the multi-enzyme OTC pill, and is very similar to the amount of protease in my prescription PERT! I’ve mostly discussed the math by units of lipase, but I also dose based on how much protein I’m eating (thus, protease to cover protein the way lipase covers fat digestion), so this is also a benefit. As a result, two of the new OTC pill now more than match 1 PERT on lipase, double the protease to 1 PERT, and is only two swallows instead of the 4-6 swallows needed with the previous combination of OTCs.

I have only tested for a few days, but so far this new OTC is working fairly well as a substitute for my previous two OTC kinds.

Given the unreliability of OTCs, even with different brands that are more reliable than the above picture, I still want to consume one prescription PERT to “anchor” my main meals. I can then “top off” with some of the new OTC pills, which is lower price than more PERT but has the tradeoff cost of slightly less reliability compared to PERT.

So with 3 main meals, that means at least 3 PERT per day ($8.34 per pill) at $25.02 per day in prescription PERT costs and $9,132 per year in prescription PERT costs. Then to cover the additional 3-5 PERT pills I would otherwise need, assuming 2 of the new OTC covers 1 PERT pills, that is 6-10 OTC pills.

Combined, 3 PERT + 6 OTC pills or 3 PERT + 10 OTC pills would be $27.36 or $28.92 per day, or $9,986 or $10,556 per year.

Still quite a bit of money, but compared to 6-8 PERT per day (yearly cost $18,264 to $24,352), it saves somewhere between $7,708 per year (comparing 6 PERT to 3 PERT + 6 OTC pills per day) all the way up to $14,366 per year (comparing 8 PERT to 3 PERT +10 OTC pills per day).

And coming back to number of pills swallowed, 6 PERT per day would be 2,190 swallows per year; 8 PERT pills per day is 2,920 swallows per year; 3 PERT + 6 OTC is 9 pills per day which is 3,285 swallows per year; and 3 PERT + 10 OTC is 13 swallows per day which is 4,745 swallows per year.

That is 1,095 more swallows per year (3PERT+6 OTC vs 6 PERT) or 1,825 more swallows per year (3 PERT + 10 OTC vs 8 PERT).

Given that I estimated I swallowed ~10 enzyme pills per day this year so far, the estimated range of 9-13 swallows with the combination of PERT and OTC pills (either 3 PERT + (6 or 10) OTC) for next year seems reasonable.

Again, in future this might change if I begin to have issues swallowing for whatever reason, but in my current state it seems doable.

The daily and annual costs of thyroid treatment for Graves’ Disease

No, we’re still not done yet with annual health cost math. I also developed Graves’ disease with subclinical hyperthyroidism this year, putting me to a grand total of 4 chronic health conditions.

Luckily, though, the 4th time was the charm and I finally have a cheap(er) one!

My thyroid med DOES have a generic. It’s cheap: $11.75 for 3 months of a once-daily pill! Woohoo! That means $0.13 per day cost of thyroid treatment and $48 per year cost of thyroid treatment.

(Isn’t it nice to have cheap, easy math about at least one of 4 things? I think so!)

Adding up all the costs of diabetes, celiac disease, exocrine pancreatic insufficiency and Graves’ Disease

High five if you’ve read this entire post; and no problem if you skimmed the sections you didn’t care about.

Adding it all up, my personal costs are:

  • Diabetes: $23.25 per day; $8,486 per year
  • Celiac: $3 per day; $1,100 per year (all out of pocket)
  • Exocrine Pancreatic Insufficiency:
    • Anywhere from $50.04 up to $66.72 per day with just prescription PERT pills; $18,265 (6 per day) to $24,353 (8 per day) per year
    • With a mix of prescription and OTC pills, $27.36 to $28.92 per day; $9,986 to $10,556 per year.
    • Of this, the out of pocket cost for me would be $2.34 to $3.90 per day; or $854 up to $1,424 per year.
  • Thyroid/Graves: $0.13 per day; $48 per year

Total yearly cost:

  • $27,893 (where EPI costs are 6 prescription PERT per day); 2,190 swallows
  • $33,982 (where EPI costs are 8 prescription PERT per day); 2,920 swallows
  • $19,615 (where EPI costs are 3 prescription PERT and 6 OTC per day); 3,285 swallows
  • $20,185 (where EPI costs are 3 prescription PERT and 9 OTC per day); 4,745 swallows

* My out of pocket costs per year are $854-$1424 for EPI when using OTCs to supplement prescription PERT and an estimated $1,100 for celiac-related gluten free food costs. 

** Daily cost-wise, that means $76.42, $93.10, $53.74, or $55.30 daily costs respectively.

*** The swallow “cost” is 1,095-1,825 more swallows per year to get the lower price cost of enzymes by combining prescription and OTC.

Combining these out of pocket costs with my $3,000 out of pocket max on my insurance plan, I can expect that I will therefore pay around $4,900 to $5,600 next year in health supply costs, plus another few hundred for things like tape or vitamins etc. that aren’t major expenses.

TLDR: 

  • Diabetes is expensive, and it’s not just insulin.
    • Insulin is roughly 19% of my daily cost of diabetes supplies. CGM is currently 56% of my diabetes supply costs.
  • EPI is super expensive.
    • OTC pills can supplement prescription PERT but have reliability issues.
    • However, combined with prescription PERT it can help drastically cut the price of EPI.
    • The cost of this price reduction is significantly more pills to swallow on a daily basis, and adds an additional out of pocket cost that insurance doesn’t cover.
    • However in my case; I am privileged enough to afford this cost and choose this over increasing everyone in my insurance plan’s costs.
  • Celiac is expensive and mostly an out of pocket cost.
  • Thyroid is not as expensive to manage with daily medication. Yay for one of four being reasonably priced!

REMEMBER to not use these numbers or math out of context and apply them to any other person; this is based on my usage of insulin, enzymes, etc as well as my insurance plan’s costs.

Yearly costs, prices, and calculations of living with 4 chronic diseases (type 1 diabetes, celiac, Graves, and exocrine pancreatic insufficiency)

What It Feels Like To Take Thyroid Medication

I’ve been taking thyroid medication for a few months now. It surprised me how quickly I saw some symptom resolution. As I wrote previously, I started taking thyroid medication and planned to get more lab work at the 8 week mark.

The theory is that thyroid medication influences the production of new thyroid hormones but not the stored thyroid hormones; thus, since it takes around 6 weeks for you to replace your stores of thyroid hormones, you usually get blood work no sooner than 6 weeks after making a change to thyroid medication.

I had noted, though, that some of my symptoms included changes in my heart rate (HR). This was both my overnight resting HR and how my HR felt during the day. I had hypothesized:

Given I have a clear impact to my heart rate, I’m hypothesizing that I might see changes to the trend in my heart rate data sooner than 6 weeks – 2 months, so that’ll be interesting to track!

This turned out to be an accurate prediction!

My provider had suggested starting me on a low dose of “antithyroid” medication. Guidelines typically suggest 10-20mg per day, with plans to titrate (adjust) the dose based on how things are going. However, in my case, I have subclinical hyperthyroidism – not actual hyperthyroidism – which means my thyroid levels themselves (T3 and T4) were in range. What was out of range for me was my thyroid stimulating hormone (TSH), which was below range, and my thyroid antibodies, all of which were above range. (If you want to read about my decision making and my situation with Graves’ disease with eye symptoms and subclinical hyperthyroidism, read my previous post for more details.)

I ended up being prescribed a 5mg dose. Thinking about it, given my T3 and T4 were well within range, that made sense. I started taking it in early August.

What it felt like to start taking antithyroid medication for the first time:

For context, my primary most bothersome symptoms were eye symptoms (eyelid swelling, sometimes getting a red patchy dry area outside the outer corner of my eye, eye pressure that made me not want to wear my contacts); increased resting overnight HR and higher HR during periods of rest during the day; and possibly mood and energy impacts.

  • Within a week (!) of starting the antithyroid medication, my overnight HR began lowering. This can be influenced by other factors like exercise etc., but it was also accompanied by fewer days with higher heart rate while I was sitting and relaxing! I definitely felt a noticeable improvement within a week of my heart rate-related symptoms. 
  • My eyelid swelling went away toward the end of the first week. Then after 3 or so days, it came back again for a few days, then went away for 12 days. It came back for several days, went away for another 6 days. Came back, then…nothing! I went weeks without eyelid swelling and none of the other eye-related symptoms that typically ebbed and flowed alongside the eyelid swelling. HOORAY!
  • It’s unclear how much my mood and energy were directly effected by the wonky thyroid antibody levels compared to being a correlation with the symptoms themselves. (I was also resuming ultramarathon training during this time period, following the recovery of my broken toe.) However, I definitely was feeling more energetic and less grumpy, as noticed by my husband as well.

What is interesting to me is that my symptoms were changed within a week. They often talk in the medical literature about not knowing exactly how the thyroid medication works. In my case, it’s worth noting again for context that I had subclinical hyperthyroidism (in range T3 and T4 but below range TSH) and Graves’ disease (several thyroid antibodies well above range) with correlated eye symptoms. The theory is that the eye symptoms are influenced by the thyroid antibody levels, not the thyroid levels (T3 and T4) themselves. So although the thyroid medication influences the production of new thyroid hormones and it takes 6 weeks to replace your store of thyroid hormones; my working hypothesis is that the symptoms driven by TSH and thyroid antibodies are influenced by the production of those (rather than the stores) and that is why I see a change to my symptoms within a week or so of starting thyroid medication.

I went for repeat lab work at 8 weeks, and I was pretty confident that I would have improved antibody and TSH levels. I wasn’t sure if my T3 and T4 would drop below range or not. The lab work came back in and… I was right! TSH was back to normal range (HOORAY), T3 and T4 were slightly lower than the previous numbers but still nicely in the middle of the range. Yay! However, my TSI (thyroid stimulating immunoglobulin) was still well above range, and slightly higher than last time. Boo, that was disappointing, because there are some studies (example) showing that out of range TSI can be a predictor for those with Graves’ disease for the need to continue antithyroid medication in the future.

Animated gif showing changes to various thyroid labs two days and 8 weeks after annual lab work. T3 and T4 remain in range, TSH returns from below to in range, TSI remains above range; TRAb, TgAB, and TPO were above range but not re-tested at 8 weeks.

As I wrote in my last post:

I am managing my expectations that managing my thyroid antibody and hormone levels will be an ongoing thing that I get to do along with managing insulin and blood sugars and managing pancreatic enzymes. We’ll see!

The TSI was a pointer that although I had reduced all of my symptoms (hooray) and my T3 and T4 were within range, I would probably need ongoing medication to keep things in range.

However, as a result of the lab work, my provider suggested dropping down to 2.5mg dose, to see if that would manage my thyroid successfully without pushing me over to hypothyroidism (low T3 and T4) levels, which can be a risk of taking too much antithyroid medication. He suggested switching to 2.5mg, and repeating lab work in 3 months or if I felt unwell.

I agreed that it was worth trying, but I was a little nervous about reducing my dose, because my T3 and T4 were still well within the middle of normal. And, I had an upcoming very long ultramarathon. Given that with the start of thyroid medication I saw symptoms change within a week, and I was two weeks out from my ultra, I decided to wait until after the ultramarathon so I could more easily monitor and assess any symptoms separately from the taper and ultra experience.

Recovery from my ultramarathon was going surprisingly well, enough so that I felt ready to switch the medication levels pretty soon after my ultra. I started taking the 2.5mg dose (by cutting the 5mg dose in half, as I had some remaining and it was easier than ordering a changed prescription to 2.5mg).

I carefully watched and saw some slight changes to my HR within the first week. But, I was also recovering from an ultramarathon, and that can also influence HR. Again, I was looking at both the overnight resting HR and noting any periods of time during the day where I was resting when my HR was high (for me). I had two days where it did feel high during the day, but the following days I didn’t observe it again, so I chalked that up to maybe being related to ultramarathon recovery.

But a little over a week and my right eye started feeling gunky. I had just been to the eye doctor for my annual exam and all was well and my eye didn’t look red or irritated. I didn’t think much of it. But a few days after that, I had rubbed my right eyelid and realized it felt poofy. I felt my left eyelid in comparison, and the right was definitely swollen in comparison. Looking in the mirror, I could see the swollen eyelid pushing down the corner of my right eye. Just like it had done before I started thyroid medications. Ugh. So eye symptoms were back. A few days later, I also woke up feeling like my eyes hurt and they needed lubrication (eye drops) as soon as I opened my eyes. That, too, had been a hallmark of my eye symptoms from last October onward.

The plan had been to wait until 3 months after this medication change to repeat labs. I’m going to try to wait until the 6-8 week mark again, so we can see what the 2.5mg does to my T3 and T4 levels alongside my TSH. But, my prediction for this next round of lab work is that T3 and T4 will go up (maybe back to the higher end but likely still within range; although the possibility to fully go above range), and that my TSH will have dropped back down below range, because the symptom pattern I am starting to have mimics the symptom pattern I had for months prior to starting the 5mg thyroid medication.

Why only wait 6-8 weeks, when my provider suggested 3 months?

These symptoms are bothersome. The eyelid swelling thankfully subsided somewhat after 4 days (after the point where it got noticeable enough for my husband to also see it compressing my outer corner of my eye, which means anyone would be able to visibly see it), but I’m watching it to see if it returns with a cyclical pattern the way it went away previously, expecting it to likely return to constant every day eye swelling. Since it influences my vision slightly (because the eyelid is pushed down by the swelling), that impacts my quality of life enough to take action sooner. If it gets really bad, I might discuss with my provider and get labs even sooner, but I’m going to try to tough it out to 6-8 weeks to get a full picture of data of how the 2.5mg impacted all of my levels and also see what pattern of symptoms return when, because it will be interesting to compare the symptom levels at 5mg (essentially all gone within 1-2 weeks) and at 2.5mg compared to my original, pre-thyroid medication symptom levels and patterns.

But depending on those labs, I predict that I will return to taking the 5mg dose, and hopefully my symptoms will go away completely and stay away. Then it’ll be a future decision on if/when to try titrating down again; possibly guided by the TSI level, since the TSI was still above range when we had switched me to 2.5mg (despite the change in TSH back to range).

The good news is, though, that in future I should be able to use the 1-2 weeks of symptom data to determine whether a change in dose is working for me or not, instead of having to wait a full 6-8 weeks, because my symptoms seem to be driven by the TSH and antibody levels, rather than out of range T3 and T4 levels (because they were and are still in the middle of the goal range).

I also discussed this with my eye doctor. You’ll note from my previous post that I was very concerned about the eye impacts and symptoms, so I had asked my eye doctor if she’s still comfortable treating me (she is), and we talked about what things would cause me to get a referral to a specialist. So far my symptoms don’t seem on track for that; it would be my eyes protruding from the socket and having pressure that would possibly need surgery. Disappointingly, she confirmed that there’s really no treatment for the symptoms since they’re caused by the antibody levels. There’s no anti-swelling stuff to put on my eyelid to help. Instead, the goal is to manage the antibody levels so they don’t cause the symptoms. (Which is everything I’m talking about doing above, including likely returning to the 5mg dose given that my eye symptoms resumed on the 2.5mg dose).

In summary, I think it is worth noting for anyone with Graves’ disease (whether or not they have subclinical or actual hyperthyroidism) that it is possible to see symptom changes within a week or two of starting or changing your thyroid medication. I can’t find anything in the literature tracking symptom resolution on anything shorter than a 6 week time period, but maybe in the future someone will design a study to capture some of the real-world data and/or run a prospective study to capture this data and see how prevalent this is for symptoms to resolve on a much shorter time frame, for those of us whose symptoms are driven not by thyroid levels themselves (T3 and T4) but for the TSH and TSI and other thyroid antibodies (TPO etc).

If you do start thyroid medication, it’s worth logging your symptoms as soon as  possible, ideally before you start your medication, or if it’s too late for that, start logging them afterward. You can then use that as a comparison in the future for if you reduce, increase, or are directed to stop taking your medication, so you can see changes in the length of time it takes to develop or reduce symptoms and whether the patterns of symptoms change over time.

What it feels like to take thyroid medication

Convening The Center Paper Describing Our Methods and The Two-Spectrum Framework For Assessing Patient Experience

I’m excited to share another paper is out that has been in the works for a while. This paper describes the methods we used to design the Convening The Center project, and an artifact we ended up creating in the process that we think will be helpful to people with lived experience and traditional researchers and others who want to partner with patients!

As a quick recap, John Harlow and I (Dana Lewis) collaborated to create Convening The Center (CTC) to bring people (known as “patients” and “carers”, or people with lived experience based on health and healthcare experiences) together, solely to allow them to connect and convene about what they care about. There was no agenda! It’s a bit hard to design an agenda-less meeting, and we put a lot of thought into it. We ended up converting from an in-person gathering in 2020 to a digital experience due to the COVID-19 pandemic, which also required a lot of design in order to achieve a digital space that allowed virtual strangers to feel comfortable connecting and discussing their experiences and perspectives.

One theme that came up throughout the first individual round of discussions (Phase 1) was that there was a spectrum of participation; some people participate and contribute as individuals to other projects and organizations, whereas others choose to or find themselves in situations that necessitate creating something new. I also saw there were different levels, from individual to community or system-level creation and contributions.

Thus, the Two-Spectrum Framework for Assessing Patient Experience was created, and we used it to “see” where our 25 participants from CTC fell, based on our Phase 1 discussions, and this helped us group people in Phase 2 (alongside scheduling availability) for smaller group discussions.

Figure 1 from our paper, illustrating the Two-Spectrum Framework for Assessing Patient Experience. It shows a horizontal spectrum with "contributing" on the left and "creating" on the right. The vertical axis has "level 1 - individual" at the bottom; "level 2 - community" in the center, and "level 3 - systems" at the top. Light blue boxes, 25 in total, are arranged across this spectrum to illustrate where CTC participants are.
Figure 1 from our paper, illustrating the Two-Spectrum Framework for Assessing Patient Experience

It was really helpful for thinking about how patients (people with lived experience) do things; not just the labels we are given by others. And so I decided we should try to write it up as a paper so that others could use it as well!

An animated gif showing an individual first on the continuum from contributing to creating; then the various locations on the vertical spectrum (indivdiual to community to systems) where they might be.
An illustrated gif I use to articulate how individuals might see themselves on the Two-Spectrum Framework for Assessing Patient Experience.

As of today, our paper is now out and is open access: “From Individuals to Systems and Contributions to Creations: Novel Framework for Mapping the Efforts of Individuals by Convening The Center of Health and Health Care”.

I encourage you to read it, and in particular the “Principal Findings” section of the discussion that talks more about the Two-Spectrum Framework for Assessing Patient Experience. Notably, “Rather than making claims about what patients “are,” this framework describes what patients “do,” the often-unseen work of patients, and, importantly, how they do this work “, and the implications of this.

We hope you find something in this paper useful, and we’re excited to see how this framework might be further used in the future!

Huge thanks to our advisors, Liz Salmi and Alicia Staley, who not only advised throughout the project but also co-authored this paper with us. And of course, ongoing respect, admiration, and appreciation to the 25 participants of Convening The Center, as well as our artist collaborator, Rebeka Ryvola who’s beautiful work is represented in this paper!