Understanding the Difference Between Open Source and DIY in Diabetes

There’s been a lot of excitement (yay!) about the results of the CREATE trial being published in NEJM, followed by the presentation of the continuation results at EASD. This has generated a lot of blog posts, news articles, and discussion about what was studied and what the implications are.

One area that I’ve noticed is frequently misunderstood is how “open source” and “DIY” are different.

Open source means that the source code is openly available to view. There are different licenses with open source; most allow you to also take and reuse and modify the code however you like. Some “copy-left” licenses commercial entities to open-source any software they build using such code. Most companies can and do use open source code, too, although in healthcare most algorithms and other code related to FDA-regulated activity is proprietary. Most open source licenses allow free individual use.

For example, OpenAPS is open source. You can find the core code of the algorithm here, hosted on Github, and read every line of code. You can take it, copy it, use it as-is or modify it however you like, because the MIT license we put on the code says you can!

As an individual, you can choose to use the open source code to “DIY” (do-it-yourself) an automated insulin delivery system. You’re DIY-ing, meaning you’re building it yourself rather than buying it or a service from a company.

In other words, you can DIY with open source. But open source and DIY are not the same thing!

Open source can and is usually is used commercially in most industries. In healthcare and in diabetes specifically, there are only a few examples of this. For OpenAPS, as you can read in our plain language reference design, we wanted companies to use our code as well as individuals (who would DIY with it). There’s at least one commercial company now using ideas from the OpenAPS codebase and our safety design as a safety layer against their ML algorithm, to make sure that the insulin dosing decisions are checked against our safety design. How cool!

However, they’re a company, and they have wrapped up their combination of proprietary software and the open source software they have implemented, gotten a CE mark (European equivalent of FDA approval), and commercialized and sold their AID product to people with diabetes in Europe. So, those customers/users/people with diabetes are benefitting from open source, although they are not DIY-ing their AID.

Outside of healthcare, open source is used far more pervasively. Have you ever used Zoom? Zoom uses open source; you then use Zoom, although not in a DIY way. Same with Firefox, the browser. Ever heard of Adobe? They use open source. Facebook. Google. IBM. Intel. LinkedIn. Microsoft. Netflix. Oracle. Samsung. Twitter. Nearly every product or service you use is built with, depends on, or contains open source components. Often times open source is more commonly used by companies to then provide products to users – but not always.

So, to more easily understand how to talk about open source vs DIY:

  • The CREATE trial used a version of open source software and algorithm (the OpenAPS algorithm inside a modified version of the AndroidAPS application) in the study.
  • The study was NOT on “DIY” automated insulin delivery; the AID system was handed/provided to participants in the study. There was no DIY component in the study, although the same software is used both in the study and in the real world community by those who do DIY it. Instead, the point of the trial was to study the safety and efficacy of this version of open source AID.
  • Open source is not the same as DIY.
  • OpenAPS is open source and can be used by anyone – companies that want to commercialize, or individuals who want to DIY. For more information about our vision for this, check out the OpenAPS plain language reference design.
Venn diagram showing a small overlap between a bigger open source circle and a smaller DIY circle. An arrow points to the overlapping section, along with text of "OpenAPS". Below it text reads: "OpenAPS is open source and can be used DIY. DIY in diabetes often uses open source, but not always. Not all open source is used DIY."

More Thoughts And Strategies For Managing Wildfire Smoke And Problematic Air Quality

In 2020 we had a bad wildfire smoke year with days of record-high heat and poor air quality. It was especially problematic in the greater Seattle area and Pacific Northwest (PNW) where most people don’t have air conditioning. I previously wrote about some of our strategies here, such as box fans with furnace filters; additional air purifiers; and n95 masks. All of those are strategies we have continued to use in the following years, and while our big HEPA air purifier felt expensive at the time, it was a good investment and has definitely done what it needs to do.

This year, we got to September 2022 before we had bad wildfire smoke. I had been crossing my fingers and hoped we’d skip it entirely, but nope. Thankfully, we didn’t have the record heat and the smoke at the same time, but we did end up having smoke blowing in from other states, and then a local wildfire 30-40 miles away that has been making things tricky for several days on and off…several different times.

I’ve been training for an ultramarathon, so it’s been frustrating to have to look not only at the weather but also the air quality to determine how/when to run. I don’t necessarily have a medical condition that makes me higher risk to poor air quality (that I know of), but I think there’s some correlation with being allergic to a lot of environmental things (like dust, mold, trees, grass, etc) that makes it so that I also am more sensitive to most people I know to poor air quality.

Tired of wildfire smoke making it hard to exercise easily outdoors

Everyone’s sensitivity is different, but I’ve been figuring out thanks to multiple stretches of up and down AQI that my threshold for masking outside is about 50 AQI. If it gets to be around 100 or above, I don’t want to be walking or running outside, even with a mask. And as it gets above 150 outside, it becomes yucky inside for me, too, even with the doors and windows closed, the vents on our windows taped shut, and air purifiers and box fans etc running. My throat was scratchy and my eyes hurt, and my chest started to feel yucky, too.

It got so bad last week that I took a small, portable mini air purifier that I had bought to help mitigate COVID-19 exposure on planes, and stuck it in front of my face. It noticeably made my throat stop feeling scratchy, so it was clearly cleaning the air to a degree. On the worst days, I’ve been sitting at my desk working with the stream of air blowing in my face, and I’ve also been leaving it turned on and pointed at my face overnight.

This is kind of a subjective, arbitrary “this helps”, but today we ended up being able to quantify how much it helps to have our big air purifier, box fans with furnace filters, smaller air purifier, and the mini air purifier. Scott ordered a small, portable PM2.5 / PM10 monitor to be able to see what the PM2.5 and PM10 levels are in that exact spot, as opposed to relying on IQAir or similar locally reported sensors that only tell us generally how bad things are in our area.

It also turned out to be useful for checking how effective each of our things are.

It turns out that our box fans with furnace filters taped to the back are most effective at fan speed “1” (they all go up to 3), probably because putting it up to 3 is prone to stirring up dust from the floor (despite robot vacuuming multiple times of day) and increasing PM10 levels. A box fan with 2” MERV 10 filter taped to the back doesn’t affect the already-low PM2.5 levels indoors; on fan level 1 the PM10 gets reduced to zero as long as it’s not pointed at the carpet and stirring up dust. So while it doesn’t help with smoke, these fans are good with increasing circulating air (so it feels cooler) and getting rid of the dust and cat hair that I’m allergic to.

The big HEPA air purifier we bought has a connected app that tells us the PM2.5 levels, and our portable PM2.5 monitor confirms that it’s putting out air with a PM2.5 level of 0. Yay! This sits in our kitchen by our front door, so it helps clean the smoky hallway air coming inside.

A cat sticking it's face toward the phone camera. Behind the cat, a portable PM 2.5 / PM 10 air monitor sits on the floor by a door to measure incoming air.

The hallway air is TERRIBLE. The hallway opens directly to the parking garage, and is usually about as smoky as the outdoor air: it only has a single A/C duct for the whole building, which isn’t always running. The stairwell leading outside is a little cleaner than the hallway and outside. (So I’m glad we have our best air purifier situated to take on the air coming in when we open the hallway door). So we won’t be spending time exercising in the hallways, either; with that level of air quality you might as well be outside anyway, because we need to be masked either way.

The other purifier we have is a smaller purifier. I have it sitting on the counter in our bathroom, because the air exchange to outside is really reduced compared to what it should be (and the building management doesn’t seem very interested in trying to figure out how to fix it). That purifier gets PM2.5 down from 4 to 1 ug/m^3, or about a 4x improvement! Which is pretty good, although not quite as good as the big purifier in our kitchen/entry. Since it’s small enough to sit on a desk or bedside table and blow clean air at me where I’m working or sleeping, we decided to order 2 more of these smaller purifiers for my office and our bedroom, since the box fans take care of PM10 but not the PM2.5.

PM2.5 and PM10 readings from the portable monitor, from on top of the air purifier; next to my office; next to a box fan with filter; in the hallway; in the stairwell; and outside. This is roughly in order of best (inside over the air purifier) to worst (hallway and outside; the stairwell is slightly better than the hallway).

Since the portable air quality monitor would be hard to fit inside his mask or his mouth, and impossible to read there, Scott also held up the PM2.5/10 monitor to the exhaust valve on his n95 mask (note: not all our n95 masks our valved but the valved ones are good for wildfire smoke and managing temperature levels inside your mask when exercising) while outside, and the average PM2.5 level there is about half that of the ambient air. Since about half the time he’s breathing in (and the meter is sucking in outside air) and the other half of the time he’s breathing out (so it’s getting the mask-filtered air he inhaled and then exhaled), this suggests that the mask is doing it’s job of reducing PM2.5 levels he’s breathing inside the mask to very low levels (probably about the same as our very clean indoor air).

He also held it over the small air purifier that I’ve been keeping my face over. It, too, reduces PM2.5 down to about 2 – so not as good as the bigger purifiers, but a ~2x improvement over the ~4 in the ambient air that I would otherwise be breathing.

TLDR:

  • Box fans with MERV 10 filters are great for allergens and PM10, but don’t noticeably reduce the PM2.5. Higher MERV filters might do better, but are very expensive, and probably less cost-effective than a purifier with a proper HEPA filter.
  • Small and big air purifiers work well for reducing PM2.5.
  • N95 masks are effective at drastically reducing the PM2.5 you’d be exposed to outside.
  • If you’re like me and are bothered inside when the air quality outside is bad, additional air purifiers (small or big) might help improve your quality of life during these smoky days that we are increasingly getting every year.

Continuation Results On 48 Weeks of Use Of Open Source Automated Insulin Delivery From the CREATE Trial: Safety And Efficacy Data

In addition to the primary endpoint results from the CREATE trial, which you can read more about in detail here or as published in the New England Journal of Medicine, there was also a continuation phase study of the CREATE trial. This meant that all participants from the CREATE trial, including those who were randomized to the automated insulin delivery (AID) arm and those who were randomized to sensor-augmented insulin pump therapy (SAPT, which means just a pump and CGM, no algorithm), had the option to continue for another 24 weeks using the open source AID system.

These results were presented by Dr. Mercedes J. Burnside at #EASD2022, and I’ve summarized her presentation and the results below on behalf of the CREATE study team.

What is the “continuation phase”?

The CREATE trial was a multi-site, open-labeled, randomized, parallel-group, 24-week superiority trial evaluating the efficacy and safety of an open-source AID system using the OpenAPS algorithm in a modified version of AndroidAPS. Our study found that across children and adults, the percentage of time that the glucose level was in the target range of 3.9-10mmol/L [70-180mg/dL] was 14 percentage points higher among those who used the open-source AID system (95% confidence interval [CI], 9.2 to 18.8; P<0.001) compared to those who used sensor augmented pump therapy; a difference that corresponds to 3 hours 21 minutes more time spent in target range per day. The system did not contribute to any additional hypoglycemia. Glycemic improvements were evident within the first week and were maintained over the 24-week trial. This illustrates that all people with T1D, irrespective of their level of engagement with diabetes self-care and/or previous glycemic outcomes, stand to benefit from AID. This initial study concluded that open-source AID using the OpenAPS algorithm within a modified version of AndroidAPS, a widely used open-source AID solution, is efficacious and safe. These results were from the first 24-week phase when the two groups were randomized into SAPT and AID, accordingly.

The second 24-week phase is known as the “continuation phase” of the study.

There were 52 participants who were randomized into the SAPT group that chose to continue in the study and used AID for the 24 week continuation phase. We refer to those as the “SAPT-AID” group. There were 42 participants initially randomized into AID who continued to use AID for another 24 weeks (the AID-AID group).

One slight change to the continuation phase was that those in the SAPT-AID used a different insulin pump than the one used in the primary phase of the study (and 18/42 AID-AID participants also switched to this different pump during the continuation phase), but it was a similar Bluetooth-enabled pump that was interoperable with the AID system (app/algorithm) and CGM used in the primary outcome phase.

All 42 participants in AID-AID completed the continuation phase; 6 participants (out of 52) in the SAPT-AID group withdrew. One withdrew from infusion site issues; three with pump issues; and two who preferred SAPT.

What are the results from the continuation phase?

In the continuation phase, those in the SAPT-AID group saw a change in time in range (TIR) from 55±16% to 69±11% during the continuation phase when they used AID. In the SAPT-AID group, the percentage of participants who were able to achieve the target goals of TIR > 70% and time below range (TBR) <4% increased from 11% of participants during SAPT use to 49% during the 24 week AID use in the continuation phase. Like in the primary phase for AID-AID participants; the SAPT-AID participants saw the greatest treatment effect overnight with a TIR difference of 20.37% (95% CI, 17.68 to 23.07; p <0.001), and 9.21% during the day (95% CI, 7.44 to 10.98; p <0.001) during the continuation phase with open source AID.

Those in the AID-AID group, meaning those who continued for a second 24 week period using AID, saw similar TIR outcomes. Prior to AID use at the start of the study, TIR for that group was 61±14% and increased to 71±12% at the end of the primary outcome phase; after the next 6 months of the continuation phase, TIR was maintained at 70±12%. In this AID-AID group, the percentage of participants achieving target goals of TIR >70% and TBR <4% was 52% of participants in the first 6 months of AID use and 45% during the continuation phase. Similarly to the primary outcomes phase, in the continuation phase there was also no treatment effect by age interaction (p=0.39).

The TIR outcomes between both groups (SAPT-AID and AID-AID) were very similar after each group had used AID for 24 weeks (SAPT-AID group using AID for 24 weeks during the continuation phase and AID-AID using AID for 24 weeks during the initial RCT phase).. The adjusted difference in TIR between these groups was 1% (95% CI, -4 to 6; p=-0.67). There were no glycemic outcome differences between those using the two different study pumps (n=69, which was the SAPT-AID user group and 18 AID-AID participants who switched for continuation; and n=25, from the AID-AID group who elected to continue on the pump they used in the primary outcomes phase).

In the initial primary results (first 24 weeks of trial comparing the AID group to the SAPT group), there was a 14 percentage point difference between the groups. In the continuation phase, all used AID and the adjusted mean difference in TIR between AID and the initial SAPT results was a similar 12.10 percentage points (95% CI, p<0.001, SD 8.40).

Similar to the primary phase, there was no DKA or severe hypoglycemia. Long-term use (over 48 weeks, representing 69 person-years) did not detect any rare severe adverse events.

CREATE results from the full 48 weeks on open source AID with both SAPT (control) and AID (intervention) groups plotted on the graph.

Conclusion of the continuation study from the CREATE trial

In conclusion, the continuation study from the CREATE trial found that open-source AID using the OpenAPS algorithm within a modified version of AndroidAPS is efficacious and safe with various hardware (pumps), and demonstrates sustained glycaemic improvements without additional safety concerns.

Key points to takeaway:

  • Over 48 weeks total of the study (6 months or 24 weeks in the primary phase; 6 months/24 weeks in the continuation phase), there were 64 person-years of use of open source AID in the study, compared to 59 person-years of use of sensor-augmented pump therapy.
  • A variety of pump hardware options were used in the primary phase of the study among the SAPT group, due to hardware (pump) availability limitations. Different pumps were also used in the SAPT-AID group during the AID continuation phase, compared to the pumps available in the AID-AID group throughout both phases of trial. (Also, 18/42 of AID-AID participants chose to switch to the other pump type during the continuation phase).
  • The similar TIR results (14 percentage points difference in primary and 12 percentage points difference in continuation phase between AID and SAPT groups) shows durability of the open source AID and algorithm used, regardless of pump hardware.
  • The SAPT-AID group achieved similar TIR results at the end of their first 6 months of use of AID when compared to the AID-AID group at both their initial 6 months use and their total 12 months/48 weeks of use at the end of the continuation phase.
  • The safety data showed no DKA or severe hypoglycemia in either the primary phase or the continuation phases.
  • Glycemic improvements from this version of open source AID (the OpenAPS algorithm in a modified version of AndroidAPS) are not only immediate but also sustained, and do not increase safety concerns.
CREATE Trial Continuation Results were presented at #EASD2022 on 48 weeks of use of open source AID

Reasons to “DIY” or Self-Organize Your Own Solo Ultramarathon or Ultra Run

I’ve now run two ultramarathons (both happened to be 50k races, with a race report for the second race here), and was planning my third ultrarace. I had my eye on the 50 mile (50M) version of the 50k I ran last year. It’s on a course I adore – a 6 foot wide crushed gravel trail that’s slightly uphill (about 1,000 feet) for the first 30 miles and then downhill at 2% grade for the remaining 20 miles. It happens to be close to home (hour and a half drive to the start), which helps for logistics.

I started training for the 50M weeks after my 50k this year, including talking my husband into taking me out to run some of the segments along the first 25 miles of the course. I’ve done the back half of the course several times through training and racing the 50k, and I wanted to check out each of the earlier segments to get a sense of what trail bathrooms existed on the course, make notes about milestones to watch for at various distances, etc.

After the first training run out there, when I started talking goal paces to get through the first and main cutoff at mile 30 (cutoffs got progressively easier from there, and even walking very slowly you could finish if you wanted to), my husband started to suggest that I should just run the course some other time on my own, so I didn’t have to worry about the cutoffs. I told him I didn’t want to do that. The cutoffs are a good incentive to help me push myself, and it’s worth the stress it causes in order to try to perform my best. (My target pace would get me through a comfortable 15 minutes before cutoff, and I could dial up the effort if needed to achieve cutoff). However, he suggested it another time and pointed out that even when running an organized race, I tend to run self-supported, so I don’t really don’t benefit as much from running in a race. I protested and talked again about the camaraderie of running when everyone else did, the fact that there were aid stations, the excellent search and rescue support, the t-shirt, the medal, the pictures! Then out loud I realized that I would be running at the back of the pack that I would miss the pictures at 25 miles because the photographer heads to the finish before I would get there. And they stop finish line pictures 3 hours before the end of the race. (Why, I don’t know!) And so I’d miss those photos too. And last year, I didn’t partake in the 50k staffed aid stations because I couldn’t eat any of their food and didn’t want any extra COVID exposure. Instead, my husband crewed me and refilled my hydration at two points on the course. The un-staffed aid stations didn’t have the plethora of supplies promised, and one race report from someone near the front of the pack said they were low on water! So it was a good thing I didn’t rely on the aid stations. I didn’t wear the tshirt last year, because it wasn’t a tech tee. Medals aren’t that exciting. So…why was I running the organized race?

My only remaining reasons were good search and rescue (still true) and the motivation of signing up for and committing to running on that date. It’s a commitment device. And my husband then smashed that reason, too, by reminding me that the only commitment device I typically need is a spreadsheet. If I decide I’m going to work toward a goal, I do. Signing up doesn’t make a difference.

And to be fair, he crews me whether it’s an organized race or not! So to him, it makes no difference whether I’m running an organized race or a self-organized long ultra.

And so I decided to give it some thought. Where would I run, if I could run anywhere in an hour’s distance from home? Do the same 50 mile course? Was that course worth it? Or was there somewhere closer to home where I could run that would be easier for my husband to crew?

He suggested running on our “home” trails, which is a network of hundreds of miles of paved trail that’s a short walk away. I immediately scoffed, then took the suggestion seriously. If I ran “from home”, he could crew from home and either drive out or e-bike out or walk out to bring me supplies along my route. If the park trail bathrooms ended up getting locked, I could always use the bathroom at home (although not ideal in terms of motivating myself to move quickly and get back out on the trail). I’d have a bigger variety of fueling options, since he could microwave and bring me out more options than if it had to be shelf-stable.

The list of benefits of potentially doing my own DIY or self-organized ultra grew.

(And then, I broke my toe. Argh. This further solidified my willingness to do a DIY ultra, because I could train up until when I was ready, and then run my distance, without having to choose between a non-refundable signup and not running or risking injury from running before I was ready.)

Eventually, my plans evolved (in part due to my broken toe). I was originally going to DIY a 50M or 100k (62M) over Labor Day weekend, recover, then re-train up and run a DIY 100 mile (100M) in late October or early November. When I broke my toe, I decided to scratch the “test” 50M/100k and just train and run the 100M, since that was my ultimate goal distance for the year.

Here are the pros of running a DIY ultra or a “self-organized” ultra, rather than an organized race with other people:

  • For me specifically, I have better trail options and route options. I can run a 95% flat course on paved, wide, safe trails through my local community.
  • These are so local that they are only a few minutes walk from my door.
  • The location means it’s easy for Scott to reach me at any point. He can walk out and bring me water and fuel and any needed supplies when I complete a loop every 4 or so hours. If needed, he could also e-bike out to bring me anything I need if I ran out or had a more urgent need for supplies. He can also drive out and access the course every half mile or mile for most of my planned route.

    This also means I have more fuel options that I can prepare and have for Scott to bring out. This is awesome because I can have him warm up ¼ of a ham and cheese quesadilla, or a corn dog, or sweet potato tots, or any other fuel options that I wouldn’t be able to use if I had to rely on pre-packed shelf stable options for a 30 hour race.

    (Note that even if I did an organized race, I most likely still wouldn’t benefit from aid station food. In part, because I have celiac and have to have everything gluten free. I also have to watch cross contamination, so a bowl of any kind of food that’s not individually packaged is something that’s likely contaminated by gluten. COVID has helped reduce this but not completely. Plus, I have diabetes so I need to be roughly aware of the amount of carbs I’m eating to decide whether or not to dose insulin for them, given what is happening to my blood sugar at the time. And, I have exocrine pancreatic insufficiency (EPI) which means I have to dose enzymes for everything I eat. Grazing is hard with EPI; it’s easier to dose and eat the amount that matches my enzymes, so pre-packaged snacks that I know the carb and fat and protein count means I know what insulin I need and what enzymes I need for each set of “fuel”. Guessing carb counts or enzyme counts in the middle of the night while running long distance is likely not going to be very effective or fun. So as a result of all that – pre-planned food is the way to go for me. Related, you can read about my approach for tracking fuel on the go with a spreadsheet and pre-planned fuel library here.)

  • There is regular public bathroom access along my chosen route.
  • I’ve designed out and back laps and loops that have me coming back by my start (remember, only a few minutes walk from home) and that make it so I am passing the bathrooms multiple times on a regular basis in case I need them.

    These laps and loops also make for mentally smaller chunks to tackle. Instead of 100 miles, I’ve got a ~24 mile out and back, a 13 mile loop, a 16 mile out and back, a repeat of the 13 mile loop, repeating again the 16 mile out and back followed by the 13 mile loop one more time, and then a quick 5 mile total out and back (so 2.5 out and back). These are also all routes I know well, so mentally finding waypoints to focus on and know how far I’ve gone are a huge benefit for mentally breaking down the distance into something my brain and body “know”.

  • There are no cutoffs or pace requirements. If I slow down to a 20 minute mile (or slower)…well hey, it’s faster than I was walking with my hands-free knee crutch a few months ago! (I rocked anywhere from a 45 minute mile to a 25 minute mile).

    There’s no pressure to go faster, which means I won’t have pressure to push my effort, especially at the start. Hopefully, that means I can maintain an “easy”, even effort throughout and maybe cause less stress to my body’s hormone systems than I would otherwise.

    The only pressure I have will be the pressure I put on myself to finish (eventually), which could be 26 hours or could be 30 hours or could be 36 hours or even slower… basically I have to finish before my husband gives up on coming out to refuel me!

  • And, once I finish, it’ll be ‘fast’ to get home, shower, refuel, and be done. This is in comparison to a race where I’d have an hour+ drive to get home. I’ll need to walk home which might actually take me much longer than that after I’ve ambulated for 100 miles…but it should hopefully be shorter than an hour!
  • Finally, the major benefit is flexibility. I can set my race date for a weekend when I’ve trained enough to do it. I can move it around a week or two based on the weather (if it’s too cold or too rainy). I can even decide to move it to the spring (although I’d really love to do it this year).

Here are some of the cons of running a DIY ultra or a “self-organized” ultra, rather than an organized race with other people:

  • Theoretically, it would be easier to stop because I am so close to home. I haven’t committed money or drive time or dragged my husband to far away places to wait for me to finish my run. (However, I’m pretty stubborn so in my case I think this is less of an issue than it might be for others?)
  • Yet, out and back loops and the route I’ve chosen could get monotonous. I chose these loops and the route because I know the distance and almost every tenth mile of the route super well. The first 6 miles of all the laps/loops are the same, so I’ll run those same 6 miles repeated 7 times over the course of the run.
  • I won’t have the camaraderie and knowledge that other people are out here tackling the same distance. I’m a back of the pack runner (and celebrate being places from last the way most people celebrate places from first!) and often don’t see anyone running after the start…yet there’s comfort in knowing I’m one of dozens or hundreds out here covering the same course on the same day with the same goal. I do think I’ll miss this part.
  • There is no one to cheer for me. There’s no aid station volunteers, fellow runners, or anyone (other than my amazing husband who will crew me) to cheer for me and encourage me and tell me I’m moving well.
  • There’s no medal (not a big deal), t-shirt (not a big deal), or official finishing time (also not a big deal for me).
  • There’s no cutoffs or pace requirements to motivate me to keep pushing when things get hard.

All in all, the benefits pretty clearly outweigh the downsides – for me. Again, I’m a back of the pack super slow runner (in fact, I typically run 30 seconds and walk 60 seconds throughout my whole race consistently) who can’t eat aid station food (because celiac/EPI makes it complicated) coming off of a broken toe injury (which messed up my training and racing plans), so my pros/cons lean pretty heavily toward making a DIY/self-organized solo ultra run an obvious choice. Others might have different pro/con list based on the above variables and their situations, but hopefully this helps someone else think through some of the ways they might decide between organized and un-organized ultramarathon efforts!

Reasons to "DIY" or self-organize your own ultramarathon run

Wondering about the “how” rather than the “why” of autoimmune conditions

I’ve been thinking a lot about stigma, per a previous post of mine, and how I generally react to, learn about, and figure out how to deal with new chronic diseases.

I’ve observed a pattern in my experiences. When I suspect an issue, I begin with research. I read medical literature to find out the basics of what is known. I read a high volume of material, over a range of years, to see what is known and the general “ground truth” about what has stayed consistent over the years and where things might have changed. This is true for looking into causal mechanisms as well as diagnosis and then more importantly to me, management/treatment.

I went down a new rabbit hole of research and most articles were publicly accessible

A lot of times with autoimmune related diseases…the causal mechanism is unknown. There are correlations, there are known risk factors, but there’s not always a clear answer of why things happen.

I realize that I am lucky that my first “thing” (type 1 diabetes) was known to be an autoimmune condition, and that probably has framed my response to celiac disease (6 years later); exocrine pancreatic insufficiency (19+ years after diabetes); and now Graves’ disease (19+ years after diabetes). Why do I think that is lucky? Because when I’m diagnosed with an autoimmune condition, it’s not a surprise that it IS an autoimmune condition. When you have a nicely overactive immune system, it interferes with how your body is managing things. In type 1 diabetes, it eventually makes it so the beta cells in your pancreas no longer produce insulin. In celiac, it makes it so the body has an immune reaction to gluten, and the villi in your small intestine freak out at the microscopic, crumb-level presence of gluten (and if you keep eating gluten, can cause all sorts of damage). In exocrine pancreatic insufficiency, there is possibly either atrophy as a result of the pancreas not producing insulin or other immune-related responses – or similar theories related to EPI and celiac in terms of immune responses. It’s not clear ‘why’ or which mechanism (celiac, T1D, or autoimmune in general) caused my EPI, and not knowing that doesn’t bother me, because it’s clearly linked to autoimmune shenanigans. Now with Graves’ disease, I also know that low TSH and increased thyroid antibodies are causing subclinical hyperthyroidism symptoms (such as occasional minor tremor, increased resting HR, among others) and Graves’ ophthalmology symptoms as a result of the thyroid antibodies. The low TSH and increased thyroid antibodies are a result of my immune system deciding to poke at my thyroid.

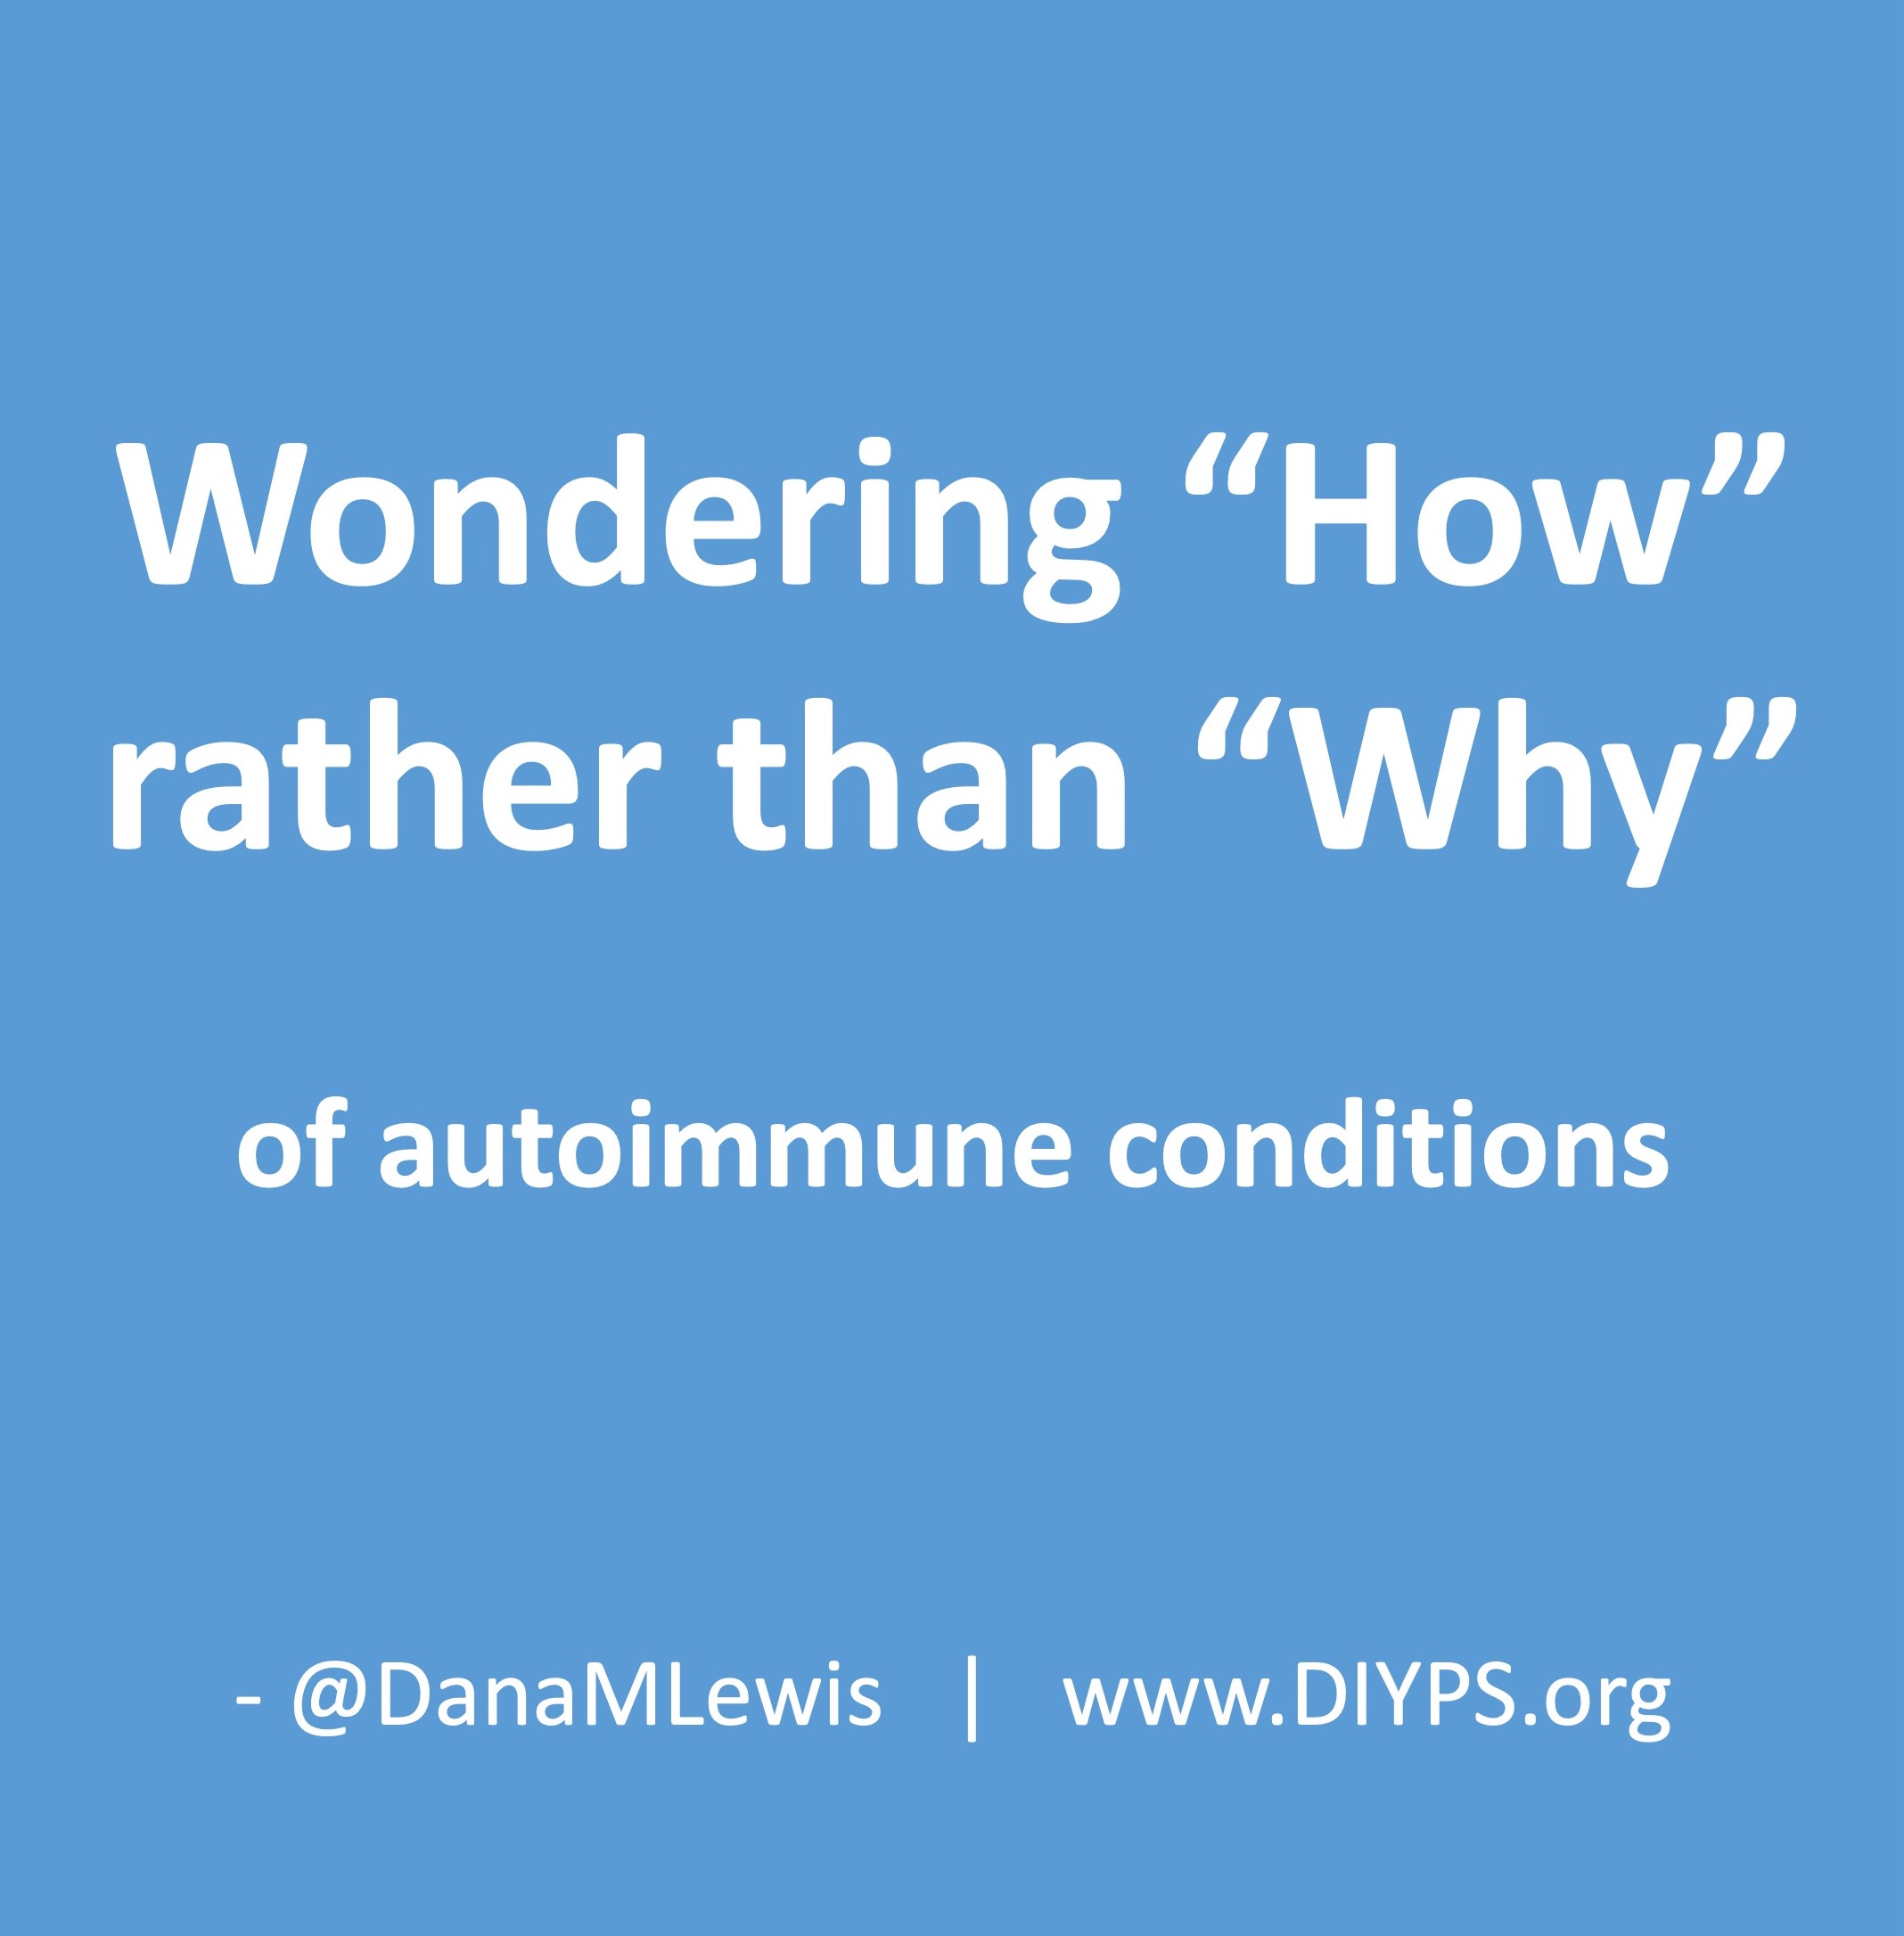
All this to say…I typically wonder less about “why” I have gotten these things, in part because the “why” doesn’t change “what” to do; I simply keep gathering new data points that I have an overactive immune system that gives me autoimmune stuff to deal with.

I have contrasted this with a lot of posts I observe in some of the online EPI groups I am a part of. Many people get diagnosed with EPI as a result of ongoing GI issues, which may or may not be related to other conditions (like IBS, which is often a catch-all for GI issues). But there’s a lot of posts wondering “why” they’ve gotten it, seemingly out of the blue.

When I do my initial research/learning on a new autoimmune thing, as I mentioned I do look for causal mechanisms to see what is known or not known. But that’s primarily, I think, to rule out if there’s anything else “new” going on in my body that this mechanism would inform me about. But 3/3 times (following type 1 diabetes, where I first learned about autoimmune conditions), it’s primarily confirmed that I have autoimmune things due to a kick-ass overactive immune system.

What I’ve realized that I often focus on, and most others do not, is what comes AFTER diagnosis. It’s the management (or treatment) of, and living with, these conditions that I want to know more about.

And sadly, especially in the latest two experiences (exocrine pancreatic insufficiency and Graves’ disease), there is not enough known about management and optimization of dealing with these conditions.

I’ve previously documented and written quite a bit (see a summary of all my posts here) about EPI, including my frustrations about “titrating” or getting the dose right for the enzymes I need to take every single time I eat something. This is part of the “management” gap I find in research and medical knowledge. It seems like clinicians and researchers spend a lot of time on the “why” and the diagnosis/starting point of telling someone they have a condition. But there is way less research about “how” to live and optimally manage these things.

My fellow patients (people with lived experiences) are probably saying “yeah, duh, and that’s the power of social media and patient advocacy groups to share knowledge”. I agree. I say that a lot, too. But one of the reasons these online social media groups are so powerful in sharing knowledge is because of the black hole or vacuum or utter absence of research in this space.

And it’s frustrating! Social media can be super powerful because you can learn about many n=1 experiences. If you’re like me, you analyze the patterns to see what might be reproducible and what is worth experimenting in my own n=1. But often, this knowledge stays in the real world. It is not routinely funded, studied, operationalized, and translated in systematic ways back to healthcare providers. When patients are diagnosed, they’re often told the “what” and occasionally the “why” (if it exists), but left to sometimes fall through the cracks in the “how” of optimally managing the new condition.

(I know, I know. I’m working on that, in diabetes and EPI, and I know dozens of friends, both people with lived experiences and researchers who ARE working on this, from diabetes to brain tumors to Parkinson’s and Alzheimer’s and beyond. And while we are moving the needles here, and making a difference, I’m wanting to highlight the bigger issue to those who haven’t previously been exposed to the issues that cause the gaps we are trying to fill!)

In my newest case of Graves’ disease, it presented with subclinical hyperthyroidism. As I wrote here, that for me means the lower TSH and higher thyroid antibodies but in range T3 and T4. In discussion with my physician, we decided to try an antithyroid drug, to try to lower the antibody levels, because the antibody levels are what cause the related eye symptoms (and they’re quite bothersome). The other primary symptom I have is higher resting HR, which is also really annoying, so I’m also hoping it helps with that, too. But the game plan was to start taking this medication every day; and get follow-up labs in about 2 months, because it takes ~6 weeks to see the change in thyroid levels.

Let me tell you, that’s a long time. I get that the medication works not on stored thyroid levels; thus, it impacts the new production only, and that’s why it takes 6 weeks to see it in the labs because that’s how long it takes to cycle through the stored thyroid stuff in your body.

My hope was that within 2-3 weeks I would see a change in my resting HR levels. I wasn’t sure what else to expect, and whether I’d see any other changes.

But I did.

It was in the course of DAYS, not weeks. It was really surprising! I immediately started to see a change in my resting HR (across two different wearable devices; a ring and a watch). Within a week, my phone’s health flagged it as a “trend”, too, and pinpointed the day (which it didn’t know) that I had started the new medication based on the change in the trending HR values.

Additionally, some of my eye symptoms went away. Prior to commencing the new medication, I would wake up and my eyes would hurt. Lubricating them (with eye drops throughout the day and gel before bed) helped some, but didn’t really fix the problem. I also had pretty significant red, patchy spots around the outside corner of one of my eyes, and eyelid swelling that would push on my eyeball. 4 days into the new medication, I had my first morning where I woke up without my eyes hurting. The next day it returned, and then I had two days without eye pain. Then I had 3-4 days with the painful eyes. Then….now I’m going on 2 weeks without the eye pain?! Meanwhile, I’m also tracking the eye swelling. It went down to match the eye pain going away. But it comes back periodically. Recently, I commented to Scott that I was starting to observe the pattern that the red/patchy skin at the corner and under my right eye would appear; then the next day the swelling of and above the eyelid would return. After 1-2 days of swelling, it would disappear. Because I’ve been tracking various symptoms, I looked at my data the other day and saw that it’s almost a 6-7 day pattern.

Interesting!

Again, the eye stuff is a result of antibody levels. So now I am curious about the production of antibodies and their timeline, and how that differs from TSH and thyroid hormones, and how they’re impacted with this drug.

None of that is information that is easy to get, so I’m deep in the medical literature trying again to find out what is known, whether this type of pattern is known; if it’s common; or if this level of data, like my within-days impact to resting HR change is new information.

Most of the research, sadly, seems to be on pre-diagnosis or what happens if you diagnose someone but not give them medication in hyperthyroid. For example, I found this systematic review on HRV and hyperthyroid and got excited, expecting to learn things that I could use, but found they explicitly removed the 3 studies that involved treating hyperthyroidism and are only studying what happens when you don’t treat it.

Sigh.

This is the type of gap that is so frustrating, as a patient or person who’s living with this. It’s the gap I see in EPI, where little is known on optimal titration and people don’t get prescribed enough enzymes and aren’t taught how to match their dosing to what they are eating, the way we are taught in diabetes to match our insulin dosing to what we’re eating.

And it matters! I’m working on writing up data from a community survey of people with EPI, many of whom shared that they don’t feel like they have their enzyme dosing well matched to what they are eating, in some cases 5+ years after their diagnosis. That’s appalling, to me. Many people with EPI and other conditions like this fall through the cracks with their doctors because there’s no plan or discussion on what managing optimally looks like; what to change if it’s not optimal for a person; and what to do or who to talk to if they need help managing.

Thankfully in diabetes, most people are supported and taught that it’s not “just” a shot of insulin, but there are more variables that need tracking and managing in order to optimize wellbeing and glucose levels when living with diabetes. But it took decades to get there in diabetes, I think.

What would it be like if more chronic diseases, like EPI and Graves’ disease (or any other hyper/hypothyroid-related diseases), also had this type of understanding across the majority of healthcare providers who treated and supported managing these conditions?

How much better would and could people feel? How much more energy would they have to live their lives, work, play with their families and friends? How much more would they thrive, instead of just surviving?

That’s what I wonder.

Wondering "how" rather than "why" of autimmune conditions, by @DanaMLewis from DIYPS.org

What is in my running pack for running ultramarathons or training for a marathon

After three years of using a multi-purpose activity backpack as my running pack, the strap connector broke, and I had to find and re-stock a new running pack. I use a running pack for when I’m doing long runs for marathon or ultramarathon training.  I ended up pulling everything out of my old backpack and evaluating whether I still wanted to carry it on every long run. For the most part, everything got moved over to the new pack. There were a few cases where I had excessive duplicates (more on that below and why) where I ended up reducing the quantity. But everything else made the list for what I carry with me on long runs every single time.

  1. Hydration – via a camelbak or other bladder with a hose (example). I prefer straight water in my hydration pack and to separately manage electrolytes and fuel separately. The bonus of just having water is it’s easier to clean the hydration pack after each run!Tips: put ice cubes in your bladder and fill it with cold water. Cold water is awesome for long, hot runs in the sun. Also, my old hydration pack had an insulated compartment that kept the ice water cold for hours. My new running vest does not, and in fact has holes in the back for air flow that also means the heat from my back melts my ice pretty fast. To work around this in the new vest is to slide the filled hydration bladder into a padded mailing envelope that’s open at the top. It’s not quite as insulated as true insulation, but it protects the bladder from some of the heat coming off of your back and it probably stays cool 60% instead of 20% as long as before, which is a huge improvement.Extra tip: use a Qtip or similar to clean out the mouthpiece of your hose every few runs!
  2. Diabetes backups  – this means things like a backup insulin pump site. On long unsupported runs, it can also mean my blood glucose meter. (I wear a CGM so I don’t always take a meter along on runs unless it’s in an unsupported area where I don’t have easy crew access or support within a few miles). I’ve had several runs where my pump site has stopped working or ripped out, so having a backup pump site is just as necessary as having bandaids.The other source of backups is extra low carbs, e.g. sugar in case my blood sugar goes low. I usually keep a stash of carbs in my shorts pocket, but I also keep extra in my backpack in case I run through everything in my pocket. This is in addition to regular food/fuel for ultrafueling, it has to be faster-acting glucose/sugar that can more quickly fix a dropping or already-low blood sugar level.(This is one of the places I mentioned where I had excessive duplicates. I have continued to add extra to my backup stashes, and ended up with well over 100+ grams of “backup” carbs just in case. I ended up cutting down the total amount of carbs to closer to ~50 grams instead.)

    Emergency backup carbs maybe don't need to be 100g worth

    You can read some more about my strategy for running with diabetes here.

  3. Baggie with extra socks – I always carry a pair of extra socks, although I’ve never needed them in a normal training long run, I did end up using them in my 50k that involved crossing a river up to my knees five times.
  4. Bandaids – Just like hiking, but I carry bandaids in case of bleeding cuts or scratches or worse, blisters on my heels, feet, or toes. I carry some that are blister-style and some regular style, smaller ones and larger ones, all the way up to large multi-inch squares that can cover the backs of my heels if I don’t already have them covered.More recently, I also started carrying small squares and strips of kinesiology tape for the same purpose. I originally did kinesio tape strips in case my knee needed some extra support, but I’ve found the kinesio tape also works well to cover my toes or backs of my heels in lieu of bandaids for blister prevention. For fixing blisters, I have to dry my feet really well or the kinesio tape doesn’t stay well or easily rubs off; so I tend to cover the toes that blister frequently as well as my heels prior to my runs so they’re less likely to generate blisters and require fixing mid-runs. I get a large roll of kinesiology tape (example) and cut it into smaller pieces as needed for all of these uses cases.I also keep at least one mini individual packet of antibiotic ointment (example) in the baggie as well.
  5. Lubrication – I carry a lubrication stick (Squirrel Nut Butter, because it works for me and is easy to reapply) to making sure between my thighs and other areas don’t chafe. When I sweat a lot, I often have to reapply every few hours to my thighs. While this can also be accomplished by carrying dabs of vaseline or your preferred lubrication in a baggie, the SNB stick is lightweight and I don’t mind carrying it so it’s easy to reapply and the hassle doesn’t prevent me from wanting to prevent chafing.
  6. Stuff to fix GI problems – it’s common to have GI issues when running, but I also had a two-year stretch of known GI issues that ultimately turned out to be undiscovered exocrine pancreatic insufficiency. During this time, I always carried individual Immodium and GasX in case I needed them.
  7. Electrolyte pills – I prefer to measure and track electrolytes separate from my hydration, so I use electrolyte pills (example) that I swallow on a scheduled basis to keep my electrolyte levels topped off. I’ve tried chew kinds (but they make me burp), so I stick with a baggie full of electrolyte pills. I bring extra just in case I drop some, but I generally eyeball and count out to make sure I have enough for each super long run.
  8. Any medication you need during the run – For me, that includes enzymes for fuel because I have exocrine pancreatic insufficiency and I need enzymes to help me digest any of my fuel. I have expensive, larger dose prescription pills that I usually use for meals, but it would make running even more expensive if I had to use a $9 pill every 30 minutes for a fuel snack. Luckily, there are over the counter versions of enzyme pills (more about that here) that are single-enzyme or multi-enzyme, that are more in the ballpark of $0.35 per pill, and I have a baggie of both kinds that I use to cover each snack.
  9. Fuel or snacks – A lot of ultra runners use gels, but I have been experimenting with ‘real’ foods. Basically, anything that’s around ~20g of carbs and less than ~10g of fat and 5-10g of protein that I like to eat. So far, that list includes chili Cheese Fritos, yogurt covered pretzels, peanut butter pretzel nuggets, beef sticks, Honey Stinger Stroopwaffles (the gluten free kinds – beware that only some of their flavors are GF!), mini date or fruit bars, fruit snacks, sweet potato tots, ¼ of a ham and cheese quesadilla, ¼ of a PBJ sandwich, a waffle, mini PayDay bars…. Noting that all of these are gluten free versions or are naturally gluten free, because I have celiac disease. I do a lot of work in advance to test these snacks carefully on training runs before I commit to using them repeatedly throughout longer runs so I know my body likes them during runs as well as other times. I only take the fresh/hot snacks (sweet potato tots, quesadilla etc) and eat those at the start or when my husband re-fills my pack for me mid-run, so I don’t have to worry about them spoiling. Everything else is shelf stable so when I pack a few more than I need per run and leave some in my pack, they’re not an issue to sit there for weeks until I manage to eat them in my rotation of snacks on a future run.
  10. Miscellaneous other supplies – car keys, house keys, hand sanitizer, a mask for going into trail bathrooms, and a battery and cord for charging my phone.

Phew. That’s a lot of stuff. And yes, it does end up being more supplies and more weight than most people carry. But…I use pretty much everything in my pack every few runs. Stuff happens: pump sites fall out, blisters happen, chafing happens, GI stuff happens..and I’ve found that training and running with a little extra weight in my pack is worth having the proper supplies when I need them, rather than having to end runs early due to lack of preparation or minor supplies that would enable me to keep running.

Every time I go out for a run, I add the requisite amount of snacks, enzymes, electrolyte pills, and hydration for the run. Any time I come back from a run and I have depleted a supply off of the above list – such as using my backup pump site – I immediately go and refill that supply so I don’t have to remember to refill it prior to the next run. Keeping the above supplies topped off and ready to go always in my backpack means they’re always there when I need them, and the peace of mind of knowing how I can handle and that I can handle these situations while running is priceless.

Note: previously I was using a backpack, because it was $30 and for my running it was good enough. However, when the strap broke, I looked to buy the same backpack again and it was $60. It was fine for $30 but if I was going to double the cost, I decided to research alternative running packs and vests. Vests seem to be more common in ultrarunners, so I looked for those, although they’re a lot more expensive (often $125-200). I was disappointed with how small of a volume some of them held, or they were just ugly. I liked the look of a purple one I found that came with a 1.5L bladder….but ugh. I fit a 3L bladder in my previous backpack and typically fill it 2-2.5L full as a baseline, and all the way up for a longer (6h+) unsupported run. I decided to risk getting this vest even though it was smaller and try putting my larger 3L capacity bladder in the new vest. (Luckily it was on sale for $90 at the time  which made it a little less annoying to buy compared to a $150 one.) The bladder does fit, but it sticks out the top and hits the back of my neck if it’s all the way full (3L). So for the most part, I’m filling the 3L capacity bladder about 2L full (and as noted in this post earlier, putting it inside an insulated envelope to help retain the cold for longer), and that works for me.

One thing I do like a lot from my new running vest is the front pockets. My old backpack I had to partially take off and twist around me in order to get snacks out. With two large front pockets, I can fit several hours of fuel in there so there is no twisting involved to get my fuel out, which is helping with my goal to fuel every 30 minutes. I do wish there was a separate smaller pouch – my old backpack had a small old school flip phone size “cell phone” pocket that I used to keep my baggies of enzymes and electrolytes in. Right now, I just have those baggies floating around the top of those pockets and it’s fairly easily to grab and pull out the right baggie, but I’m toying with adding some kind of small strap-on holster/pouch to the shoulder just for enzymes so I don’t have to worry as much about them jostling out when my pockets are completely full of snacks. But otherwise, these front pockets are overall a nice improvement.

A purple running vest on the left; supplies described in blog post in the middle laid out on the ground, and my old purple backpack used for running on the right.
A cat in mid air jumping over the purple runing vest in the left of the picture; another cat sitting to the right of the old purple backpack used for running.
Outtake! Mint jumping over my new running vest and running supplies while Mo looks on from the right next to my old running backpack.
A cat sitting on and sniffing the new smells of a new, purple running vest
Mint helpfully inspected my new running vest as soon as I set it on the ground.

NEJM Publishes RCT On Open Source Automated Insulin Delivery (OpenAPS Algorithm in AndroidAPS in the CREATE TRIAL)

First page of NEJM article on Open Source AID in T1D, which contains the text of the abstract. 
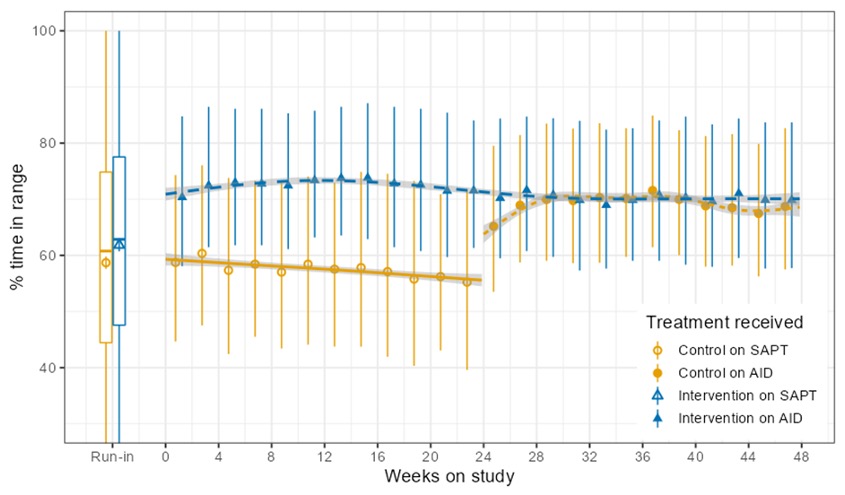
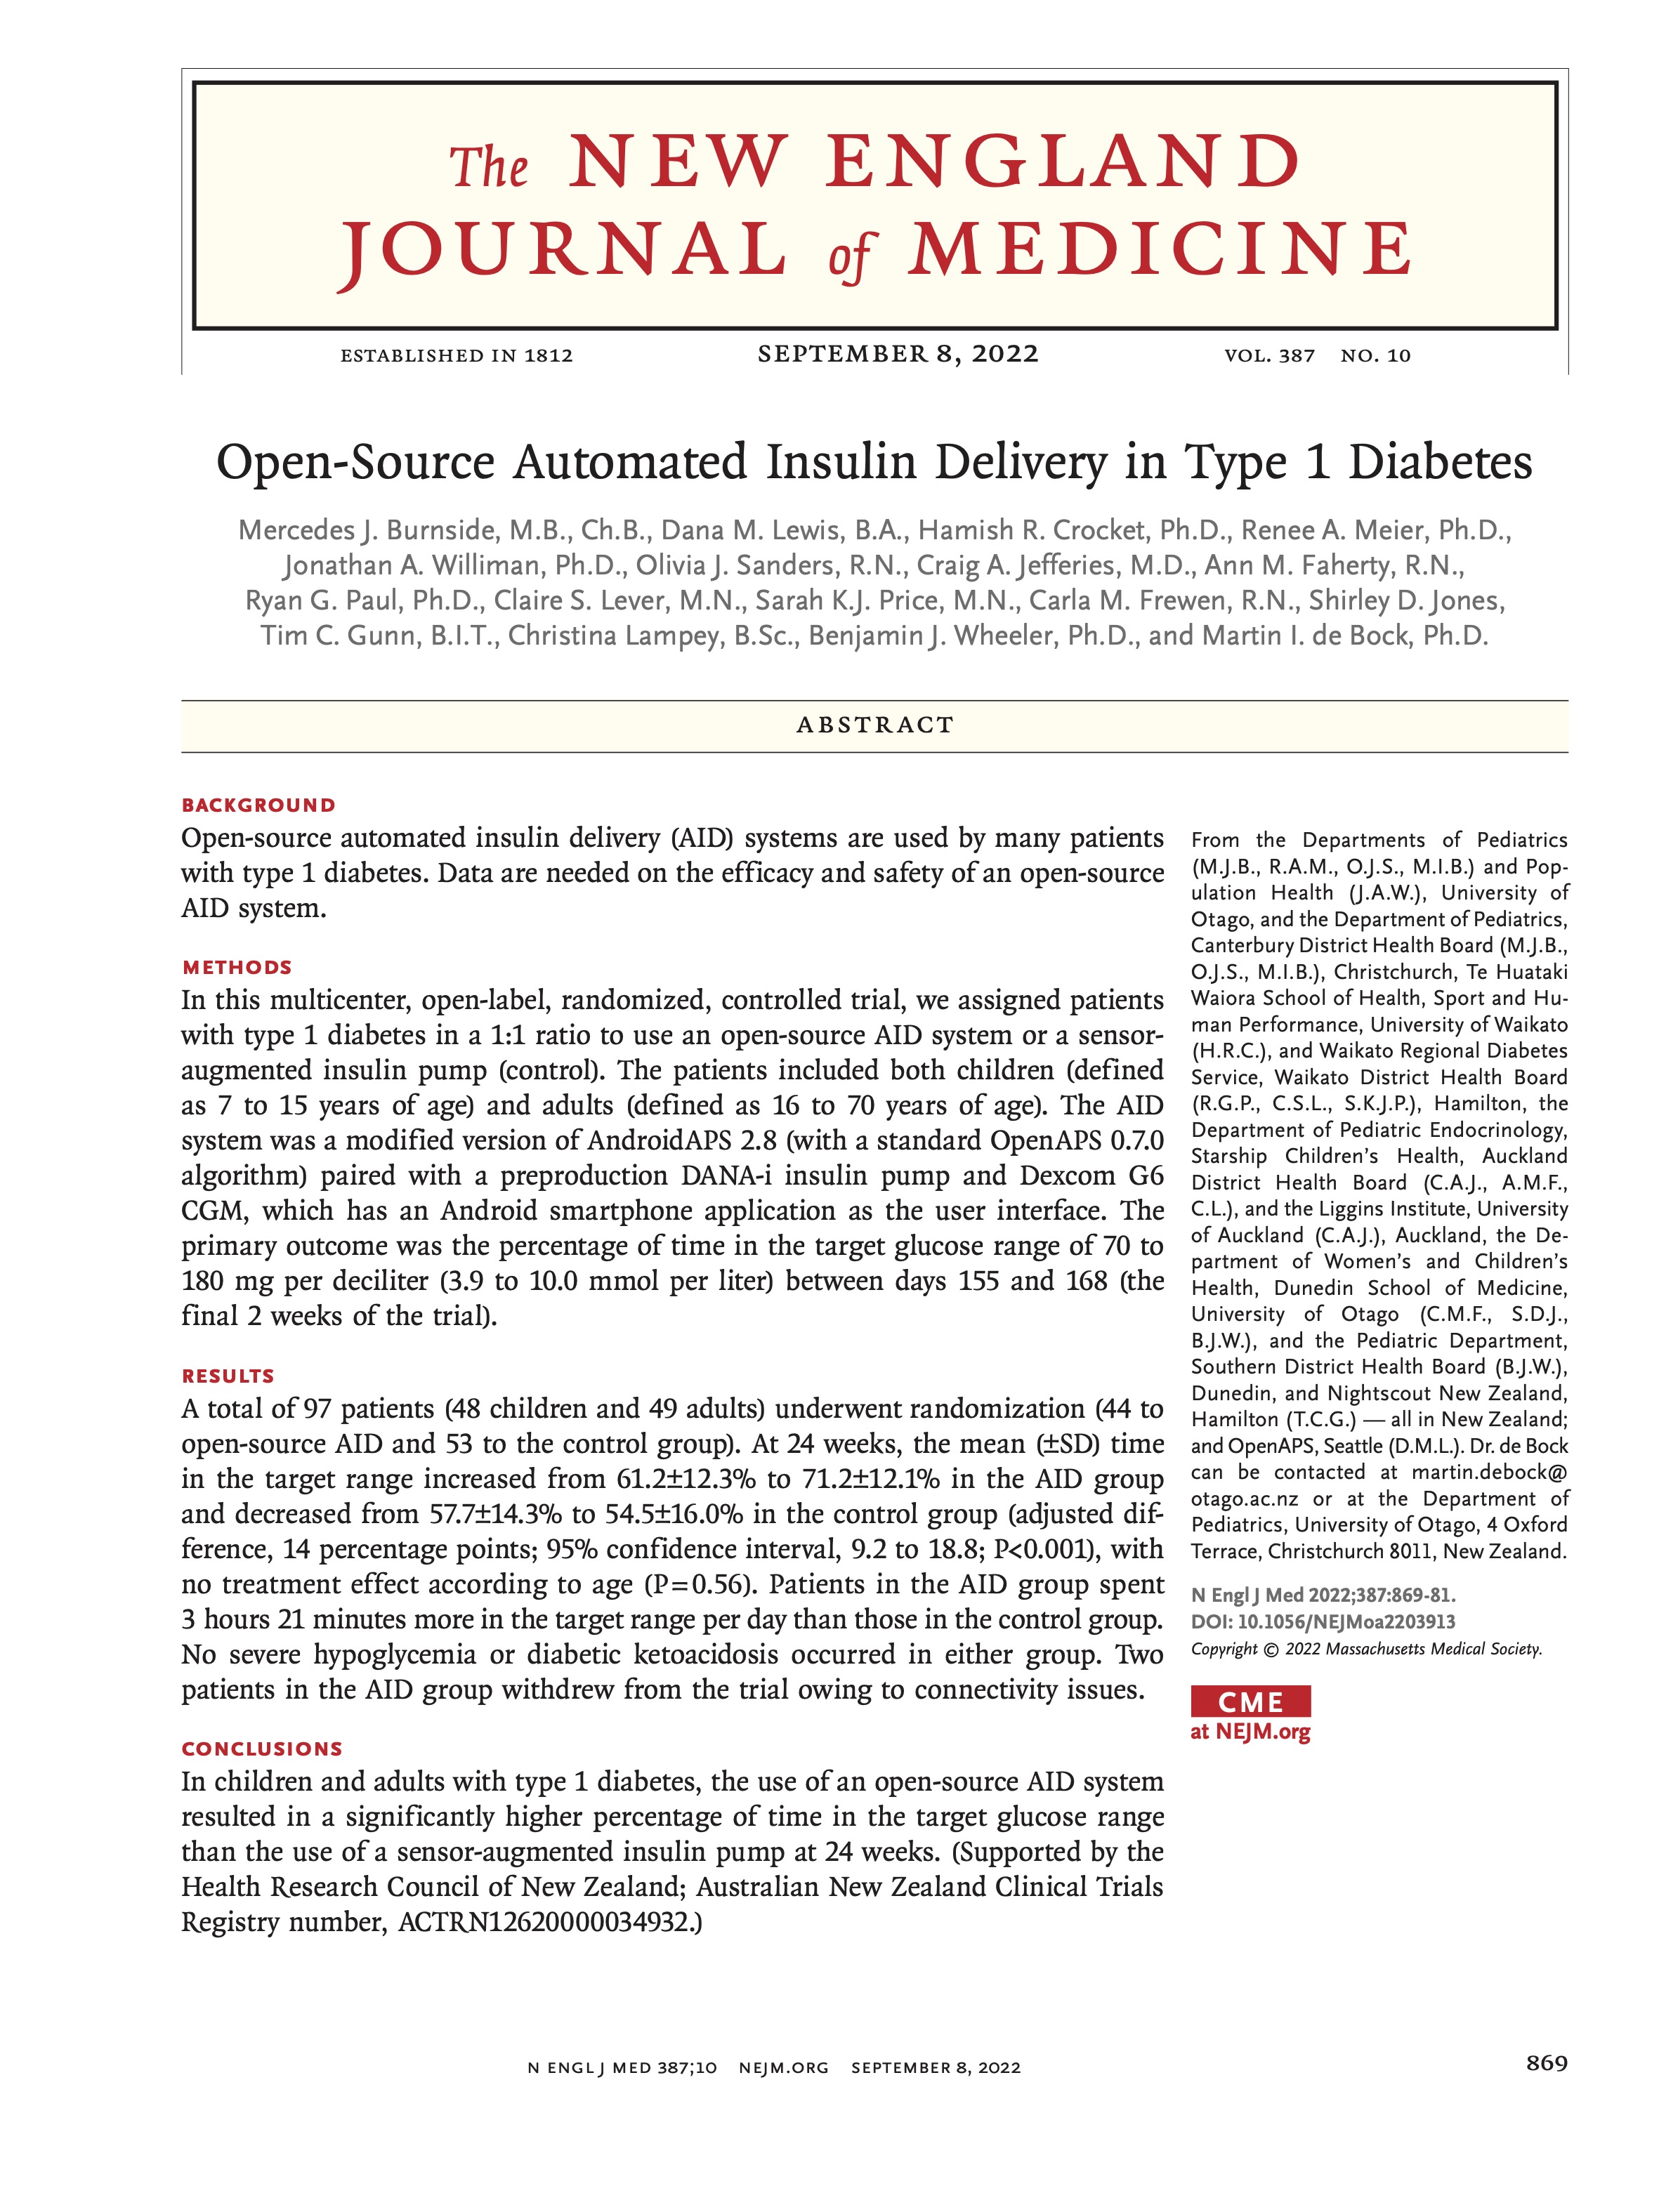
I’m thrilled to share that the results of the first RCT on open source automated insulin delivery (AID) is now published in a peer-reviewed medical journal (New England Journal of Medicine, known as NEJM). You can find it at NEJM here, or view an author copy here. You can also see a Twitter post here, if you are interested in sharing the study with your networks.

(I previously wrote a plain language summary of the study results after they were presented at ADA Scientific Sessions in June. You can read the plain language summary here, if you haven’t already seen it.)

I wanted to highlight a key few takeaway messages from the study:

  • The CREATE study found that across children and adults, the percentage of time that the glucose level was in the target range of 3.9-10mmol/L [70-180mg/dL] was 14.0 percentage points higher among those who used the open-source AID system compared to those who used sensor augmented pump therapy. This difference reflects 3 hours 21 minutes more time spent in target range per day!
  • For children AID users, they spent 3 hours 1 minute more time in target range daily (95% CI, 1h 22m to 4h 41m).
  • For adult AID users, they spent 3 hours 41 minutes more time in target range daily (95% CI, 2h 4m to 5h 18m).
  • Glycemic improvements were evident within the first week and were maintained over the 24-week trial. Meaning: things got better quickly and stayed so through the entire 24-week time period of the trial!
  • The CREATE study also found that the greatest improvements in time in range (TIR) were seen in participants with lowest TIR at baseline. This means one major finding of the CREATE study is that all people with T1D, irrespective of their level of engagement with diabetes self-care and/or previous glycemic outcomes, stand to benefit from AID. There is also no age effect observed in the trail, meaning that the results of the CREATE Trial demonstrated that open-source AID is safe and effective in children and adults with type 1 diabetes.

I’d also like to highlight some meta aspects of this trial and the significance of these results being published in NEJM.

The algorithm (open source, from OpenAPS) used in the trial, as well as the open source app (AndroidAPS) used to automate insulin delivery, were built by people with diabetes and their loved ones. The algorithm/initial AID work was made open source so other people with diabetes could use it if they chose to, but also so that researchers and clinicians could research it, learn from it, use it, etc. Speaking on behalf of Scott (Leibrand) who worked with me endlessly to iterate upon the algorithm and then also Ben West whose work was critical in communicating with insulin pumps and putting the pieces together into the first open source “closed loop” automated insulin delivery system: we all wanted this to be open source for many reasons. You’ll see some of those reasons listed at the bottom of the plain language OpenAPS “reference design” we shared with the world in February 2015. And it is exceptionally thrilling to see it go from n=1 (me, as the first user) to thousands worldwide using it and other open source AID systems over the years, and be studied further in the “gold standard” setting of an RCT to validate the real-world outcomes that people with diabetes have experienced with open source AID.

But these results are not new to those of us using these systems. These results every day are WHY we use and continue to choose each day to use these systems. This study highlights just a fraction of the benefits people with diabetes experience with AID. Over the years, I’ve heard any of the following reasons why people have chosen to use open source AID:

  • It’s peaceful and safer sleep with less fear of dying.
  • It’s the ability to imagine a future where they live to see their children grow up.
  • It’s the ability to manage glucose levels more effectively so they can more easily plan for or manage the process of having children.
  • It’s less time spent doing physical diabetes tasks throughout the days, weeks, and years.
  • It’s less time spent thinking about diabetes, diabetes-related short-term tasks, and the long-term aspects of living with diabetes.

All of this would not be possible without hundreds of volunteer contributors and developers who iterated upon the algorithm; adapted the concept into different formats (e.g. Milos Kozak’s work to develop AndroidAPS using the OpenAPS algorithm); wrote documentation; troubleshot and tested with different pumps, CGMs, hardware, phones, software, timezones, etc; helped others interested in using these systems; etc. There are many unsung heroes among this community of people with diabetes (and you can hear more of their stories and other milestones in the open source diabetes community in a previous presentation I gave here).

There are thousands of hours of work behind this open source technology which led to the trial which led to these results and this publication. Both the results and the fact of its publication in the NEJM are meaningful. This is technology developed by people with diabetes (and their loved ones) for people with diabetes, which more people will now learn is an option; it will fuel additional conversations with healthcare providers who support people with diabetes; and it will likely spur additional research and energy in the ongoing development of diabetes technologies.

From developers, to community contributors and community members, to the study team and staff who made this trial happen, to the participants in the trial, and to the peer reviewers and editor(s) who reviewed and recommended accepting the now-published article in the New England Journal of Medicine:

Thank you.

Tips and Tricks for Forefoot Bursitis or Intermetatarsal Bursitis

It’s apparently rare (ish) to get forefoot bursitis. If you look for information or treatment options about bursitis, most “foot bursitis” is about heel bursitis. If not foot, then it’s knee, elbow, or hip bursitis. All sounds unfun. But what’s also unfun is actual forefoot bursitis, which is usually intermetatarsal bursitis.

Flash back to when I broke my fifth toe on my right foot about 7 weeks ago. I cried, hard, after I broke it. Not only because it hurt, but also because I knew how hard it was to return to walking after I broke my ankle 3.5 years ago. And I knew from that experience that returning to walking would come not only with the standard trials and tribulations of injury recovery but also a risk of redeveloping intermetatarsal bursitis in not one but two parts of my foot. It was brutal, and I had to take another 6 weeks off of running last time after I discovered it. So when I broke my toe, I wasn’t looking forward to the recovery process, as I knew there was a greater than zero chance that I’d have to face bursitis again as well.

And sure enough, a week or so after I returned to full weight bearing and was working on extending my walking, I felt the no good terrible horrible pain in my forefoot that is intermetatarsal bursitis. Same spot as last time. And worse, because it actually was in the second spot, too, between my first and second toes as well as the third and fourth. Last time I primarily felt it in the third/fourth area of my foot while an MRI identified that I also had it between one/two. This time, I felt it in both places, and there was no winning and no reduction in pain no matter how I set my foot on the ground. Ahhh!

But I learned my lesson from last time, I think. I very quickly started trying to reduce the pain by changing the shoes I was wearing (didn’t help) and the way I was walking (didn’t help). I had been nearly to the stage of my recovery process where I could try to start running again, but I knew if I couldn’t even walk barefoot across a hard floor in the house that it likely wasn’t going to be bearable to run on my foot. And it wasn’t.

I gnashed my teeth and did a bunch of research, looking for solutions. I found heaps of information on every other type of bursitis, but very little on intermetatarsal bursitis. Harumph. (Thus, I’m leaving this post as breadcrumbs for anyone else in the future, and maybe for me, too, so I remember what works for next time if I ever have to deal with it yet again.)

Last time, I tried a metatarsal pad in a little sleeve for my foot, which didn’t help. Nothing helped except for trying to stay off my foot as much as possible. I tried a different insole for my shoe with a steel tip, to help reduce the force in the forefoot area as my foot hit the ground. That helped minimize the pain somewhat to make short daily walks tolerable. Otherwise, I waited 6+ weeks for the pain to go away.

This time, I was really hoping to not have another 6 weeks before I could run, since I was and am again training for an ultramarathon. Breaking my toe put a 6+ week snafu on my plans for the fall; I was hoping not to have to give up on my fall ultra plans completely.

Most of the research on bursitis in general suggests trying to reduce inflammation, because that’s what bursitis is: inflammation of bursa. Oral NSAIDs like ibuprofen may or may not help. In my case this time, I was already taking oral NSAIDs for other reasons and it didn’t seem to do anything in regards to bursitis pain. But this reminded me to try NSAID gel (such as this, a generic option, or there are brand name kinds that do the same thing) on my forefoot. It does seem to help a little bit with pain in the hours following using it. The challenge is putting it on and sitting to let it dry so it can get into the skin and start working.

But since I was so desperate, I dug through my cabinet of ankle braces and other foot-related gear and found the metatarsal sleeve pad that I didn’t use last time because it didn’t work. But lo and behold, this time it DID work! I tentatively walked around the house barefoot, amazed that it completely eliminated the bursitis pain in both spots of my foot, and enabled me to walk over my foot without having to compensate by putting too much pressure onto my recently broken (but now mostly healed) toe.

The metatarsal pad sleeve (similar to this one) is a small pad inside a sleeve that sits and takes weight and distributes it to different areas of your foot, rather than the same bursitis areas of your foot getting the full force of your step. I am not sure why it didn’t work well for me last time, but this time it’s the closest thing to magic that I’ve ever experienced. Usually, when something hurts, a solution might reduce pain, but there have been few things that completely eliminate pain during use like this does. (Note that I still have bursitis and will likely still have it for weeks, so I still have to wear flip-flops or the foot sleeve around the house to make sure my foot doesn’t hurt.)

Because it’s a fabric sleeve, it does take up space in my shoe, and I’ve found that even with a larger size shoe it’s uncomfortable to wear a sock when I’m wearing the sleeve on that foot. It feels weird, but the metatarsal sleeve and otherwise being barefoot inside my normal-size shoe works well. So well that I can get back to my running, even with bursitis, which is awesome.

The other trick that I learned last time is to leave a squishy or memory foam flip-flop by my shower. (Here’s an example. Although they’re harder to find, I’ve also found a random store brand memory foam flip-flop option that works well.) Some days standing in the shower hurts due to the pressure on the bottom of my foot, other days it doesn’t. Setting my right foot, the one with the intermetatarsal bursitis, on top of the flip-flop (or wearing it) helps distribute the weight in a way that doesn’t hurt the bursitis as much on the hard shower floor. (If you try this, I’d be sure to be careful getting in and out of the shower with it – I usually set it in the shower and step on it once I’m already in, and that way I step out of the shower without a wet flip-flop to worry about slipping with.)

So TLDR:

  • Intermetatarsal bursitis or forefoot bursitis is a thing.
  • It hurts, a lot. If you have it, I’m sorry.
  • It takes weeks for it to fix itself usually. Argh
  • Normal anti-inflammation things might help: ice, oral NSAID, NSAID gel, heat, etc.
  • Try to rest/not do things that make it hurt (if at all possible).
  • If you have intermetatarsal bursitis, look at getting a metatarsal pad to put in your shoe, or get a metatarsal pad sleeve that you can wear with any shoes, including when barefoot or in sandals.
  • Set a squishy or memory foam flip-flop by the shower to stand on if your foot hurts standing in the shower, or wear flip-flops in the shower.