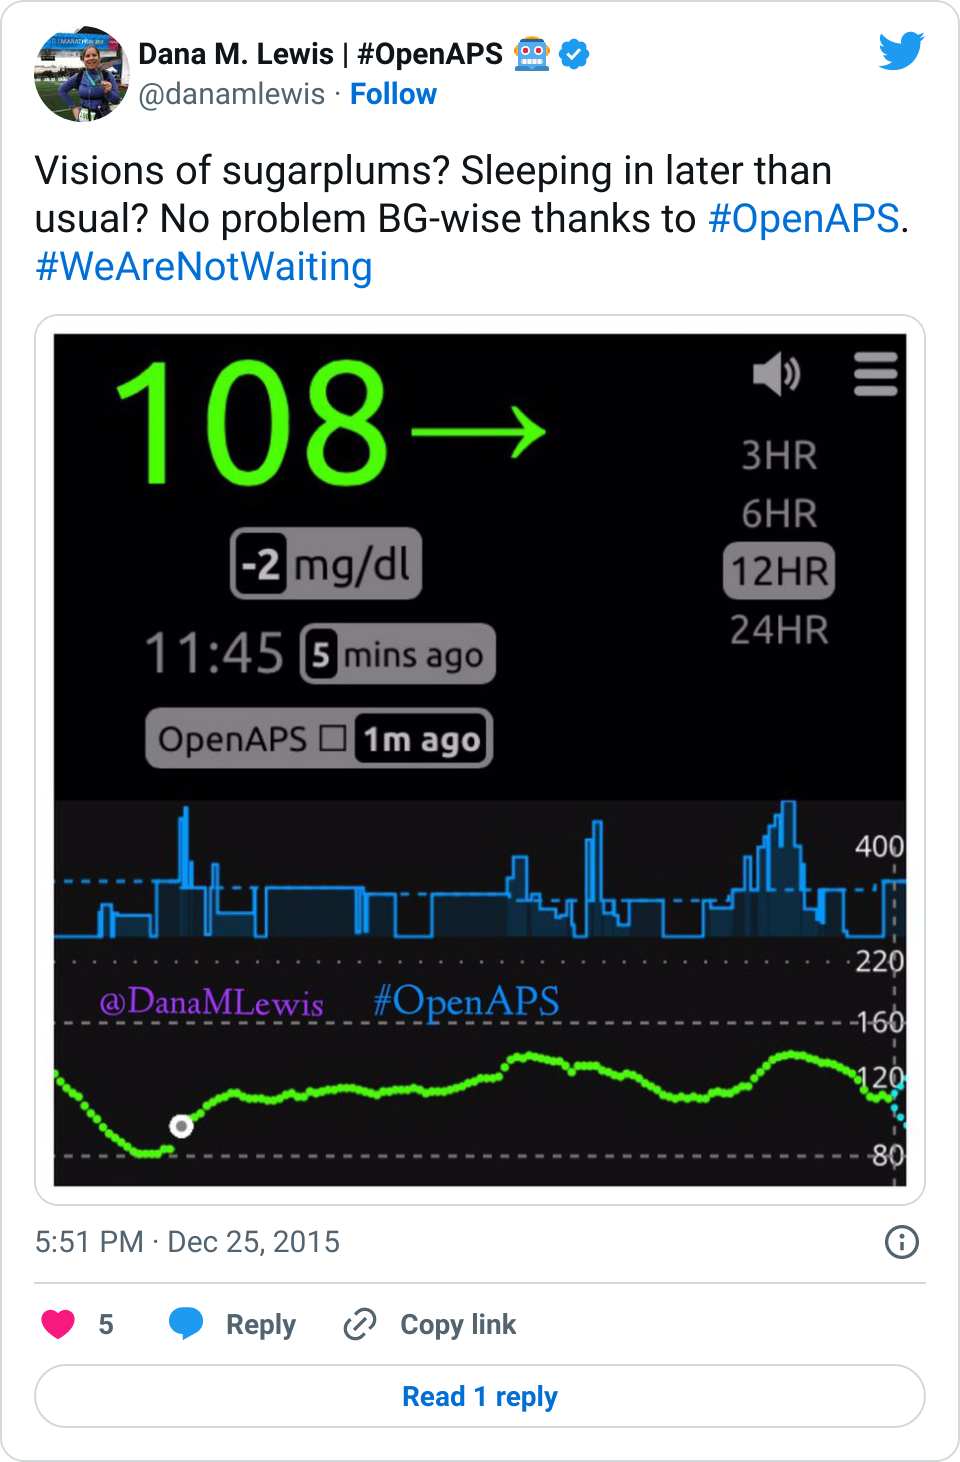
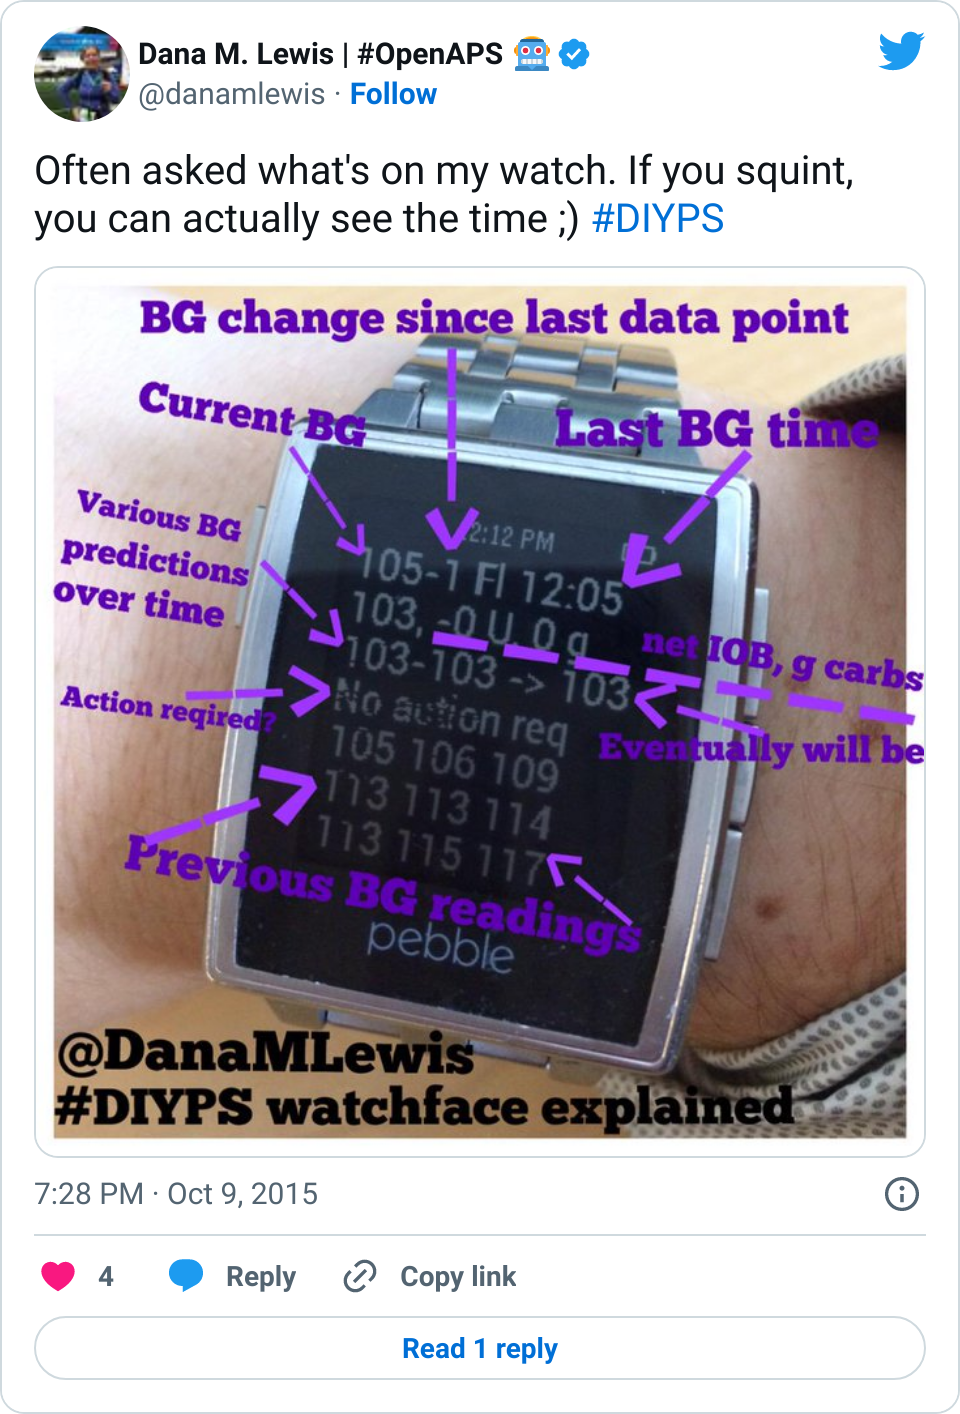
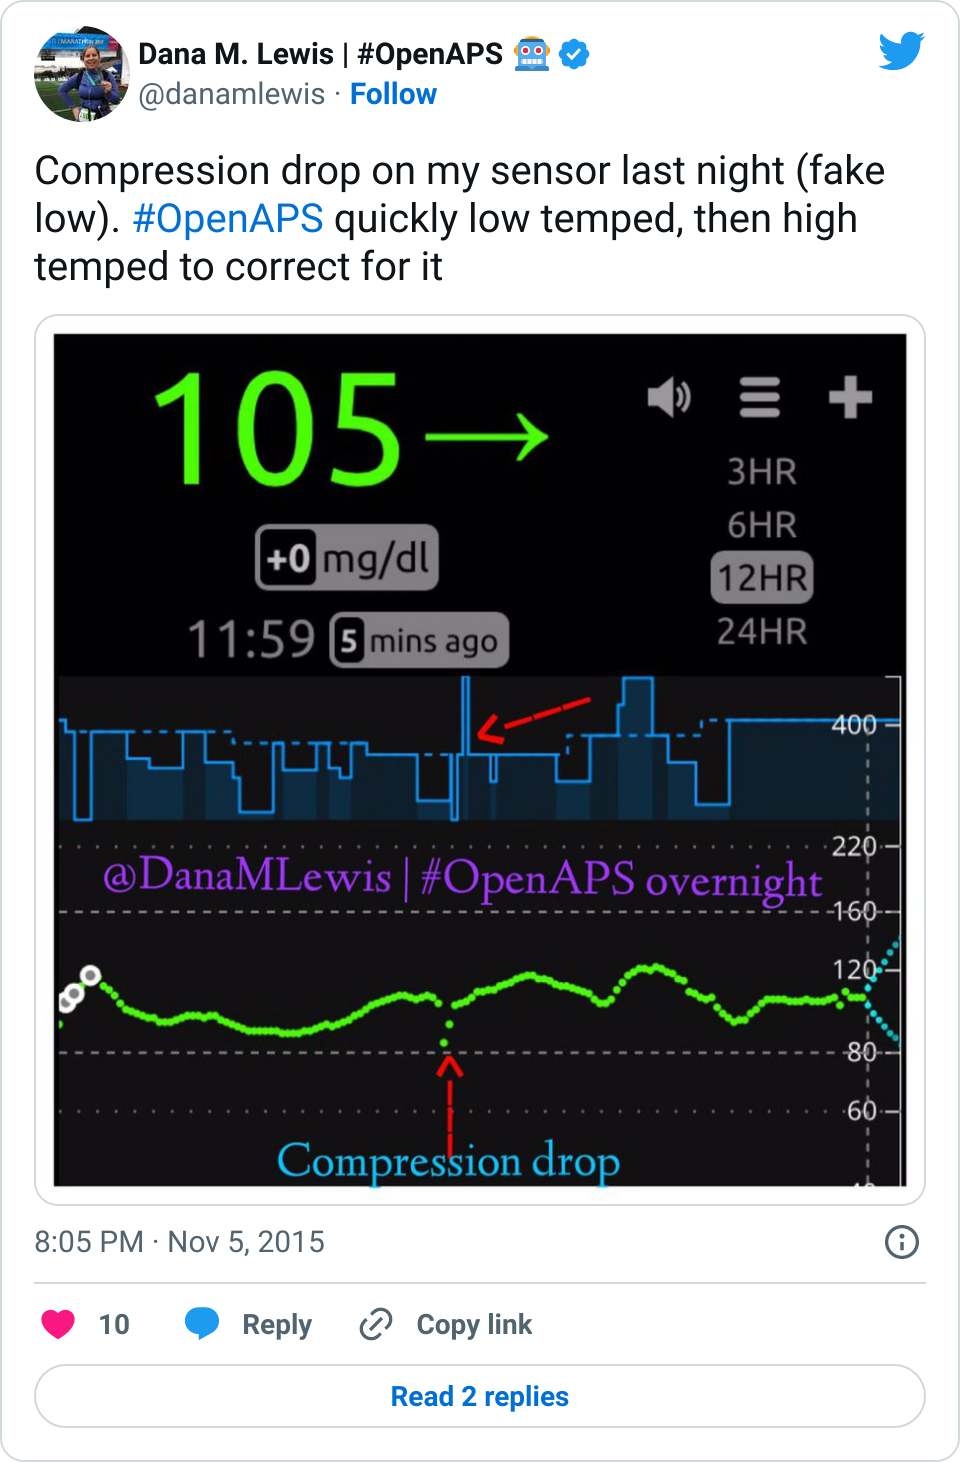
Not bolusing for meals (Fiasp, 0.6.0 algorithm in oref0 dev branch, and more)

I tweeted last week+, “I just realized I’ve now gone about 3 weeks without meal bolusing.” That means just a meal announcement (i.e. carb entry estimate, a la 30 carbs or 60 carbs or whatever, based on my IFTTT buttons). No manual bolus.
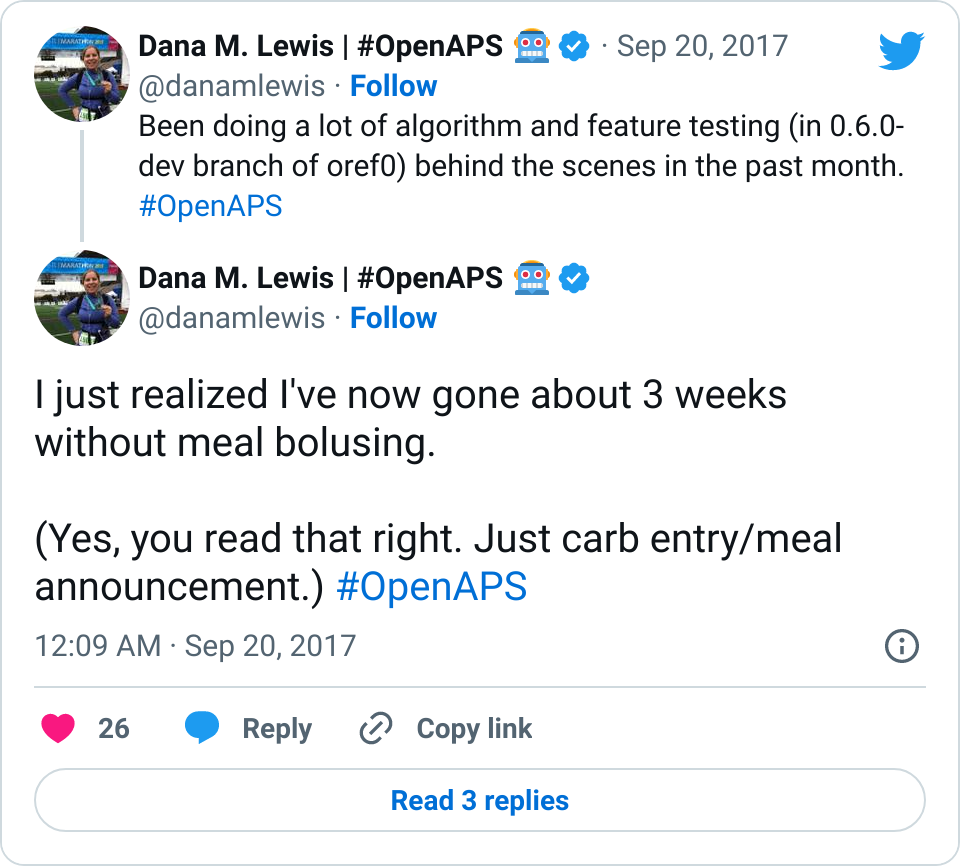
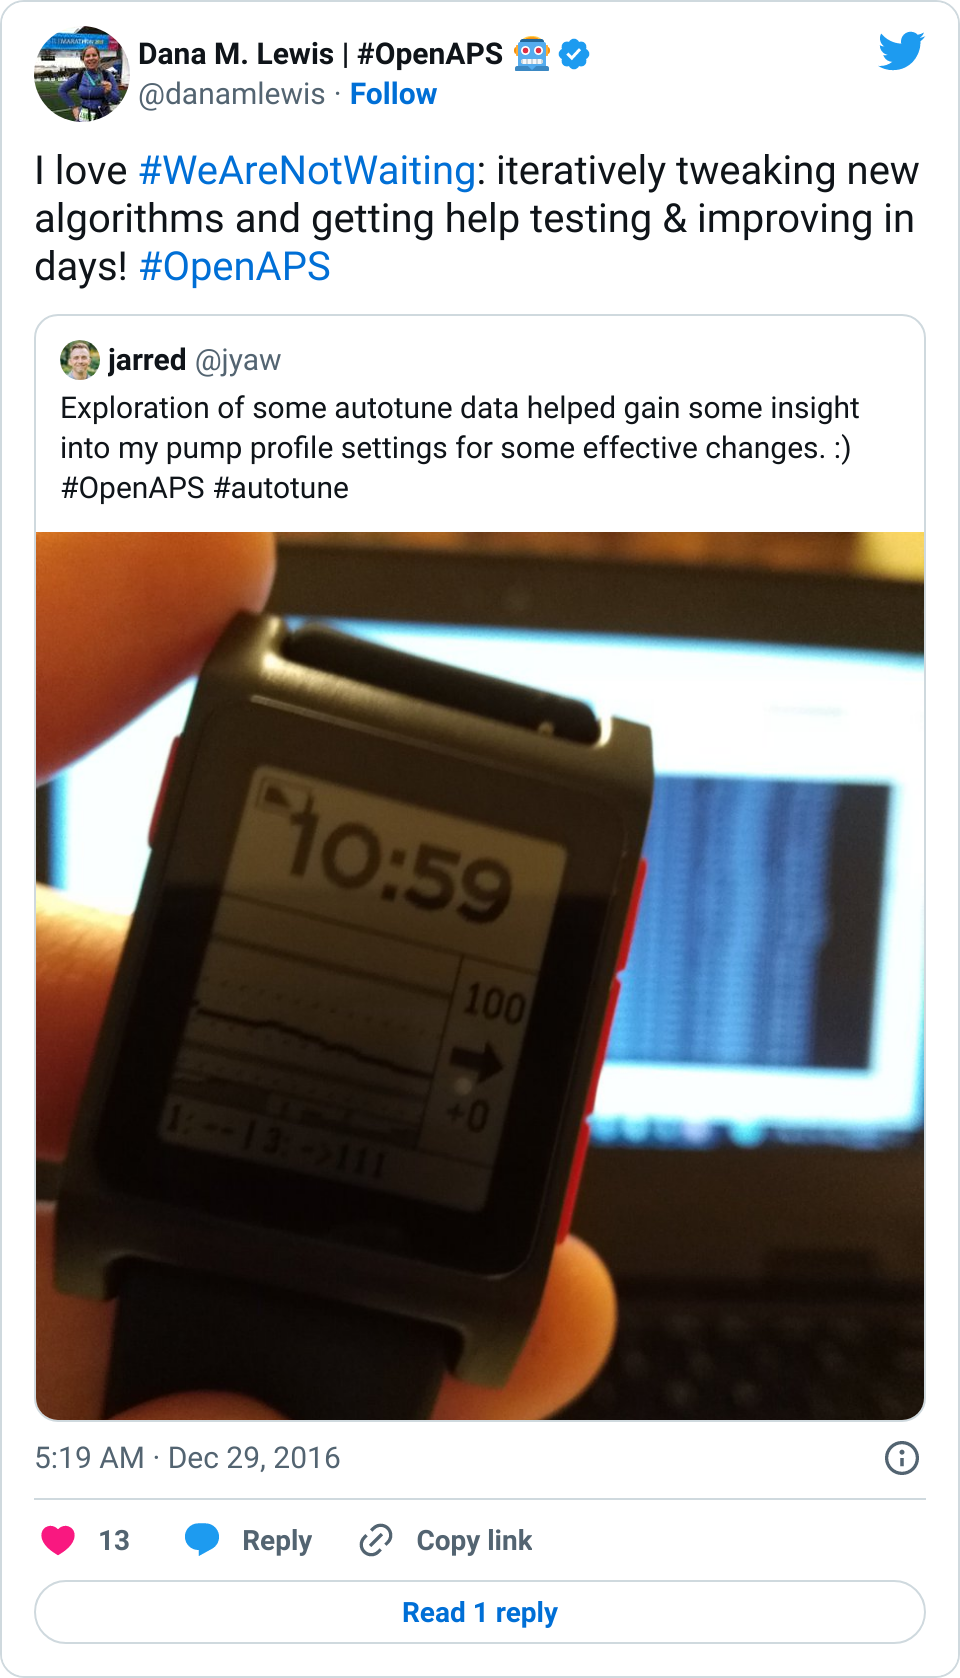
Highlighting 3 weeks without meal bolusing, and just doing a carb announcement, with good outcomes thanks to OpenAPS

I kind of keep waiting for the other shoe to drop, because it sounds to good to be true. I’m sure you’re skeptical reading this.

I bet she’s doing SOME bolus.

Well, she must not be eating any carbs.

She must be having worse outcomes, bad post-meal BGs, etc.

Nope, nope, and nope.

  • While I started testing this new set of features with partial boluses and worked my way down (see more below on the testing topic), I’m now literally doing no manual meal bolus. I start eating, and press one button on my watch for a carb estimate entry (that via IFTTT goes to Nightscout and my rig).
  • I eat carbs. I’ve eaten 120 grams of carbs of gluten free biscuits and gravy; 60-90 grams of pasta; dinner followed by a few gluten free cookies, etc.
  • More nuanced details below, but:
    • My 70-180 time in range has stayed the same (93+%) compared to the versions I was testing before with manual meal boluses.
    • My 70-150 and 80-160 time in ranges have decreased slightly compared to manual meal boluses, but…
    • My average blood sugar has actually dropped down (as has my a1c to match).
    • (So this means I’m having a few more spikes above 160, usually topping off in 160-170 whereas before my manual meal boluses would have me top off around 150, when all was well.)

Also note – no eating soon required. No early bolus or pre-bolus. Just single button press as I stick food in my mouth.

Wow.

(See where I said, waiting for the other shoe to drop?)

That’s why I waited a while to even tweet about it. Maybe it’s a fluke. Maybe it won’t work for other people. Maybe, maybe, maybe. Who knows. It’s still fairly early to tell, but as other people are beginning to test the current dev branch of oref0 with 0.6.0-related features, other people are starting to see improvements as well. (And that could be some of the many other features we are adding to 0.6.0, ranging from exponential curves for insulin activity, to allowing SMBs to do more, to carb-ratio-tuned-autosensitivity, to huge autotune improvements, etc.) 

So while I don’t want to over-hype – and never do, what works for me will not work for everyone – I do want to share my cautious excitement over continuing to be able to push the envelope on algorithms and what might be possible outcome-wise for this kind of technology.
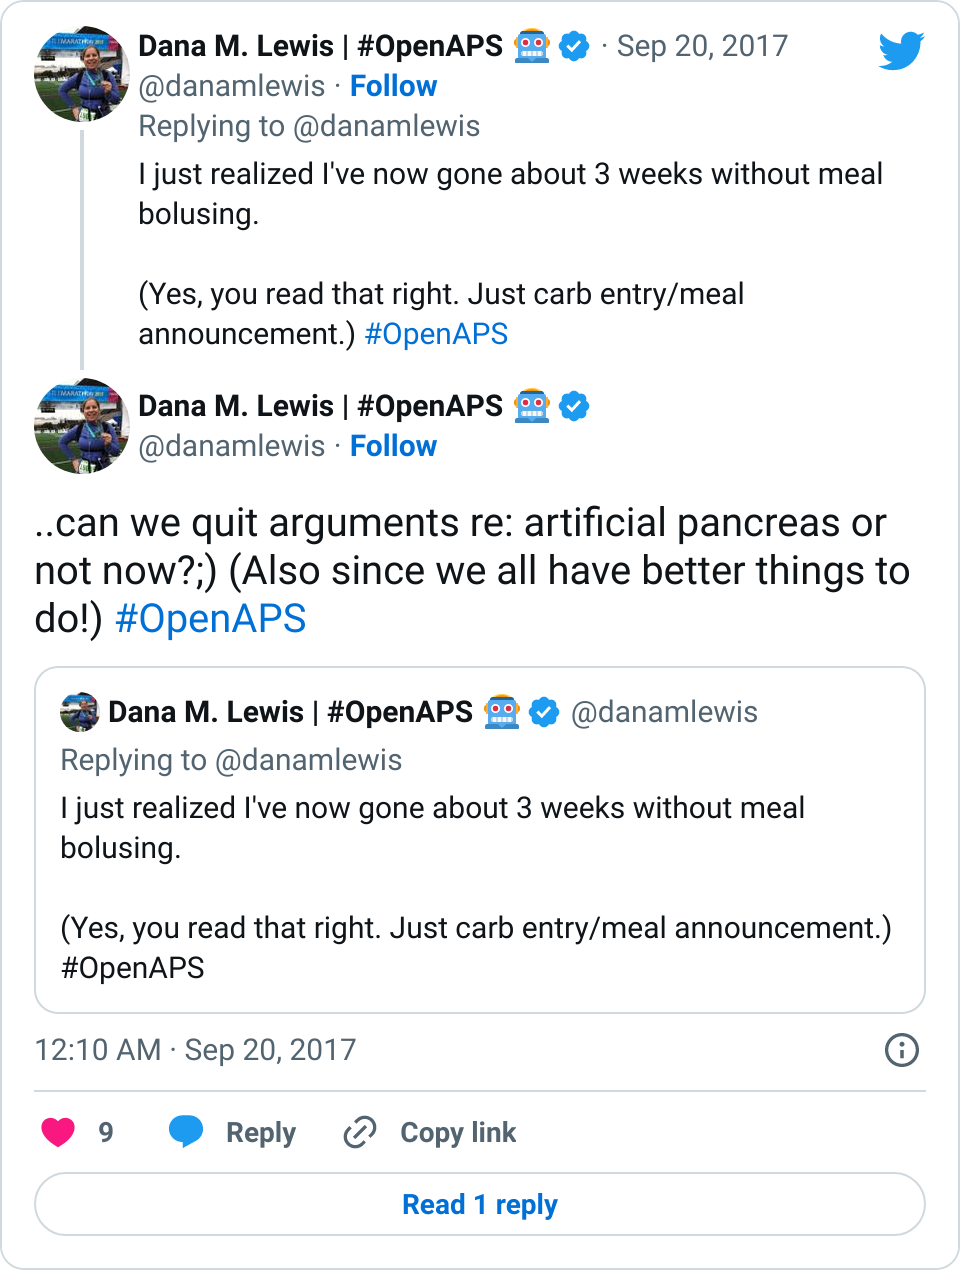
Suggesting no meal bolus means we can quit arguing about the name "artificial pancreas"

Here’s what is enabling me to be in the no-bolus zone for now well over a month, with still (to me) great outcomes worth the tradeoffs described above:

  1. Faster insulin. Thanks to our lovely looping friends in Germany/Austria, we came back from Europe with a few vials of Fiasp to try. I was HIGHLY skeptical about this. Some of our European friends saw great results right away, others didn’t. I didn’t get great results on it at first. Some of that may be due to natural changes between insulin types and not knowing exactly how to adjust my manual bolus strategy to the faster insulin action, but until we did some code changes to allow SMB‘s to do more and added some other features to what’s now 0.6.0, I wasn’t thrilled and in fact after about two weeks of it was about to switch off of it. So that brings me to #2.
  2. More improvements to the algorithm, which is now what will become the 0.6.0 release of oref0. There’s a whole lot of stuff packed in there. Exponential curves. Different carb absorption decay calculations. Allowing SMB to do more. Additional safety guards since we ramped SMB up.

How we started testing no-bolus approach:

  • I have always known that about 6u of insulin (thanks to testing dating back to my early DIYPS days, many many many moons ago) is about as much as I should bolus at any time. So, even if I ate 120 carbs, I usually did about a 6u bolus up front, and let the rig pick up the rest as needed over more hours. I started doing ~75% or something like that of boluses, based on wherever I felt like rounding to with my easy bolus buttons.
  • Whether I did 75% or 100%, I didn’t see a ton of difference at first…
  • ..so I took a leap and tried no-bolus with some SMB adjustments to allow it to ramp up faster with carb entry. Behaviorally, I find it a lot easier to do nothing 😀 vs. figure out the right amount of up front bolus. And outcomes wise (see above) it was very similar.

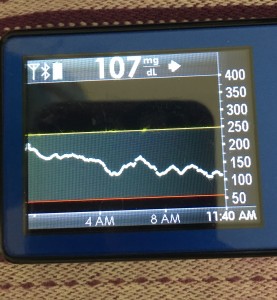
It definitely was an interesting approach to test. Between the Fiasp and the no-bolus up front, in some meals it matched really well and I had practically no rise. Due to incoming netIOB, food type, etc, sometimes I did have a rise – but while it spiked slightly higher (160-170 usually vs my earlier 150s with manual bolus), it was only up there for 2-3 data points and then came sharply down, leveling out smoothly in my preferred post-meal range. So an important lesson I learned was not to over-react to just the BG curve going up, without looking at the predictions to see where I was going to come just back down. (And as I had more than one meal where the spike and drop back to normal happened, it was very easy to adjust to the BG graph and not get that emotional tug to “do more” with a quick short rise like that).

Obviously, starting BG makes a difference. I’m usually starting <130 mg/dL when I see these spikes cap out at 170 or lower. I’ve started higher, and seen higher rises, too. They’re not all perfect: with occasional pump site issues, carb underestimates, unplanned carb stacking, and all the randomness of diabetes and a non-structured lifestyle (including live-testing bleeding edge algorithm changes), I’ve spent 12% of the last month >160 mg/dL, which is about the same as the 3 months before that. But in most cases (I’d say 95%), the no-bolus approach has actually yielded better outcomes than I expected AND has avoided post-meal lows better than I would have achieved with a manual bolus.

This is huge when you think about the QOL aspect of not having to do as much math at a meal; and when you think about all the complicating factors related to food – timing (do you bolus when you order, or when the food arrives, or earlier than that?), and the gluten factor. I have celiac disease, so if I’m eating out (which we do a lot, and especially since I travel frequently), bolusing prior to setting eyes on the food (knowing they didn’t plate it with bread, causing them to have to go back and start all over again) just isn’t smart. That’s why eating soon historically worked so well for me vs. traditional pre-boluses, because I could set the target entering the restaurant, bolus when I laid eyes on my hopefully safe food, and get reasonable (150 topping out) meal outcomes.

It also worked really well in the case where a restaurant cooked my gluten free pasta in the same pasta cooker and water as regular pasta, but didn’t inform me until after I found stray gluten noodles in the bottom of my pasta dish and started asking how that was possible since they (used to) do gluten free well. (Now, I pick up heaps of pasta, and sort pasta noodles one by one to make sure they all match before ever eating gluten free pasta. It makes waiters look at you very worriedly as you wave pasta around in the air, but better safe than glutened (again).) So, I was majorly glutened, and my digestion system was all out of sorts (isn’t that a nice polite way to describe getting glutened?) for many days, which of course impacted BG and insulin right then and for the days afterward. But because I had done carb entry and no-bolus, I was able to edit the carb entry down, and I didn’t have that much insulin stacked, and didn’t end up low after glutening, which is usually what happens.

Is that a super regular situation for most people? No. But it was super nice. And also helped me face pasta again last night, so I could put in a (very low in case of gluten) carb estimate, match my noodles, eat pasta, and let the SMBs ramp up to match absorption. It works very well for me.
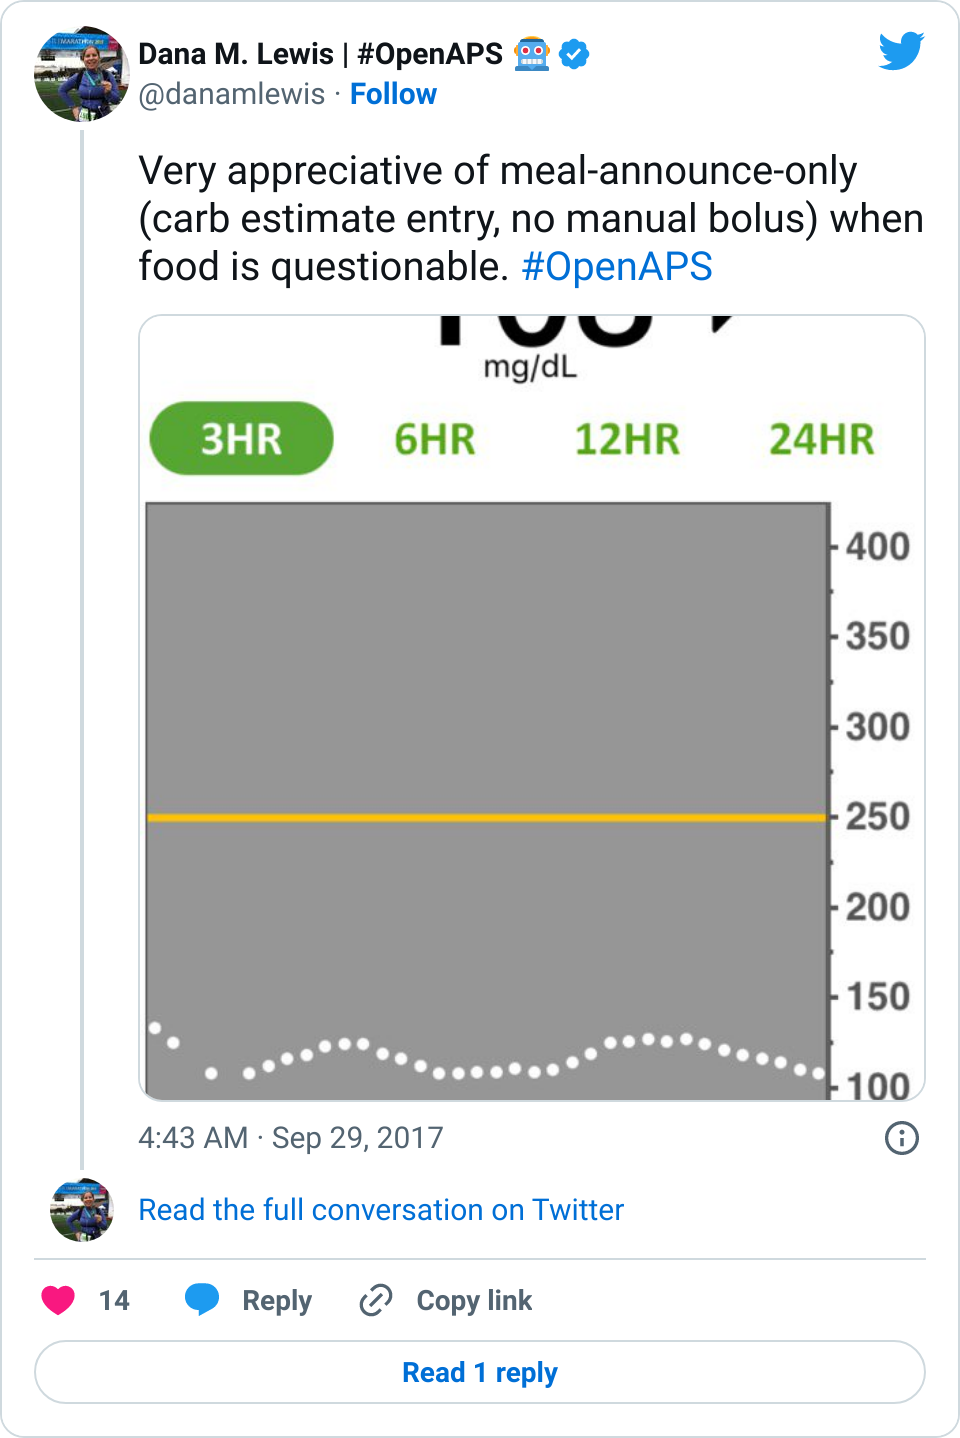
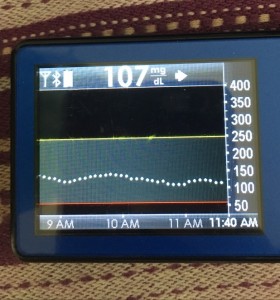
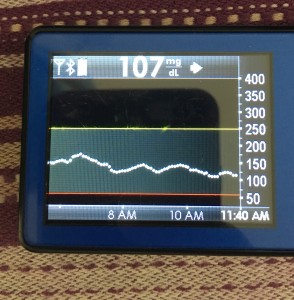
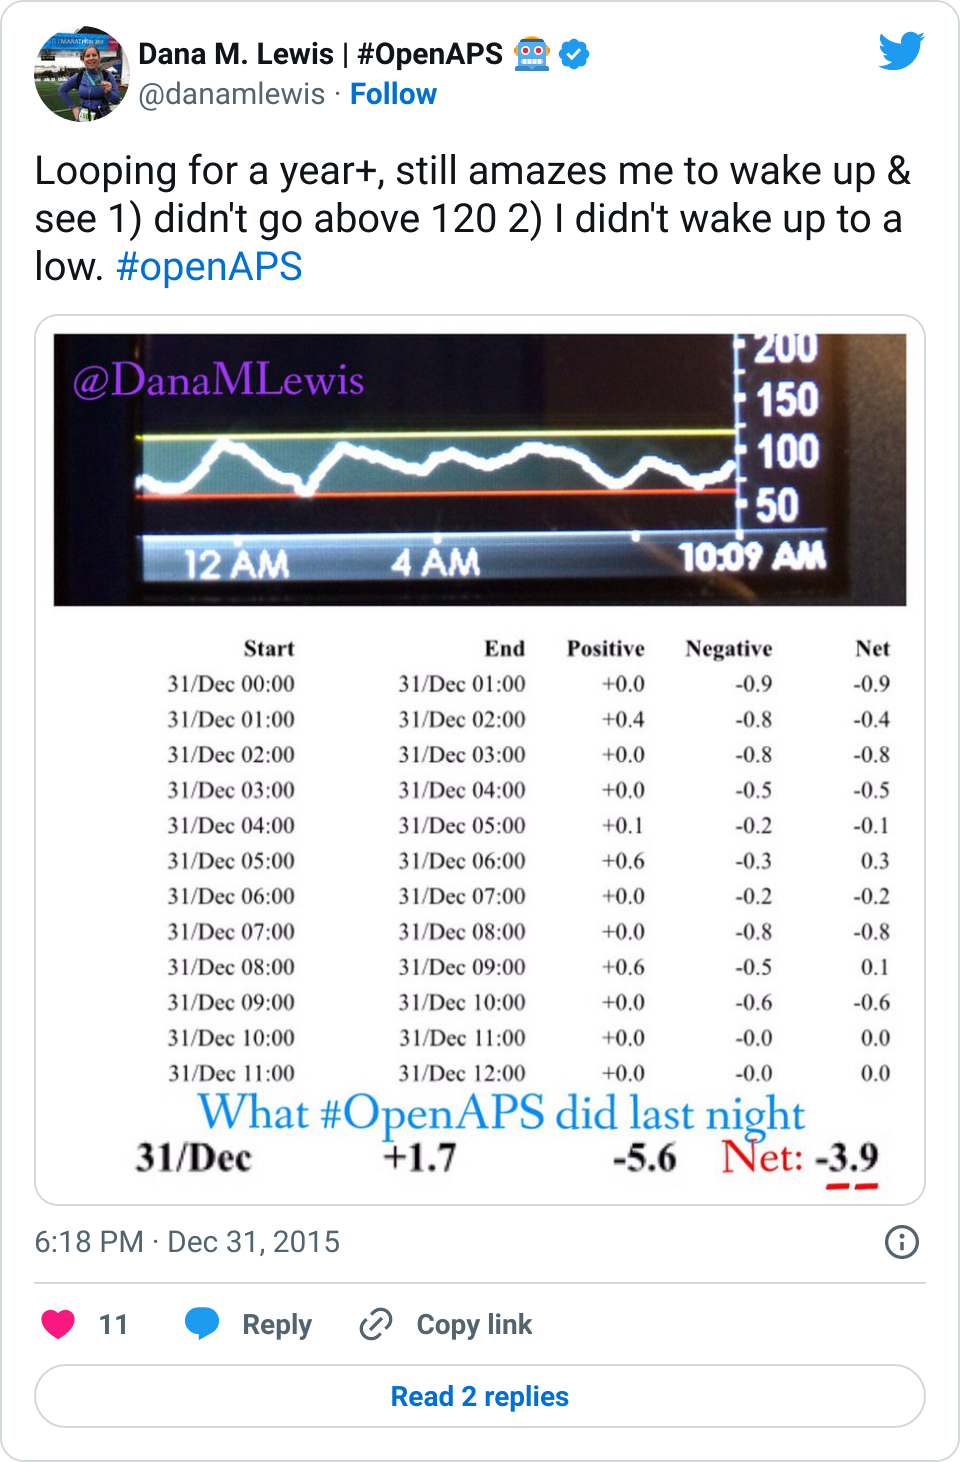
Example BG graph from only announcing, not bolusing for, a meal with OpenAPS

Whether you have celiac or not, for many reasons (insert yours here), it’s nice to not to have to commit to the bolus up front. It’s closer to approaching what I think non-PWDs do at mealtimes: just eat.

(I haven’t done much testing (yet? TBD) for no-carb-entry and no-meal-bolus scenario, I expect I would have higher spikes but would be interesting to see if it would still come down reasonably fast. Probably wouldn’t be my go-to strategy because I don’t mind a general meal size estimate one button push, but would be nice to know what that curve shape would look like. If I test that, it’ll start with small snacks and ramp my way up.)

The questions I always get:

  1. Q: HOW DO I GET THIS?
    A: Caution: like all things OpenAPS but especially always true for the development branch, 0.6.0 is NOT released yet to master and is still highly experimental. I wouldn’t install dev unless you want to pay lots of close attention to it, and are willing to update multiple times over the course of the week, because Scott and I are merging features and tweaks almost daily to it.

    Got the disclaimers down? Ok. It’s in the dev branch of oref0. You should read this PR with notes on some more detail of what’s included, but you should also review the code diff to see all that’s changed, because it’s not all documented yet. Also, follow the instructions at the bottom to be able to install it without git. Hop into Gitter if you have questions about it!

    (Big huge thanks to folks like Tim and Matthias for early testing of 0.6.0; and to Tim for writing up about the initial rounds of 0.6.0-dev here (note that we’ve made further changes since this post), and others who’ve been testing & providing feedback and input into the dev branch!)

  2. Q: When will this get “released” to master?
    A: It depends. This is still a highly active dev branch, and we’re making a lot of changes and tweaking and testing things. The more people who test now and provide feedback will enable us to get to the final “prepare for release” testing stage. Lots and lots of testing, and things depend on how much existing needs tweaked, and what else we decide should go with this release. So, there’s never any specific release date.
  3. Q: What is Fiasp?
    A: Faster acting insulin that was only approved in Europe and Canada…until today. Convenient timing. I asked a PR person who messaged me about it, and they said it’s estimated to be available in U.S. pharmacies by late December/earlier Q1. As previously stated, available elsewhere in other parts of the world.

    Fiasp peaks sooner (say, ~45 minutes) with the same tail as everything else. It’s not instantaneous. For your million and one questions about whether it’s approved for your use in a tree, on a plane, at the zoo, and all other extrapolations – please ask Google/your doctor/the manufacturer, and not me. I don’t know. :)

  4. Q: Will any of this work for people NOT on Fiasp?
    A: Nothing is guaranteed (even for other people on Fiasp), but the folks who’ve started testing 0.6.0 even without Fiasp (on Humalog or Novolog/Novorapid, etc.) have been happier on it vs. earlier versions, too.

    I don’t expect Fiasp to work super well forever for me, given what I’ve heard from other people with months of experience on it…and given my first two weeks of Fiasp not being spectacular, I want people to not expect miracles. (Sorry, this blog post does not promise miracles, so sorry if you got super excited at the above. No miracles! This is not a cure! We still have diabetes!) Like all things artificial pancreas, I think it’s better to be cautiously hopeful with realistic expectations that things *might* be a little bit better than before, but as always, YDMV (your diabetes may/will always vary), your body will vary, and life happens, etc. so who knows.

Just 4 months ago, we published a blog post pointing out that the new features had allowed us to achieve 4 out of 5 of: no bolus; not counting carbs, medium/high carb meals, 80%+ time in range; and no hypoglycemia.  With Fiasp and  0.6.0 (currently what’s in the dev branch), we’ve now achieved all 5 simultaneously: I can eat large high-carb meals, enter very vague guesstimates of 60 or 90 carbs (no need for actual carb counting, just general size-based meal announcement), and still achieve 80%+ time in range 70-150 mg/dL without ever going <55 mg/dL.  Does that mean that OpenAPS with Fiasp finally meets the definition of a “real” Artificial Pancreas (step 5 on JDRF’s 6-step AP development pathway)?  We think it does.

So, tl;dr (because long post is long): with Fiasp and 0.6.0-dev branch, I’m able to not bolus for meals, and just enter a very generally sized meal estimate. It’s working well for me, and like all things, we’re working to make it available to other people via OpenAPS for others who want to try similar features/approaches. It may not work well for everyone. If it helps one other person, though, like everything else it’ll be worth it. Big thanks to Scott for LOTS of development in 0.6.0 and partnership in design of these features; too many people to name for testing and providing feedback and helping iterate on these features; and to the entire community for being awesome and helping us to continue to push the envelope on what might be possible for those of us with type 1 diabetes. :)

What you should know about closed looping (DIY like #OpenAPS or otherwise)

I’ve been wearing a DIY closed loop for something like 979 days..which means something like ~20,000 hours with this technology. Additionally, I’m not the only one. At the time of writing this post (see the latest count here), there are (n=1)*369+ (and that’s an undercount just based on who’s told us they’re looping) other DIYers out there, so the community has an estimated 1,800,000+ hours of cumulative experience, too.

Suffice to say, we’ve all learned a lot about this technology and how hybrid closed loop makes a difference in life with diabetes.

I previously gave a talk almost two years ago to the Sports & Diabetes Group Northwest here in Seattle, talking about #DIYPS, how we closed the loop, and #OpenAPS. (And you can see a recent TEDX talk I gave on OpenAPS here.) That was a springboard for meeting some awesome individuals who became very early DIY loopers in the Seattle area. And one of them (who also wore a pancreas at HIS wedding :)) had suggested we do another talk for SDGNW to update on some of what we have learned since then. But unfortunately, he got called out of town for work and couldn’t join me for presenting, so I went solo (ish, because Scott also came and contributed). I used a new analogy, because I think there’s a lot to think about before choosing and using closed loop technology, whether it’s DIY or commercial, and wanted to write it up for sharing here.

what_to_know_about_looping_danamlewis

First, some reminders for those familiar and some context for those who are not close to this technology. We’re talking about a hybrid closed loop, which is what I’m referring to when I say “artificial pancreas” or “AP” here. This type of technology makes small adjustments every few minutes to provide more or less insulin with the goal of keeping blood glucose (BG) levels in range. It’s complicated by the fact that insulin often peaks at 60-90 minutes…but food hits in ~15 minutes. So there’s often “catch up” being done with insulin to deal with food eaten previously, and also with hormones and other things that impact BGs that aren’t measurable. (This is also why it’s called hybrid, because for best outcomes people will still be doing some kind of meal announcement/bolus to deal with insulin timing.) As a result, even with pumps and CGMs, diabetes is still hard. A closed loop can do the needed math every five minutes, doesn’t go to sleep, and is very precise. It can respond more quickly (because it’s paying attention) than a human will in most situations, because we’re out living our lives/working/sleeping and not paying attention ONLY to diabetes. It’s not a cure, but it helps make living with diabetes better than it used to be.

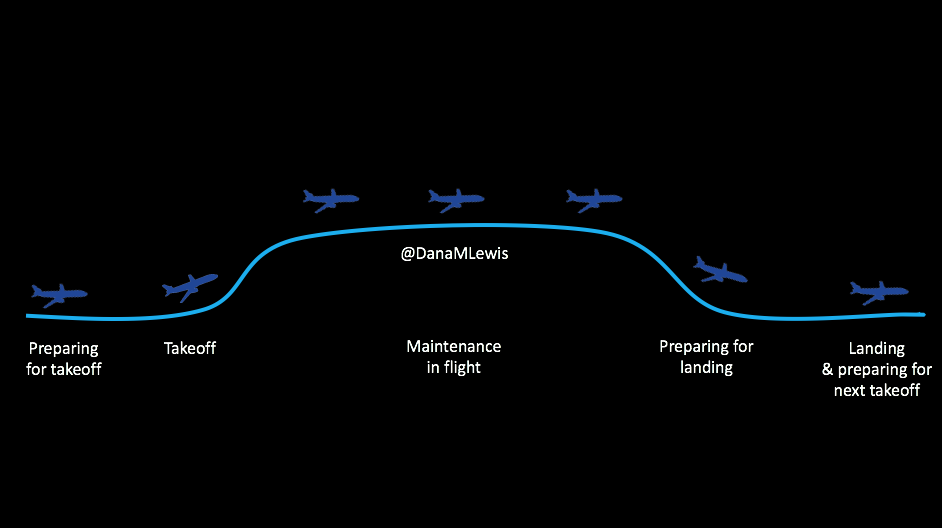
However, I equate it to being a pilot who has seen technology on planes evolve to include “autopilot”. Even with hybrid closed loop technology, we’re still flying the “plane”.

looping_is_like_flying_plane_danamlewis

Here’s what I mean. There are stages for picking out and deciding to use the technology; preparing to use it/getting in the mode where you CAN use it; using it successfully; getting ready for the times when you can’t use it; and smoothing the way for the next time you use it.

It’s not perfect 24/7, you see, because we’re still using pump sites and continuous glucose monitor (CGM) sensors. The CGM sensor may last for 7 days, but then you have to change it out (or cough restart it cough), and you have a gap in data, which means you can’t loop. So you have this type of cycle regularly, and here’s what you need to know about each of these stages, regardless of whether we’re talking about DIY (like OpenAPS) or a commercial closed loop solution.

Preparing for takeoff

prepare_for_looping_danamlewisWhen you’re getting into the plane, you have a flight plan. You know when you will and won’t use the technology on board. Same for diabetes & closed looping. Make sure to think about the following for your tech of choice:

When will your loop work? When does it not? What happens if it breaks? What are your back up tools? How do you operate it: what happens if your sensor loses data, or you don’t calibrate? How does the algorithm work? What will it target your BG to be? What behaviors will you have to do (meal bolus or announcement, etc.) and how can you alter those to optimize performance? Also, what are the warning signs of failure to let you know when you need to take additional action with corrective insulin or eating carbs?

Taking off and the new technology learning curve

taking_off_learning_curve_danamlewisJust like switching from MDI pump (or even iPhone to Android and vice versa), you have a learning curve. When you go into looping or automated insulin delivery mode, you have to figure things out. You need to be able to figure out what’s happening and why it’s doing what it’s doing, so if you’re not happy with what’s happening, you can make a change. Why are you running high? Why are you running low? Knowing why it’s doing what it’s doing is critical for adjusting – either tweaking the closed loop settings, if you can, or adjusting your own behavior. Especially in the first few cycles of new tech, you’ll have a lot of learning around “I used to do things like X, but now I need to do them like Y.”

Why you might not be taking off and able to loop

blocking_takeoff_danamlewisYou also need to know why you can’t loop. There are three major categories of things that will prevent you from looping:

  1. No sensor, no looping.
  2. In some systems, wonky or missing data, no looping
  3. Communication errors between pieces of a system.

Some of these are obvious fixes (put in a new sensor if one fell out, or decide to put in a new sensor if the old one is bad), but depending on the system may involve some troubleshooting to get things going again.

Also, some of the commercial systems will kick you out of looping for various reasons (including lack of calibration), in addition to preventing you from looping in the first place without them, so knowing what these basic things are required for looping is useful to make sure you CAN automate.

Flying high: maintenance when you’re actually looping

maintenance_when_looping_danamlewisThere are some critical behaviors required for looping. (After all, when flying, there’s always a pilot present in the cockpit..right?!)

Some of these are basic behaviors you’ll be used to if you’ve been wearing a pump and CGM previously: keeping pump sites changed so the insulin works, and changing and calibrating CGM sensors.

HOWEVER – many people who “stretch” their CGM sensors find that they don’t want to stretch their sensors as far, as the data degrades over time. You do you, but keep in mind this might change when you’re looping vs. not, because you’re relying on good data to operate the system.

That being said, in addition to good sensor life, calibration hygiene is critical. You don’t want to loop off of wonky data, but also some commercial systems will kick you out if your calibration is way off and/or if you miss a calibration. (Personal opinion on this is a big ugh, which is why no DIY system that I know of does this.)

But if you keep your sites and sensors in good condition, this is where life is good. You’re looping! It’s microadjusting and helping keep things in range. Yay! This means better sleep, more time in range, and feeling better all around.

However, you still have diabetes, you’re still in the plane, so you still need to keep an eye on things. Monitoring the system is important (to make sure you’re still in autopilot and don’t need to actually fly the plane manually), so make sure you know how you (and your loved ones) can monitor the system’s operation, and know what your backup alarms are in case of system failures.

Note: there are approximately eleventy bajillion ways to remote monitor in DIY systems, but even if you have a commercial system that comes pre-baked without remote monitoring… you can add a DIY solution for that. So don’t feel like if you have a commercial AP that you can never use anything DIY – you can totally mix and match!

Dealing with turbulence

turbulence_danamlewisWhat kind of airplane/flight analogy would this be without including turbulence? :)

Like the things that can prevent looping in the first place, there are things that can throw off your looping. I already mentioned wonky sensor data that may mean either a blip in your looping time, or may kick you off looping. Again, your sensor life and your calibration practices will likely change.

But the other big disturbance, so to speak, is around body sensitivity changes. You know all the ways it can happen: you’re getting sick, recovering from getting sick, getting ready for/or are on/or are right after your period, or have an adrenaline spike, or have hormones surging, or have a growth spurt, or just exercised, etc.

This is what makes diabetes oh so hard so often. But this is where different closed loop systems can help, so this is one area you should ask about when picking a system: how does it adjust and adapt to sensitivity changes, and on what time frame? (In the DIY world, we use a number of techniques with this, ranging from autosensitivity to adapt on a 24 hour rolling scale of sensitivity changes, as well as using autotune to track bigger picture trends and changes needed to underlying settings. Reminder – anyone can use autotune if they’re willing to log bolus & carb data in Nightscout, not just closed loopers, so check that out if you’re interested! All DIY closed loop systems also use dynamic carbohydrate absorption in their respective algorithms, so that if you have slowed digestion for ANY reason, ranging from gastroparesis to getting glutened if you have celiac to merely walking after a meal, the system takes that into account and adjusts accordingly.)

The other things that can help you tough out some turbulence? Setting different modes, like an activity mode for exercise. The two things to know about exercise are:

  1. You don’t want to go into exercise with a bucket of IOB, so set activity mode WELL BEFORE you go out for activity. Depending on how much netIOB you have, that time may vary, but planning ahead with an activity mode makes a big difference for not going low during activity – even with a closed loop.
  2. Your sensitivity may be impacted for hours afterward, into the next day. See above about having a system that can respond to sensitivity changes like that, but also think about having multiple targets you can use temporarily (if your system allows it) so you can give the system a bigger buffer while it sorts out your body’s sensitivity changes.

Preparing for landing and making time between loops more smooth

prepare_for_landing_danamlewisJust like you’ll want to plan to go on the closed loop, you’ll want to plan for how to cycle off and then back on again. Depending on your system, there may be things you can do to smooth things out. One of the things I do is pre-soak a CGM sensor to skip the first day jumpy numbers. That makes a big difference for the first hours back on a “new” looping session. The other thing I do is stagger receiver start times (where I have two receivers that I stop/start at different times, so I’m not stuck for two hours without BG data to loop on).

But even if you can’t do that, you can do some other general planning ahead – like making sure your looping session doesn’t end in the middle of a big meal that’s being digested, or overnight. Those are the times when you’ll want to be looping the most.

Landing and preparing for the next looping session

Landing_danamlewisJust like learning to fly where you take a lot of training flights and review how the flight went, you’ll want to think about how things went and what you might change behavior-wise for your next looping session. Some of the things that may change over time as you learn more about your tech of choice:

  • Timing of meal announcement or boluses
  • Precision (if needed, or otherwise lack thereof) around carb counting
  • Using things like “eating soon” mode to optimize meal-time insulin effectiveness and reduce post-meal spikes
  • Using different activity patterns and targets to get ideal outcomes around exercise
  • Tweaking underlying settings (if you can)

General thoughts on looping

general_looping_reminders_danamlewisSome last thoughts about closed looping in general, regardless of the tech you might choose now or in the future:

  1. Picking one kind of technology does NOT lock you into it forever. If you’re DIYing now, you can choose commercial later. If you start on a commercial system, you can still try a DIY system.
  2. Don’t compare the original iPhone with an iPhone 6. Let’s be blunt: the Dexcom 7plus is a different beast than the Dexcom G4/G5. Similarly, Medtronic’s original “harpoon” sensor is different than their newest sensor tech. The Abbott Navigator is different than their Libre. Don’t be held up by perceptions of the old tech – make sure to check out the new stuff with a somewhat open mind.
  3. (Similarly, hopefully, in the future we’ll get to say the same about first-generation devices and algorithms. These things in commercial systems should change over time in terms of algorithm capabilities, targets, features, and usability. They certainly have in DIY – we’ve gotten smaller pancreases, algorithm improvements, all kinds of interoperability integration, etc.)
  4. All systems (both DIY and commercial) have pros and cons. They also each will have their own learning curves. Some of that learning is generalized, and will translate between systems. But again, iPhone to Android or vice versa – your cheese gets moved and there will be learning to do if you switch systems.
  5. Remember, everyone learns differently – and everyone’s diabetes is different. Figure out what works well for you, and rock it!


Unexpected side-effect of closed looping: Body re-calibrations

It’s fascinating how bodies adapt to changing situations.

For those of us with diabetes: do you remember the first time you took insulin after diagnosis? For me, I had been fasting for ~18 hours (because I felt so bad, and hadn’t eaten anything since dinner the night before) and drinking water, and my BG was still somehow 550+ at the endo’s office.

Water did nothing for my unquenchable thirst, but that first shot of insulin first sure did.

I still remember the vivid feeling of it being an internal liquid hydration for my body, and everything feeling SO different when it started kicking in.

In case the BG of 550+, the A1c of 14+ (don’t remember exact number), and me feeling terrible for weeks wasn’t enough, that’s one of the things that really reinforced that I have diabetes and insulin is something my body desperately needs but wasn’t getting.

Over the last ~14+ years, I’ve had a handful of times that reinforced the feeling of being dependent on this life-saving drug, and the drastic difference I feel with and without it. Usually, it’s been times where a pump site ripped out, or I was sick and high and highly resistant, and then finally stopped being as resistant and my blood sugar started responding to insulin finally after hours of being really high, and I started dropping.

But I’ve had different ways to experience this feeling lately, as a result of having live with a DIY closed loop (OpenAPS) for 2+ years – and it hasn’t involved anything drastic as a HIGH BG or equipment failure. It’s a result of my body re-calibrating to the new norm of my body being able to spend more and more time close to 100% in range, in a much tighter and lower range than I ever thought possible (especially now true with some of the flexibility and freedom oref1 now offers).

I originally had a brief fleeting thought about how BGs in the low 200s used to feel like the 300s did. Then, I realized that 180 felt “high”. One day, it was 160.

Then one day, my CGM said flat in 120s and I felt “high”. (I calibrated, and turned out that it was really 140). I’ve had several other days where I’d hit 140s and feel like I used to do in the mid-200s (slightly high, and annoying, but no major high symptoms like 300-400 would cause – just enough to feel it and be annoyed).

That was odd enough as a fleeting thought, but it was really odd to wake up one morning and without even looking at my watch or CGM to see what my BGs had been all night, know that I had been running high.

I further classified “really odd” as “completely crazy” when that “running high” meant floating around the 130-140 range, instead of down in the 90-110 range, which is where I probably spend 95% of my nights nowadays.

Last night is what triggered this blog post, plus a recurring observation that because I have a DIY closed loop that does so well at handling the small, unknown variances that cause disturbances in BG levels without me having to do much work, that as result it is MUCH easier to pinpoint major influences, like my liver dumping glucose (either because of a low or because it’s ‘full up’ and needs to get rid of the excess).

In last night’s case, it was a major liver dump of glucose.

Here’s what happened:

Scott and I went on a long walk, with the plan to stop for dinner on the way home. BG started dropping as I was about half a mile out from the restaurant, but I’m stubborn 😀 and didn’t want to eat a fruit strip when I was about to sit down an eat a burger. So, my BG was dropping low when I actually ate. I expected my BG to flatten on its own, given the pause in activity, so I bolused fairly normally for my burger, and we walked the last .5 miles home.

However, I ended up not rising from the burger like I usually do, and started dropping again. It was quite a drop, and I realize my burger digestion was different because of the previous low, so I ended up eating some fruit to handle the second low. My body was unhappy at two lows, and so my liver decided to save the day by dumping a bunch of glucose to help bring my blood sugar up. Double rebound effect, then, from the liver dump and the fruit I had eaten. Oh well, that’s what a closed loop is for!

Instead of rebounding into the high 300s (which I would have expected pre-closed loop), I maxed out at 220. The closed loop did a good job of bolusing on the way up. However, because of how much glucose my liver dumped, I stayed higher longer. (Again, this probably sounds crazy to anyone not looping, as it would have sounded to me before I began looping). I sat around 180 for the first three hours of the night, and then dropped down to ~160 for most of the rest of the night, and ended up waking up around 130.

And boy, did I know I had been high all night. I felt (and still feel, hours later) like I used to years ago when I would wake up in the 300s (or higher).

Visuals

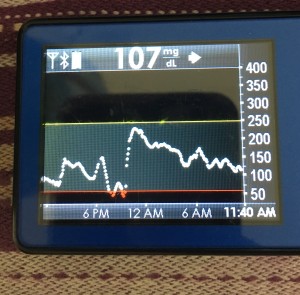
recalibration_3 hourHmm, 3 hours doesn’t look so bad despite feeling it.

recalibration_6 hour6 hour view shows why I feel it.

recalibration_12 hour12 hours. Sheesh.

recalibration_24 hour24 hours shows you the full view of the double low and why my liver decided I needed some help. Thanks, liver, for still being able to help if I really needed it!

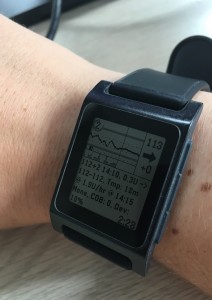
recalibrating_pebble view of renormalizing Settling back to normal below 120, hours later.

There are SO many amazing things about DIY closed looping. Better A1c, better average BG, better time in range, less effort, less work, less worrying, more sleep, more time living your life.

One of the benefits, though, is this bit of double-edged sword: your body also re-calibrates to the new “normal”, and that means the occasional extreme BG excursion (even if not that extreme!) may give you a different range of symptoms than you used to experience.

Traveling through airport security with diabetes devices (with or without #OpenAPS)

tl;dr: Put your #OpenAPS or other artificial pancreas rigs through the x-ray machine; it’s a small computer and a battery.

Traveling through airport security with your diabetes devices and artificial pancreas rigs (#OpenAPS)

I travel quite a bit these days, so it’s pretty routine for me to pack up my diabetes gear and backup supplies and whisk away to the airport and the next adventure. In fact, in 2016 I think I went through airport security 44+ times, in several countries. I have never had any issues with my #OpenAPS (DIY hybrid closed loop artificial pancreas) rigs – even when I carry multiples. Here are some tips on what gear should be put where, who should be told what during the security process, and how to further simplify (as much as is possible with diabetes!) the airport security experience when traveling with diabetes.

Showing my OpenAPS rig on my hip at the airport

A list of diabetes gear you’re probably packing for your trip:

  • BG meter
  • Test strips
  • Lancet(s)
  • Pump sites
  • Reservoirs
  • CGM sensors
  • CGM receiver
  • Tape for sites/sensors
  • Syringes as back up
  • Anti-nausea meds
  • Depending on the length of your trip, backup pump/transmitter/meter/receiver/etc.
  • Snacks
  • Extra batteries to power your phone for uploading BGs
  • (Uploader phone if you’re still using an uploader to Nightscout)
  • Artificial pancreas rig (i.e. #OpenAPS rig, whether that’s a Raspberry Pi or Explorer Board setup, or a Rileylink)
  • Insulin
  • Extra insulin
  • Juice for lows

Out of that list? Here are the only things I would pull out of your bag.

  • Insulin/extra insulin*
  • Juice for lows**

Everything else (yes, including your CGM receiver; yes, including your pancreas rigs) can stay in your bag and go through the x-ray.

*If you have a single bottle of insulin, it’s under the liquid (3oz) limits, so you don’t technically need to pull it out. But if you are carrying numerous bottles/pens/etc., if you have them separately bagged and can pull out separately, I would do so in order to reduce the risk of them flagging your bag for needing additional screening.

** Yes, you have a medical need for liquid and can take juice through security. HOWEVER, I *highly* recommend having this in a baggie and pulled out of your bag so it is separate. They’ll often pick that up, examine it, and if you say “medical liquid for diabetes”, it’s fine. Sometimes you’ll get pulled for a pat down, but not always. And, this usually prevents them from having to dig through your bags to find the juice and go through all your things. (Which is annoying, not to mention time consuming).

My second “HOWEVER” related to juice: I’ve stopped carrying juice for lows when I air travel. Yes, it only takes an extra couple of minutes or whatever for them to check things out, but I’d rather not have any hassle if I can avoid it. I instead have switched to Starbursts, Skittles, and similar. (They’re super fast acting for me, and actually make it easier to do a small 4g correction vs having to bust open an entire 15g juice box that can’t really be saved for later.) I have those in my pocket or easily accessible in an outer pocket of the bag that will go under my seat on the plane. You can of course still carry juice, but think about if that’s really worth the hassle/effort and if there’s an alternative (glucose tabs, small wrapped candies, etc.) that might be easier for treating lows when traveling. YDMV, of course.

(My favorite carrying-juice-through-security story is this: I was traveling to somewhere in Europe while in college (well before my DIY closed loop days), and I had a large baggie jam-packed with 8 or 9 juice boxes and a bottle of insulin. Despite telling them that I had diabetes and was traveling internationally and this was medically necessary in case of low BGs, the TSA agent said “how many juice boxes could you possibly need in an 11 hour flight? You wouldn’t use more than one, right?” It was *really* hard not to laugh.)

What about insulin pumps? Do you take it off?

  • I currently am wearing an insulin pump that does not alarm in 99% of metal detectors because it’s not made with lots of metal. I also have TSA Pre-Check, which means 95% of the time when traveling in the U.S. I am only asked to go through a metal detector. So right before I walk up to security, I take my pump that’s usually clipped to an outer pants pocket and clip it inside my waist band and underneath my shirt. If it doesn’t alarm, then I proceed like a usual traveler to get my bags and be on my way.
  • If I am randomly selected by the metal detector to instead go through the body scanner:
    • YDMV/YMMV, but there are no guarantees that the body scanners will not break your pump. And if you have a super special limited edition rare pump that does a special thing (like those that enable you to DIY closed loop), as I do, it may make you decide that a pat down is better than risking your pump, since if it DOES break due to scanner interference, TSA sure isn’t going to pay to fix it/get you a new one, and a new one wouldn’t allow you to DIY closed loop anyway.
    • So, if I get randomly selected, I stop right there and say “opt out”. Say it to whoever is pointing you over to the body scanner, they’ll posssibly read you a script to confirm you want to opt out, and just keep saying “yes, I opt out” and “that’s fine” to the “but then you have to have a pat down!”. They’ll order up a same-gender TSA agent who will come get you, escort you around the body scanners, and you’ll get your pat down. The usual applies – if you want, you can ask for a private area for your pat down. I usually don’t care, but if you do, make sure you keep an eye on your bags and ask for those to come with you so they’re not left out in the open for anyone to accidentally take. (They’re usually pretty good about that, though.)
    • For the pat down, they’ll ask you about sensitive areas/medical devices. This is the time to point out your pump; tell them (pat the area) where it’s connected, and ditto for patting/pointing out your CGM sensor if you have one. They’ll be extra careful then to not accidentally catch their hands on those areas.
    • At the end, they’ll go swab their gloves, then come back and ask you to pat/touch your pump and then let them swab your hands.
  • If you don’t have Pre-Check, the above will likely happen every time. So if you’re an opt-out-of-body-scanner-type and travel more than 2 times a year…IMO Pre-Check is worth the money. (And think about getting Global Entry, which comes with Pre-Check included, and also gets you expedited return to the country after traveling abroad).
  • If you have a metal-cased pump (or any other pump, and just want this instead of the metal detector or the body scanner), you can ask for a hand inspection of your pump. Different manufacturers say different things about whether x-ray and body scanners are ok/not ok, so check with them and also go with your gut about what you’d like to do with your pump.  Keep in mind that the radiation your carry-on luggage gets from the hand-luggage x-ray is about 100 times what your body gets from a backscatter x-ray, so if you’re concerned about x-ray radiation damaging your pump, it should not be sent through the scanner with your carry-on luggage.

What about a doctor’s note?

I have never carried a doctor’s note, and have not had an issue in the 14+ years I’ve been flying with diabetes – including in dozen of international airports. YDMV, and if you’d feel more comfortable with one, you can get one from your doctor. But for what it’s worth, I don’t travel with one.

What about international airports?

The only thing to know about international airports is they have similar guidelines about liquids, so plan to also pull out your juice and toiletries from your bag. Same rules apply for keeping rigs, supplies, etc. in your bag otherwise. I’ve never had an issue based on pancreas rigs internationally, either. They’re small computers and batteries, so both TSA and international security are used to seeing those in the x-ray.

OpenAPS rigs are mini computers and can go through xray and airport security

(Let me know what other travel-related questions you have, and I’ll keep adding to this post if it’s helpful. Happy traveling!)

Scuba diving, snorkeling, and swimming with diabetes (and #OpenAPS)

tl;dr – yes, you can scuba dive with diabetes, snorkel with diabetes, and swim with diabetes! Here’s what you need to know.

I meant to write this post before I left for a two-week Hawaii trip, and since I answered about a question a day on various platforms as I posted pictures from the trip, I really wish I had done it ahead of time. Oh well. :) I especially wish someone had written this post for me 2 years ago, before my first scuba dive, because I couldn’t find a lot of good information on the practicalities of good approaches for dealing with all the details of scuba diving with diabetes and an insulin pump and CGM and now closed loops. Scuba diving, snorkeling, and swimming with diabetes are actually pretty common, so here are a few things to keep in mind/tips from me, before diving (pun intended) into some explanations of what I think about for each activity diabetes-wise.

scuba_diving_with_diabetes_tips_water_activities_by_Dana_M_Lewis

General tips for water activities when living with diabetes:

  1. Most important: be aware of your netIOB going into the activity. Positive netIOB plus activity of any kind = expedited low BG. This is the biggest thing I do to avoid lows while scuba diving or snorkeling – trying to time breakfast or the previous meal to be a few hours prior so I don’t have insulin peaking and accelerated by the activity when I’m out in the water and untethered from my usual devices.
  2. Second most important: CGM sensor and transmitter on your body can get wet (shower, pools, hot tubs, oceans, etc.), but keep in mind it can’t read underwater. And sometimes it gets waterlogged from short or long exposure to the water, so it may take a while to read even after you get it above water or dry off. And, historically I’ve had sensors come back and the CGM will sometimes read falsely high (100-200 points higher than actual BG), so exercise extreme caution and I highly recommend fingerstick testing before dosing insulin after prolonged water exposure.
  3. Know which of your devices are waterproof, watertight, etc. Tip: most pumps are not waterproof. Some are watertight*. The * is because with usual wear and tear and banging into things, small surface cracks start showing up and make your pump no longer even watertight, so even a light splash can kill it. Be aware of the state of your pump and protect it accordingly, especially if you have a limited edition super special super rare DIY-loopable pump. I generally take a baggie full of different sized baggies to put pump/CGM/OpenAPS rig into, and I also have a supposedly waterproof bag that seals that I sometimes put my bagged devices into. (More on that below).
    1. And in general, it’s always wise to have a backup pump (even if it’s non-loopable) on long/tropical/far away trips, and many of the pump companies have a loaner program for overseas/cruise/tropical travel.
  4. Apply sunscreen around your sites/sensors because sunburn and applying or removing them hurts. However, as I learned on this trip, don’t do TOO much/any sunscreen directly on top of the adhesive, as it may loosen the adhesive (just surrounding the edges is fine). I usually use a rub sunscreen around the edges of my pump site and CGM sensor, and do the rest of my body with a spray sunscreen. And pack extra sites and sensors on top of your extras.

Why extras on top of your extras? Because you don’t want to have a vacation like I did where I managed to go through 5 pump site catastrophes in 72 hours and run out of pump sites and worry about that instead of enjoying your vacation. Here’s what happened on my last vacation pump-site wise:

  • Planned to change my site the next morning instead of at night, because then I would properly use up all the insulin in my reservoir. So I woke up, put in a new pump site (B) on my back hip, and promptly went off to walk to brunch with Scott.
  • Sitting down and waiting for food, I noticed my BG was rocketing high. I first guessed that I forgot to exit the prime screen on the pump, which means it wasn’t delivering any insulin (even basal). Wrong. As I pulled my pump off my waist band, I could finally hear the “loud siren escalating alarm” that is “supposed” to be really audible to anyone…but wasn’t audible to me outside on a busy street. Scott didn’t hear it, either. That nice “siren” alarm was “no delivery”, which meant there was something wrong with the pump site and I hadn’t been getting any insulin for the last hour and a half. Luckily, I have gotten into the habit of keeping the “old” pump site (A) on in case of problems like this, so I swapped the tubing to connect to the “old” site A and an hour or so later as insulin started peaking, felt better. I pulled site B out, and it was bent (that’s why it was no delivery-ing). I waited until that afternoon to put in the next pump site (C) into my leg. It was working well into dinner, so I removed site A.
  • However, that night when I changed clothes after dinner, site C ripped out. ARGHHHH. And I had removed site A, so I  had to put on another site (D). Bah, humbug. Throw in someone bumping a mostly-full insulin vial off the counter and it shattering, and I was in one of my least-pleased-because-of-diabetes moods, ever. It was a good reminder of how much a closed loop is not a cure, because we still have to deal with bonked sites and sites in general and all this hoopla.
  • Site D lasted the next day, while we went hiking at Haleakala (a 12.2 mile hike, which was amazing that neither my site or my sensor acted up!). However, on the third day in this adventure, I put on sunscreen to go to the beach with the whole family. When we came back from the beach, I went to remove my cover up to shower off sand before getting into the pool. As my shirt came over my head, I saw something white fly by – which turned out to be 4th pump site, flying around on the end of the pump tube, rather than being connected to my body. There went Site D. In went my fifth site (E), which I tackled down onto my body with extra flexifix tape that I usually use for CGM sensors because I. Was. Fed. Up. With. Pump. Sites!
  • Thankfully, site E lasted a normal life and lasted til I got home and did my next normal site change, and all is back to normal.

Lessons learned about pump sites: I repeat, don’t sunscreen too much on the adhesive, just sunscreen AROUND the adhesive. And pack extras, because I went through ~2 weeks of pump sites in 3 days, which I did not expect – luckily I had plenty of extra and extras behind those!

Now on to the fun stuff.

Scuba Diving with diabetes:

  • 2 years ago was my “Discovery” dive, where you aren’t certified but they teach you the basics and do all the equipment for you so you just do some safety tutorials and go down with a guide who keeps you safe. For that dive, I couldn’t find a lot of good info about scuba diving with diabetes, other than logical advice about the CGM sensor not transmitting under water, the receiver not being waterproof, and the pump not being waterproof. I decided to try to target my BG in advance to be around 180 mg/dl to avoid lows during the dive, and for extra safety eat some skittles before I went down – plus I suspended and removed my pump. Heh. That worked too well, and I was high in the mid-200s in between my two dives, so I found myself struggling to peel my wetsuit off in between dives to connect my pump and give a small bolus. The resulting high feeling after the second dive when my BG hadn’t re-normalized yet plus the really choppy waves made me sea-sick. Not fun. But actually diving was awesome and I didn’t have any lows.
    • Pro tip #1 for scuba diving with diabetes: If you can, have your pump site on your abdomen, arm, or other as-easy-as-possible location to reconnect your pump for between-dive boluses so you don’t have to try to get your arm down the leg of your wetsuit to re- and disconnect.
  • I decided I wanted to get PADI certified to scuba dive. I decided to do the lessons (video watching and test taking) and pool certification and 2/4 of my open water dives while on a cruise trip last February. Before getting in the pool, I didn’t do anything special other than avoid having too much (for me that’s >.5u) of netIOB. For the open water dives at cruise ports, I did the same thing. However, due to the excitement/exertion of the first long dive, along with having to do some open water safety training after the first dive but before getting out (and doing my swim test in choppy open water), I got out of the water after that to find that I was low. I had to take a little bit longer (although maybe only 10 extra minutes) than the instructor wanted to finish waiting for my BG to come up before we headed out to the second dive. I was fine during and after the second dive, other than being exhausted.
    • Pro tip #2 for scuba diving with diabetes: Some instructors or guides get freaked out about the idea of having someone diving with diabetes. Get your medical questionnaire signed by a doctor in advance, and photocopy a bunch so you can take one on every trip to hand to people so they can cover themselves legally. Mostly, it helps for you to be confident and explain the safety precautions you have in place to take care of yourself. It also helps if you are diving with a buddy/loved one who understands diabetes and is square on your safety plan (what do you do if you feel low? how will you signal that? how will they help you if you need help in the water vs. on the boat, etc.?). For my training dives, because Scott was not with me, I made sure my instructor knew what my plan was (I would point to my arm where my sensor was if I felt low and wanted to pause/stop/head to the surface, compared to the other usual safety signals).
  • This past trip in Hawaii I was finishing off a cold at the beginning, so at the end of the trip I started with a shore dive so I could go slow and make sure it was safe for me to descend. I was worried about going low on this one, since we had to lug our gear a hundred feet or so down to the beach and then into the water (and I’ve never done a shore dive prior to this). I did my usual prep: temp basal to 0 on my pump for a few hours (so it can track IOB properly) and suspend; place it and CGM and OpenAPS rigs in baggies in my backpack; and confirming that my BG was flat at a good place without IOB, I didn’t eat anything extra. We went out slowly, had a great dive (yay, turtles), and I was actually a little high coming back up after the dive rather than low. My CGM didn’t come back right away, so I tested with a fingerstick and hooked my pump back up right away and gave a bolus to make up for the missed insulin during the dive. I did that before we headed off the beach and up to clean off our gear.
    • Pro tip #3 for scuba diving with diabetes: Don’t forget that insulin takes 60-90 minutes to peak, so if you’ve been off your pump and diving for a while, even if you are low or fine in that moment, that missing basal will impact you later on. Often if I am doing two dives, even with normal BG levels I will do a small bolus in between to be active by the time I am done with my second dive, rather than going 3+ hours with absolutely no insulin. You need some baseline insulin even if you are very active.
  • While in Hawaii, we also got up before the crack of dawn to head out and do a boat dive at Molokini. It was almost worth the 5am wakeup (I’m not a morning person :)). As soon as I woke up at 5am, I did an “eating soon” and bolused fully for my breakfast, knowing that we’d be getting on the boat at 6:30amish (peak insulin time), but it’d take a while to get out to the dive site (closer to 7:30am), so it was better to get the breakfast bolus in and let it finish counteracting the carbs. I did, but still ran a little higher than I would have liked while heading out, so I did another small correction bolus about half an hour before I temped to zero, suspended, and disconnected and baggied/bagged/placed the bag up in the no-water-shelf on the boat. I then did the first dive, which was neat because Molokini is a cool location, and it was also my first “deep” dive where we went down to about ~75 feet. (My previous dives have all been no deeper than about ~45 feet.) Coming back onto the boat, I did my usual of getting the gear off, then finding a towel to dry my hands and do a fingerstick BG test to see what I was. In this case, 133 mg/dl. Perfect! It would take us almost an hour for everyone to get back on the boat and then move to dive spot #2, so I peeled down my wetsuit and reconnected my pump to get normal basal during this time and also do a small bolus for the bites of pineapple I was eating. (Given the uncertainties of accuracy of CGM coming out of prolonged water exposure, since they sometimes run 100+ points high for me, I chose not to have the loop running during this dive and just manually adjust as needed). We got to spot #2 and went down for the dive, where we saw sharks, eels, and some neat purple-tailed fish. By the end of the dive, I started to feel tired, and also felt hungry. Those are the two signs I feel underwater that probably translate to being low, so I was the first from our group to come up when we got back from the boat. I got on the boat, removed gear, dried hands, tested, and…yep. 73 mg/dl. Not a bad low, but I’m glad I stopped when I did, because it’s always better to be sure and safe than not know. I had a few skittles while reconnecting my pump, and otherwise was fine and enjoyed the rest of the experience including some epic dolphin and whale watching on the return boat ride back to the harbor!
    • Pro tip #4 for scuba diving with diabetes: You may or may not be able to feel lows underwater; but listening to your body and using your brain to pay attention to changes, about low or not, is always a really good idea when scuba diving. I haven’t dived enough  (7 dives total now?) or had enough lows while diving to know for sure what my underwater low symptoms are, but fatigue + hunger are very obvious to me underwater. Again, you may want to dive with a buddy and have a signal (like pointing to the part of your body that has the CGM) if you want to go up and check things out. Some things I read years ago talked about consuming glucose under water, but that seems above my skill level so I don’t think I’ll be the type of diver who does that – I’d rather come to the surface and have someone hand me from the boat something to eat, or shorten the dive and get back on the boat/on shore to take care of things.

All things considered, scuba diving with diabetes is just like anything else with diabetes – it mostly just takes planning ahead, extra snacks (and extra baggies) to have on hand, and you can do it just like anyone else. (The real pain and suffering of scuba diving in my opinion comes not from high or low BGs; but rather pulling hair out of your mask when you take it off after a dive! Every time = ouch.)

Snorkeling with diabetes:

  • Most of my snorkeling experiences/tips sound very similar to the scuba diving ones, so read the above if you haven’t. Remember:
    • Don’t go into a snorkel with tons of positive IOB.
    • Have easy-access glucose supplies in the outer pockets of your bag – you don’t want to have to be digging into the bottom of your beach bag to get skittles out when you’re low!
    • Sunscreen your back well 😉 but don’t over-sunscreen the adhesive on sites and sensors!
    • Make sure your pump doesn’t get too hot while you’re out snorkeling if you leave it on the beach (cover it with something).
    • You could possibly do baggies inside a waterproof bag and take your pump/cgm/phone out into the water with you. I did that two years ago when I didn’t trust leaving my pump/receiver/phone on shore, but even with a certified waterproof bag I spent more time worrying about that than I did enjoying the snorkel. Stash your pump/gear in a backpack and cover it with a towel, or stick it in the trunk/glove compartment of your car, etc.
    • Remember CGMs may not read right away, or may read falsely high, so fingerstick before correcting for any highs or otherwise dosing if needed.

Swimming with diabetes:

  • Same deal as the above described activities, but with less equipment/worries. Biggest things to think about are keeping your gear protected from splashes which seem more common poolside than oceanside…and remember to take your pump off, phone or receiver out of your pocket, etc. before getting in the water!

Wait, all of this has been about pump/CGM. What about closed looping? Can you #OpenAPS in the water?

    • If you don’t have your pump on (in the water), and you don’t have CGM data (in the water, because it can’t transmit there), you can’t loop. So for the most part, you don’t closed loop DURING these activities, but it can be incredibly helpful (especially afterward to make up for the missing basal insulin) to have once you get your pump back on.

However, if your CGM is reading falsely high because it’s waterlogged, you may want to set a high temporary target or turn your rig off during that time until it normalizes. And follow all the same precautions about baggies/waterproofing your rig, because unlike the pump, it’s not designed for even getting the lightest of splashes on it, so treat it like you treat your laptop. For my Hawaii trip, I often had my #OpenAPS rig in a baggie inside of my bag, so that when my pump was on and un-suspended and I had CGM data, it would loop – however, I kept a closer eye on my BGs in general, including how the loop was behaving, in the hour following water activities since I know CGM is questionable during this time.

I’m really glad I didn’t let diabetes stop me from trying scuba diving, and I hope blog posts like this help you figure out how you need to plan ahead for trying new water activites. I’m thankful for technology of pumps and CGMs and tools like #OpenAPS that make it even easier for us to go climb mountains and scuba dive while living with diabetes (although not in the same day ;)).

UPDATE in 2023: I went scuba diving recently using a Dexcom G6, and it did not have any issues once out of the water with falsely high readings! It reconnected instantly (no delay) to my phone once I was back in range and backfilled correctly and had a correct value for the most recent value. So, this is a huge improvement beyond what I described above with earlier generation (e.g., G4 and G5) sensors, but it still has the downside that it can’t transmit data underwater. You can also read here about how I use Libre for underwater reading when I’m doing several water activities and find it worth my while to invest in a single Libre sensor for having CGM data underwater.

Autotune (automatically assessing basal rates, ISF, and carb ratio with #OpenAPS – and even without it!)

What if, instead of guessing needed changes (the current most used method) basal rates, ISF, and carb ratios…we could use data to empirically determine how these ratios should be adjusted?

Meet autotune.

What if we could use data to determine basal rates, ISF and carb ratio? Meet autotune

Historically, most people have guessed basal rates, ISF, and carb ratios. Their doctors may use things like the “rule of 1500” or “1800” or body weight. But, that’s all a general starting place. Over time, people have to manually tweak these underlying basals and ratios in order to best live life with type 1 diabetes. It’s hard to do this manually, and know if you’re overcompensating with meal boluses (aka an incorrect carb ratio) for basal, or over-basaling to compensate for meal times or an incorrect ISF.
And why do these values matter?

It’s not just about manually dosing with this information. But importantly, for most DIY closed loops (like #OpenAPS), dose adjustments are made based on the underlying basals, ISF, and carb ratio. For someone with reasonably tuned basals and ratios, that’s works great. But for someone with values that are way off, it means the system can’t help them adjust as much as someone with well-tuned values. It’ll still help, but it’ll be a fraction as powerful as it could be for that person.

There wasn’t much we could do about that…at first. We designed OpenAPS to fall back to whatever values people had in their pumps, because that’s what the person/their doctor had decided was best. However, we know some people’s aren’t that great, for a variety of reasons. (Growth, activity changes, hormonal cycles, diet and lifestyle changes – to name a few. Aka, life.)

With autosensitivity, we were able to start to assess when actual BG deltas were off compared to what the system predicted should be happening. And with that assessment, it would dynamically adjust ISF, basals, and targets to adjust. However, a common reaction was people seeing the autosens result (based on 24 hours data) and assume that mean that their underlying ISF/basal should be changed. But that’s not the case for two reasons. First, a 24 hour period shouldn’t be what determines those changes. Second, with autosens we cannot tell apart the effects of basals vs. the effect of ISF.

Autotune, by contrast, is designed to iteratively adjust basals, ISF, and carb ratio over the course of weeks – based on a longer stretch of data. Because it makes changes more slowly than autosens, autotune ends up drawing on a larger pool of data, and is therefore able to differentiate whether and how basals and/or ISF need to be adjusted, and also whether carb ratio needs to be changed. Whereas we don’t recommend changing basals or ISF based on the output of autosens (because it’s only looking at 24h of data, and can’t tell apart the effects of basals vs. the effect of ISF), autotune is intended to be used to help guide basal, ISF, and carb ratio changes because it’s tracking trends over a large period of time.

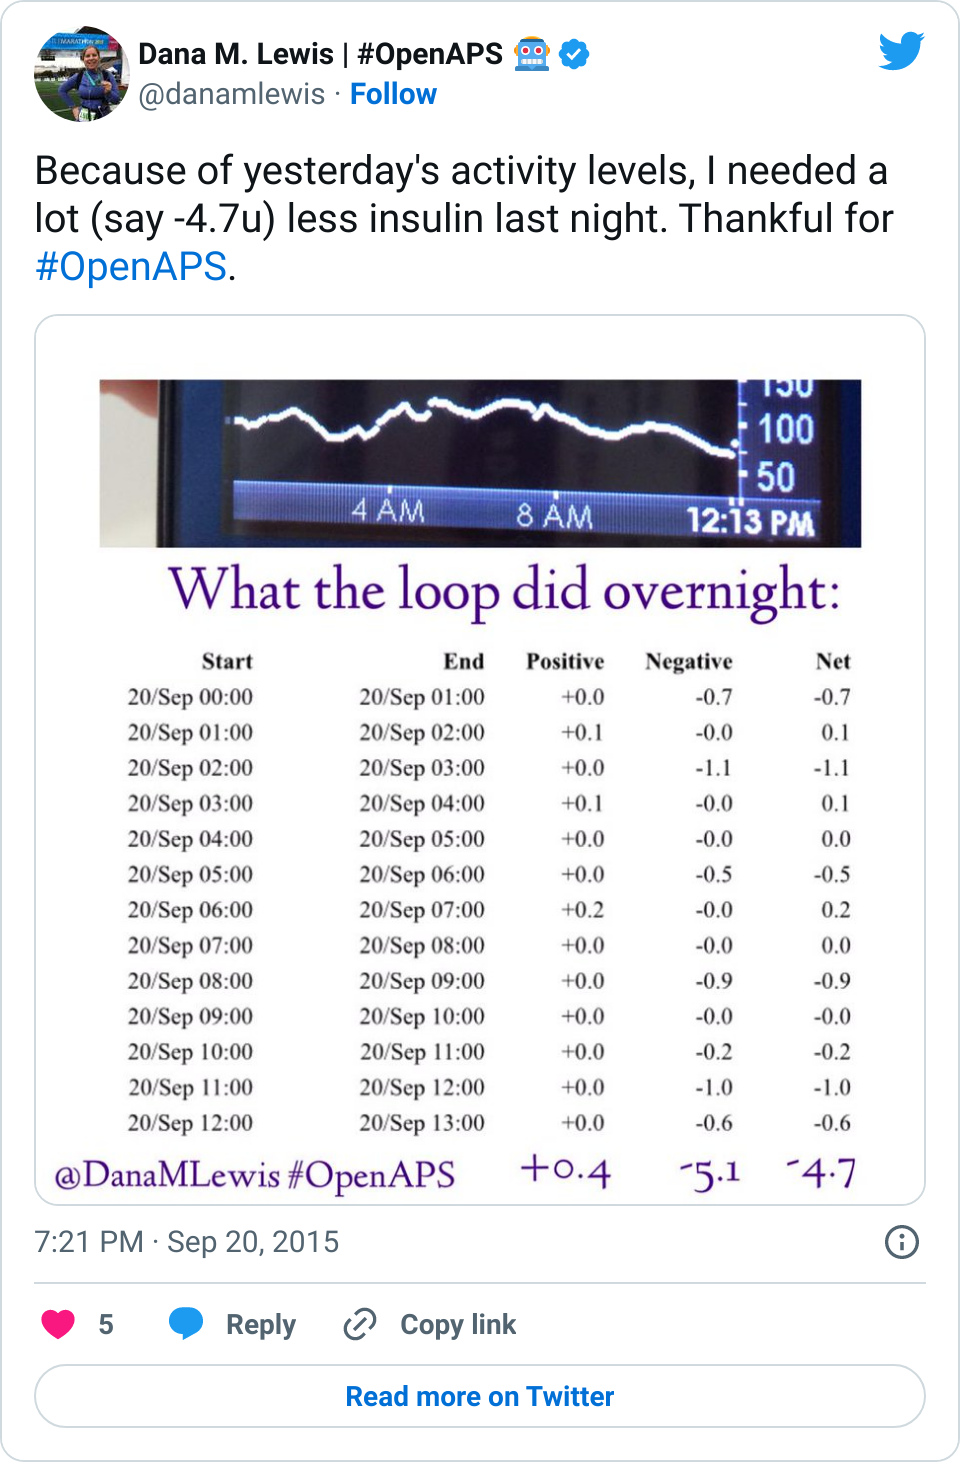
Ideally, for those of us using DIY closed loops like OpenAPS, you can run autotune iteratively inside the closed loop, and let it tune basals, ISF, and carb ratio nightly and use those updated settings automatically. Like autosens, and everything else in OpenAPS, there are safety caps. Therefore, none of these parameters can be tuned beyond 20-30% from the underlying pump values. If someone’s autotune keeps recommending the maximum (20% more resistant, or 30% more sensitive) change over time, then it’s worth a conversation with their doctor about whether your underlying values need changing on the pump – and the person can take this report in to start the discussion.

Not everyone will want to let it run iteratively, though – not to mention, we want it to be useful to anyone, regardless of which DIY closed loop they choose to use – or not! Ideally, this can be run one-off by anyone with Nightscout data of BG and insulin treatments. (Note – I wrote this blog post on a Friday night saying “There’s still some more work that needs to be done to make it easier to run as a one-off (and test it with people who aren’t looping but have the right data)…but this is the goal of autotune!” And as by Saturday morning, we had volunteers who sat down with us and within 1-2 hours had it figured out and documented! True #WeAreNotWaiting. :))

And from what we know, this may be the first tool to help actually make data-driven recommendations on how to change basal rates, ISF, and carb ratios.

How autotune works:

Step 1: Autotune-prep

  • Autotune-prep takes three things initially: glucose data; treatments data; and starting profile (originally from pump; afterwards autotune will set a profile)
  • It calculates BGI and deviation for each glucose value based on treatments
  • Then, it categorizes each glucose value as attributable to either carb sensitivity factor (CSF), ISF, or basals
  • To determine if a “datum” is attributable to CSF, carbs on board (COB) are calculated and decayed over time based on observed BGI deviations, using the same algorithm used by Advanced Meal Asssit. Glucose values after carb entry are attributed to CSF until COB = 0 and BGI deviation <= 0. Subsequent data is attributed as ISF or basals.
  • If BGI is positive (meaning insulin activity is negative), BGI is smaller than 1/4 of basal BGI, or average delta is positive, that data is attributed to basals.
  • Otherwise, the data is attributed to ISF.
  • All this data is output to a single file with 3 sections: ISF, CSF, and basals.

Step 2: Autotune-core

  • Autotune-core reads the prepped glucose file with 3 sections. It calculates what adjustments should be made to ISF, CSF, and basals accordingly.
  • For basals, it divides the day into hour long increments. It calculates the total deviations for that hour increment and calculates what change in basal would be required to adjust those deviations to 0. It then applies 20% of that change needed to the three hours prior (because of insulin impact time). If increasing basal, it increases each of the 3 hour increments by the same amount. If decreasing basal, it does so proportionally, so the biggest basal is reduced the most.
  • For ISF, it calculates the 50th percentile deviation for the entire day and determines how much ISF would need to change to get that deviation to 0. It applies 10% of that as an adjustment to ISF.
  • For CSF, it calculates the total deviations over all of the day’s mealtimes and compares to the deviations that are expected based on existing CSF and the known amount of carbs entered, and applies 10% of that adjustment to CSF.
  • Autotune applies a 20% limit on how much a given basal, or ISF or CSF, can vary from what is in the existing pump profile, so that if it’s running as part of your loop, autotune can’t get too far off without a chance for a human to review the changes.

(See more about how to run autotune here in the OpenAPS docs.)

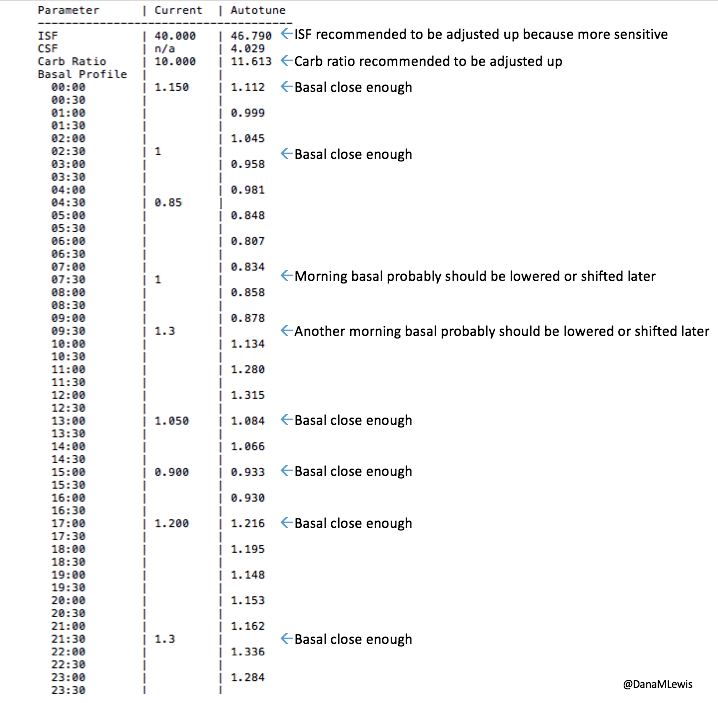
What autotune output looks like:

Here’s an example of autotune output.

OpenAPS autotune example by @DanaMLewis

Autotune is one of the things Scott and I spent time on over the holidays (and hinted about at the end of my development review of 2016 for OpenAPS). As always with #OpenAPS, it’s awesome to take an idea, get it coded up, get it tested with some early adopters/other developers within days, and continue to improve it!

Highlighting someone successfully using Autotune to help adjust baseline settings

A big thank you to those who’ve been testing and helping iterate on autotune (and of course, all other things OpenAPS). It’s currently in the dev branch of oref0 for anyone who wants to try it out, either one-off or for part of their dev loop. Documentation is currently here, and this is the issue in Github for logging feedback/input, along with sharing and asking questions as always in Gitter!


Our take on how to DIY closed loop, safely

You will often see similar growth and evolution cycles across any type of online community, and the closed loop community is following this growth cycle as expected. Much like how Nightscout went from one very hard way to setup to get your CGM data in the cloud, to ultimately having dozens of DIY options and now more recently, multiple commercial options, closed looping is following similar trends. OpenAPS was the first open source option for people who wanted to DIY loop, and now there are a growing number of ways to build or run closed loops! And next year, there should be at least one commercial option publicly available in the U.S. followed by several more options in 2018 on the commercial market. Awesome! This is exactly the progress we were hoping to see, and facilitate happening more quickly, by making our work & encouraging others to make their work open source.

We’ve learned a lot (from building our own closed loop and watching others do so through OpenAPS) that we think is relevant to anyone who pursues DIY closed looping, regardless of the technology option they choose. This thought process and approach will likely also be relevant to those who switch to a closed loop commercial option in the future, so we wanted to document some of the thought process that may be involved.

Approaching closed looping safely

Before considering closed looping, people should know:

  • A (hybrid or even full) closed loop is not a cure. There will be a learning curve, much like switching to a pump for the first time.
  • Even after you get comfortable with a closed loop, there will still sometimes be high or low BGs, because we are still dealing with insulin that peaks in 60-90 minutes; we’ll still get kinked pump sites or pooled insulin; and we’ll still have hormones that drive our BGs up and down very rapidly in ways we can’t predict, but must react to. Closed looping helps a lot, but there’s still a lot that goes into managing diabetes.
Before using a DIY closed loop, people should consider:

  • Identifying or creating the method to visualize their data in a way they are comfortable with, both for real-time monitoring of loop activity and retrospective monitoring. This is a key component of DIY looping.
  • Running in “open loop” mode, where the system provides recommendations and you spend days or weeks analyzing and comparing those recommendations to how you would calculate and choose to take action manually.
  • Based on watching the “open loop” suggestions, decide your safety limits: you should set max basal and bolus rates, as well as max net IOB limits where relevant. Start conservative, knowing you can change them over time as you watch and validate how a particular DIY loop works with your body and your lifestyle.

Getting started with a DIY closed loop, people should think about the following:

  • Understand how it works, so you know how to fix it. Remember, by pursuing a DIY closed loop, you are responsible for it and the operation of it. No one is forcing you to do this; it’s one of many choices you can and will make with regards to how you personally choose to manage your diabetes.
  • But even more importantly, you need to understand how it works so you can choose if you need to step in and take manual action. You should understand how it works so you can validate “this is what it should be doing” and “I am getting the output and outcomes that I would expect if I were doing this decision making manually”.
  • Often, people will get frustrated by diabetes and take actions that the loop then has to compensate for. Or they’ll get lax on when they meal bolus, or not enter carbs into the system, etc. You will get much better results by putting better data into the system, and also by having a better understanding of insulin timing in your body, especially at meal times. Using techniques like “eating soon mode” will dramatically help anyone, with or without a closed loop, reduce and limit severity of meal spikes. Ditto goes for having good CGM “calibration hygiene” (h/t to Pete for this phrase) and ensuring you have thought about the ramifications of automating insulin dosing based on CGM data, and how you may or may not want to loop if you doubt your CGM data. (Like “eating soon”, ‘soaking’ a CGM sensor may yield you better first day results.)
  • Start with higher targets for the loop than you might correct to manually.
  • Move first from an “open loop” mode to a “low glucose suspend” type mode first, where max net IOB is 0 and/or max basal is set at or just above your max daily scheduled basal, so it low temps to prevent and limit lows, but does not high temp above bringing net IOB back to 0.
  • Gradually increase max net IOB above 0 (and/or increase max basal) every few days after several days without low BGs; similarly, adjust targets down 10 points for every few days gone without experiencing low BGs.
  • Test basic algorithms and adjust targets and various max rates before moving on to testing advanced features. (It will be a lot easier to troubleshoot, and learn how a new feature works, if you’re not also adjusting to closed looping in its entirety).
This is our (Dana & Scott‘s) take on things to think about before and when pursuing a closed loop option. But there’s about a hundred others running around the world with closed loops, too, so if you have input to share with people that they should consider before looping, leave a comment below! :) And if you’re looking to DIY closed loop before a commercial solution is available, you might also be interested in checking out the OpenAPS Reference Design and some FAQs related to OpenAPS.

What we heard and saw at #DData16 and #2016ADA

As mentioned in the previous post, we had the privilege of coming to New Orleans this past weekend for two events – #DData16 and the American Diabetes Association Scientific Sessions (#2016ADA). A few things stuck out, which I wanted to highlight here.

At #DData16:

  • The focus was on artificial pancreas, and there was a great panel moderated by Howard Look with several of the AP makers. I was struck by how many of them referenced or made mention of #OpenAPS or the DIY/#WeAreNotWaiting movement, and the need for industry to collaborate with the DIY community (yes).
  • I was also floored when someone from Dexcom referenced having read one of my older blog posts that mentioned a question of why ??? was displayed to me instead of the information about what was actually going on with my sensor. It was a great reminder to me of how important it is for us to speak up and keep sharing our experiences and help device manufacturers know what we need for current and future products, the ones we use every day to help keep us alive.
  • Mark Wilson gave a PHENOMENAL presentation, using a great analogy about driving and accessing the dashboard to help people understand why people with diabetes might choose to DIY. He also talked about his experiences with #OpenAPS, and I highly recommend watching it. (Kudos to Wes for livestreaming it and making it broadly available to all – watch it here!) I’ve mentioned Mark & his DIY-ing here before, especially because one of his creations (the Urchin watchface) is one of my favorite ways to help me view my data, my way.
  • Howard DM’ed me in the middle of the day to ask if I minded going up as part of the patient panel of people with AP experiences. I wasn’t sure what the topic was, but the questions allowed us to talk about our experiences with AP (and in my case, I’ve been using a hybrid closed loop for something like 557 or so days at this point). I made several points about the need for a “plug n play” system, with modularity so I can choose the best pump, sensor, and algorithm for me – which may or may not be made all by the same company. (This is also FDA’s vision for the future, and Dr. Courtney Lias both gave a good presentation on this topic and was engaged in the event’s conversation all day!).

At #2016ADA:

  • There needs to be a patient research access program developed (not just by the American Diabetes Association for their future Scientific Sessions meetings, but at all scientific and academic conferences). Technology has enabled patients to make significant contributions to the medical and scientific fields, and cost and access are huge barriers to preventing this knowledge from scaling. At #2016ADA, “patient” is not even an option on the back of the registration form. Scott and I are privileged that we could potentially pay for this, but we don’t think we should have to pay ($410 for a day pass or $900 for a weekend pass) so much when we are not backed by industry or an academic organization of any sort. (As a side note, a big thank you to the many people who have a) engaged in discussion around this topic b) helped reach out to contacts at ADA to discuss this topic and c) asked about ways to contribute to the cost of us presenting this research this weekend.)
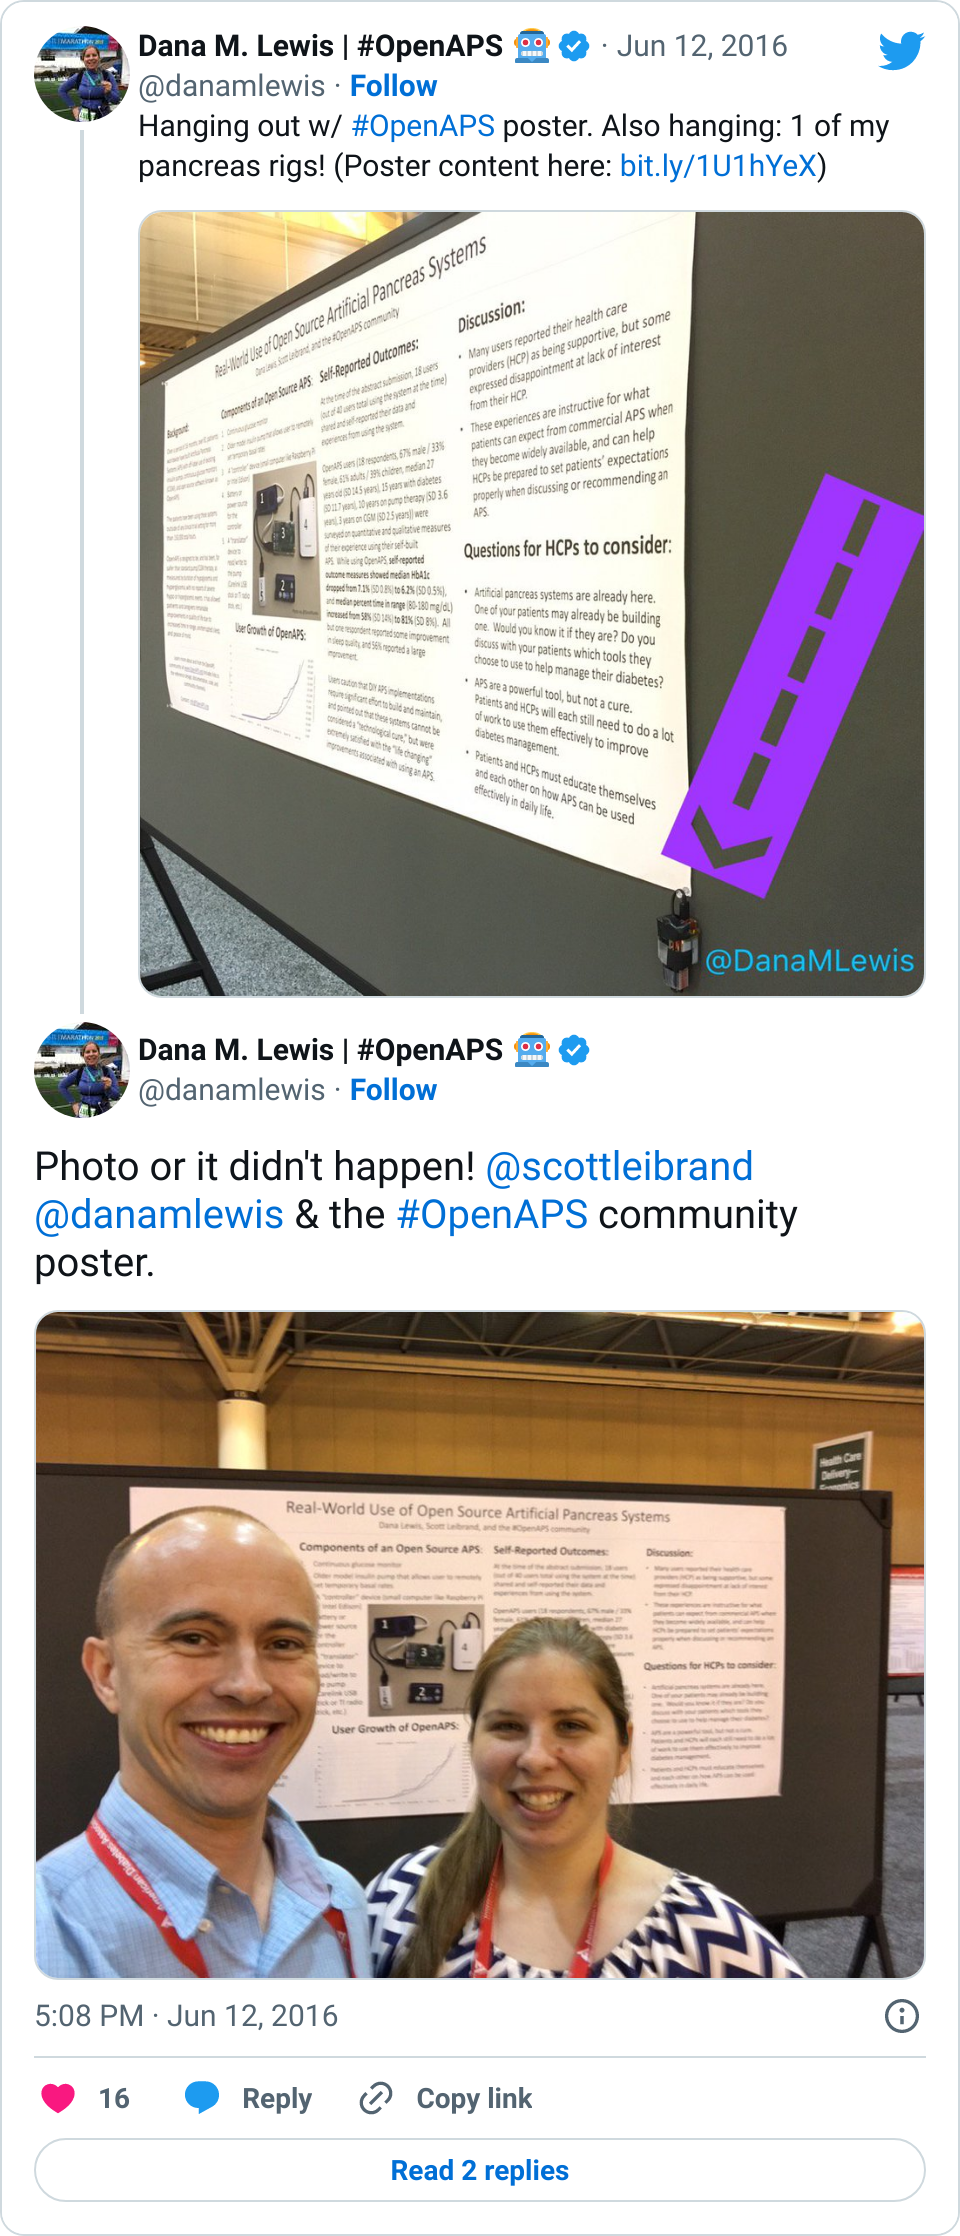
  • We presented research from 18 of the first 40 users of #OpenAPS. You can find the FULL CONTENT of our findings and the research poster content in this post on OpenAPS.org. We specifically posted our content online (and tweeted it out – see this thread) for a few reasons:
    • First, everything about #OpenAPS is open source. The content of our poster or any presentation is similarly open source.
    • Not everyone had time to come by the poster.
    • Not everyone has the privilege or funds to attend #2016ADA, and there’s no reason not to share this content online, especially when we will likely get more knowledge sharing as a result of doing so.
  • With the above in mind, we encouraged people stopping by to take whatever photos of our poster that they wanted, and told them about the content being posted online. (And in fact, in addition to the blog post about the poster, that information is now on the “Outcomes” page on OpenAPS.org.)
  • Frustratingly, some people were asked to take down posted photos of our poster. If anyone received such a note, please feel free to pass on my tweet that you have authorization by the authors to have taken/used the photo. This is another area (like the need to develop patient research access programs) that needs to be figured out by scientific/academic conferences – presenters/authors should be able to specifically allow sharing and dissemination of information that they are presenting.
  • Speaking of photos, I was surprised that around half a dozen clinicians (HCPs) stopped by and made mention of having used the picture of the #OpenAPS rig and the story of #OpenAPS in one of their presentations! I am thrilled this story is spreading, and being spread even by people we haven’t had direct contact with previously! (Feel free to use this photo in presentations, too, although I’d love to hear about your presentation and see a copy of it!)
  • We had many amazing conversations during the poster session on Sunday. It was scheduled for two hours (12-2pm), but we ended up being there around four hours and had hundreds of fantastic dialogues. Here were some of the most common themes of conversation:
    • Why are patients doing this?
      • Here’s my why: I originally needed louder alarms, built a smart alarm system that had predictive alerts and turned into an open loop system, and ultimately realized I could close the loop.
    • What can we learn from the people who are DIY-ing?
    • How can we further study the DIY closed loop community?
      • This is my second favorite topic, which touches on a few things – 1) the plan to do a follow up study of the larger cohort (since we now have (n=1)*84 loopers) with a full retrospective analysis of the data rather than just self-reported outcomes, as this study used; 2) ideas around doing a comparison study between one or more of the #OpenAPS algorithms and some of the commercial or academic algorithms; 3) ideas to use some of the #OpenAPS-developed tools (like a basal tuning tool that we are planning to build) in a clinical trial to help HCPs help patients adjust more quickly and easily to pump therapy.
    • What other pumps will work with this? How can there be more access to this type of DIY technology?
      • We utilize older pumps that allow us to send temp basal commands; we would love to use a more modern pump that’s able to be purchased on the market today, and had several conversations with device manufacturers about how that might be possible;  we’ll continue to have these conversations until it becomes a reality.
  • There is some great coverage coming of the poster & the #OpenAPS community, and I’ll post links here as I see them come out. For starters, Dave deBronkart did a 22 minute interview with Scott & I, which you can see here. DiabetesMine also included mention of the #OpenAPS poster in their conference roundup. And diaTribe wrote up the the poster as a “new now next”! Plus, WebMD wrote an article on #OpenAPS and the poster as well.
A picture of our #ADA2016 poster in the exhibit hall

Scott and I walked away from this weekend with energy for new collaborations (and new contacts for clinical trial and retrospective analysis partnerships) and several ideas for the next phase of studies that we want to plan in partnership with the #OpenAPS community. (We were blown away to discover that OpenAPS advanced meal assist algorithm is considered by some experts to be one of the most advanced and aggressive algorithms in existence for managing post-meal BG, and may be more advanced than anything that has yet been tested in clinical trials.) Stay tuned for more!

The second year of #DIYPS (and my first full year with a closed loop)

As we developed #DIYPS from a louder alarm system to a proactive alert system (details here about the original #DIYPS system before we closed the loop) to a closed loop that would auto-adjust my insulin pump basal rates as-needed overnight, I have been tracking the outcomes.

There were the first few nights of “wow! this works! I wake up at night when I’m high/low”. Then there were the first 100 nights that involved more iteration, testing, and improvements as we built it out more. And then suddenly it had been a year of using #DIYPS, and it was awesome to see how my average BG and a1c were down – and stayed down – while equally as important, my % time in range was up and stayed up. Not to mention, the quality of life improvements of having better nights of sleep were significant.

Year two has been along the same lines – more improvements on A1c/average BGs, time in range, and sleep – but heavily augmented by the fact that I now have a closed loop. If you follow me on Twitter or have checked out the hashtag, you might be tired of seeing me post CGM graphs. At this point, they all look very similar:

Looping for over a year and OpenAPS still successfully preventing overnight hypoglycemia Overnight safely looping with OpenAPS

(It’s worth noting that I still use #DIYPS, especially during the day to trigger “eating-soon” mode or basically get a snapshot glance at what my BGs are predicted to be, especially if I plan to go out without my loop in tow.)

In this past year, we also went from closing the loop with the #DIYPS algorithms (which required internet connectivity so I could tell the system when I was having carbs), to deciding we wanted to find a way to make it possible for more people to safely DIY a closed loop. (And, we feel very strongly that the DIY part of closing the loop is very important and deciding to do so is a very personal question.)

Thus, #OpenAPS was born in February 2015. Ben West spent a lot of time in 2015 building out the openaps toolkit to enable communication with diabetes devices to make things like closed loops possible. And so the first few months of #OpenAPS seemed slow, while we were busy working on the toolkit and finding ways to take what we learned with the #DIYPS closed loop and model a closed loop that didn’t require knowledge of carbs and could work without internet connectivity (see more about the #OpenAPS reference design here).

In July, we saw a tipping point – multiple other people began to close the loop, despite the fact that we didn’t have very much documented or available to guide them beyond the reference design. (These first couple of folks are incredible! Watch the #OpenAPS hashtag on Twitter to see them share some of their experiences.) With their help, the documentation has grown by leaps and bounds, as has the number of people who were subsequently able to close the loop.

As of 12/31/15 as I write this post, there are 22 people who have told me that they have a closed loop running that’s based on the OpenAPS reference design. I make a big deal about marking the date when I make a statement about the number of people running #OpenAPS (i.e. (n=1)*22), because every time I turn around, someone else seems to have done it!

It’s so exciting to see what’s happened in 2015, and what this type of #WeAreNotWaiting spirit has enabled. For Scott & me this year: we’ve climbed mountains around the world (from Machu Picchu to Switzerland), gotten married, changed jobs, and explored Europe together. Diabetes was there, but it wasn’t the focus.

There are dozens of other amazing stories like this in the #WeAreNotWaiting community. As we look to the new year, and I start to wonder about what might be next, I realize the speed of technology and the spirit of ingenuity in this community makes it impossible to predict exactly what we’ll see in 2016.

What I do know is this: we’ll see more people closing the loop, and we’ll see more ways to close the loop, using devices other than the Raspberry Pi, Carelink stick and Medtronic pump.  We’ll see more new ways to communicate with old & new diabetes devices and more ways to make the diabetes parts of our lives easier – all because #WeAreNotWaiting.

The power of visualizing your data, your way

Sometimes, it’s the little things that make a big difference – even little glimpses of data, or little improvements to ways that you can control the way you access and view your data (and generate alarms).

For example, I recently had a conversation with a few people in the #WeAreNotWaiting community about the different watch faces that exist for displaying CGM data; and about how much I like my #DIYPS watch face. A few reasons why:

  • It’s a little more discreet than some watch faces showing BG data, so the average person won’t glance at my watch and see a large number.
  • It pulls from the #DIYPS interface, so I can see what I’m predicted to be, and any current recommendations (such as carbs, temp basal, or bolus needed).
DIYPS watchface showing Dana M. Lewis's OpenAPS data

It’s data-heavy, but I like having all this information without having to pull my CGM out and run calculations in my head; or pull out my phone and pull up a web page to #DIYPS; etc.

One of the many cool things about the #WeAreNotWaiting community is how together we have learned and created so many new ways to visualize our data, on various devices (tablets, phones, smart watches) and various size screens. And so when I hear that someone’s not wanting a smart watch, or isn’t using it for diabetes related things, sometimes I think it’s a matter of them finding the right tools to build their own display that works for them. Several times a week I hear about various people working on new, interesting DIY diabetes projects, and it’s awesome that we have tech to improve the tools we have – and excellent social media channels to communicate about these projects.

Related to that, I wanted to share an update – recently Milos, Jason, and others have done some really amazing work to visualize basal rates in Nightscout. (If you use Nightscout, you can get this in the 0.8.2 release – see here for more details.) This means it also can pull in temporary basal rates that are used in #OpenAPS, so you can get a nice visual showing the adjusted basal rate compared to normal scheduled basal rates – and see why it might be needed – on top of display of BG data and everything else that Nightscout offers.

Showing a fake drop in CGM glucose data that is a compression drop

In this example, it also shows how OpenAPS deals with compression drops, or how it might react to other flukey data. Remember, we designed OpenAPS to only enact 30 minute temporary basal rates in a way that is the safest possible thing to do, even if it loses communication. But if it keeps communication, and the system sees a drop and a return to the normal pattern from before (see visual), it can counteract a low temp with higher temp, or vice versa.

The visualization of temp basals in Nightscout (another example here) is an excellent improvement over how I previously used to check and see what OpenAPS had been doing. I have a watchface (similar to the above #DIYPS one) that shows me what the loop is doing currently, but when I wake up in the morning, I was mostly using a basic screen like the below to see the positive, negative, and net temp basal rates on an hourly basis and comparing that to my CGM graph to get an understanding of what happened.

Less insulin needed and OpenAPS reduced accordingly

Visualizing basal rates in Nightscout is a seemingly minor change, but every time we make a change like this that allows me to contextualize all of my data in one place (on a single glanceable watchface; or on the Nightscout screen); it saves a few seconds or minutes that add up to a lot of time saved every day, week, month, and additional year that I’m dealing with diabetes – a big win.