Scuba diving with a flash glucose monitor (Libre)

Scuba_Flash_Glucose_Monitoring_DanaMLewisI just went scuba diving in Australia* at the Great Barrier Reef, and I took a flash glucose monitor (Libre) with me under the water.

WHAT! Yes, really. Scuba diving with a Libre. (Your mileage may vary, of course! The Libre receiver is not waterproof in of itself, and obviously not rated/tested for depth. I did some of that testing for myself. See below 😉 )

Historically (and you can read more in this post for more detail on what else I do regarding pump, CGM, and everything else for scuba diving with diabetes and other diabetes devices),  I only had a CGM that did not work underwater, and did not work for around an hour after I went diving since it would get waterlogged.

A few months ago when Libre was FDA approved in the US, I paid cash out of pocket (for a receiver + 3 sensors) to try it to see how it did compared to my CGM.  For most purposes, a CGM still makes sense for me, because I rely on it for closed looping, and on its low and high glucose alarms.  But I know from previous dives and other water activities that my CGM doesn’t work well after a long time in (deep) salt water: I often get false-positive highs for an hour (or more) afterward.  So for this trip, I was thinking I would wear a Libre sensor for the dive trip, and just scan when I got out of the water, so I didn’t have to do a fingerstick test after every dive.

In the weeks leading up to our trip, I also saw a picture and heard rumblings of people going scuba diving and taking their Libre receiver under the water. I couldn’t find any details about it, though: What case? What depth? etc. ARGH.

So we decided to pick out a waterproof phone case and just give it a try during our trip. Worst case, we’d just ruin the receiver. Scott found this waterproof phone case/bag (<–Amazon affiliate link) and ordered it, and I packed it for the trip. Probably other similar phone cases would work, too – brand likely doesn’t matter, but you obviously would want a case that’s not going to leak, and should perform a leak test on it before you leave home.

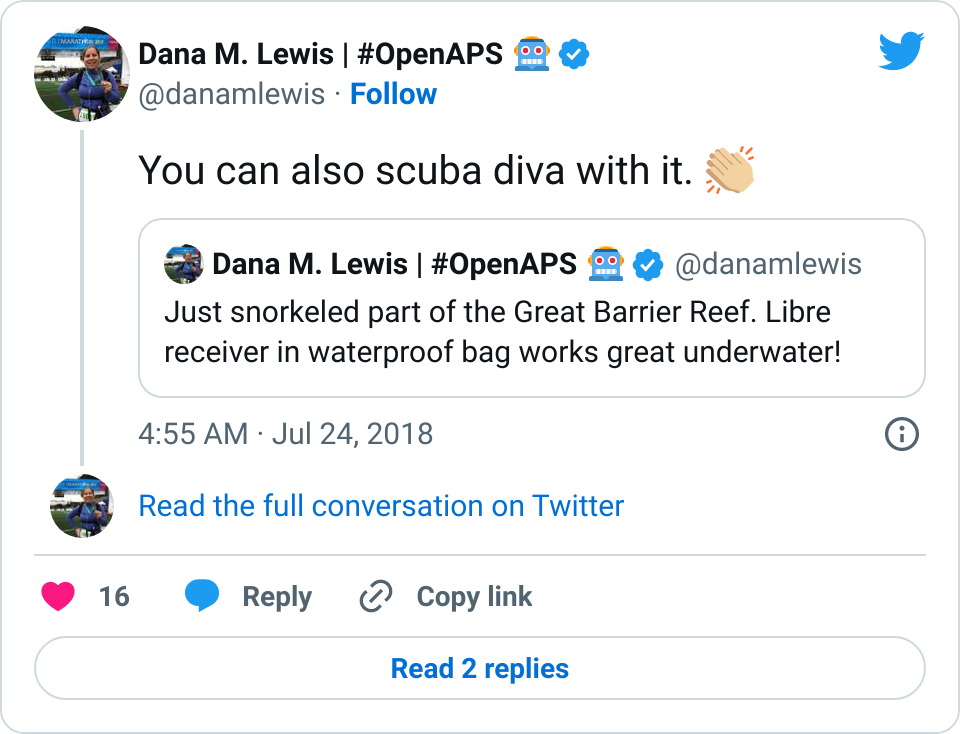
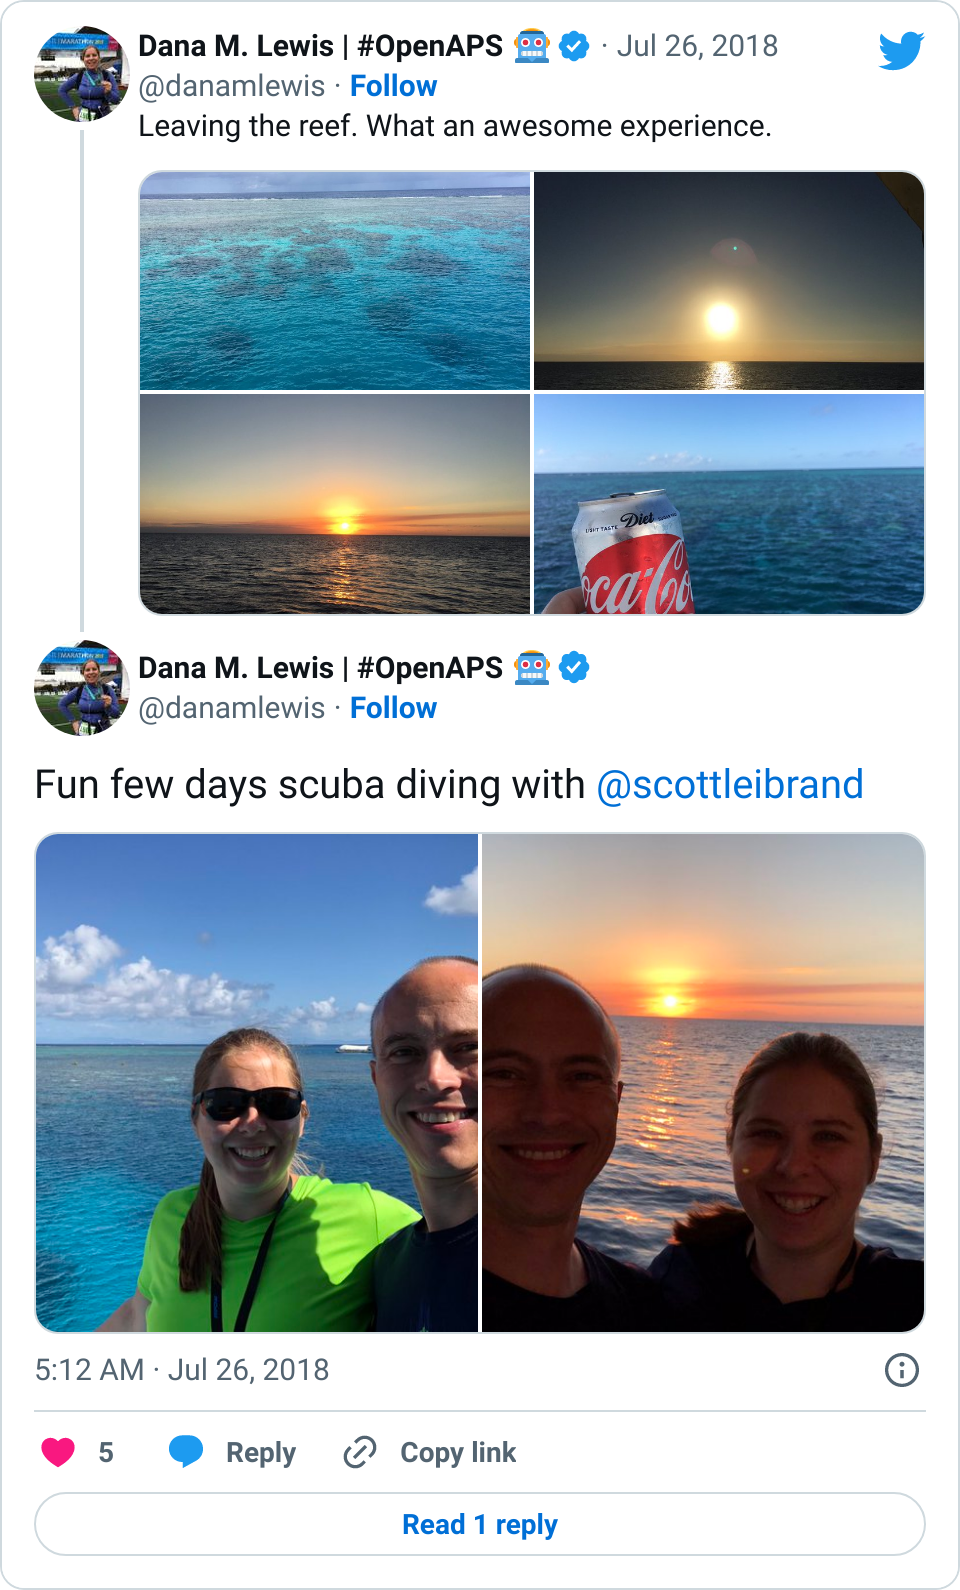
We did a “liveaboard” for 3 days and 2 nights (really, ~48 hours on the boat). There’s a transfer boat that takes you out to the “liveaboard”, which is essentially a floating hotel. When you get there, you’re allowed to do a snorkel session before lunch; the first dive briefing is after lunch, and you can then dive during the sessions (max 3 day dives total and 1 night dive) after that during your stay. All this detail to explain that we popped the Libre receiver in the waterproof bag and took it into the water with us when we went snorkeling. And it worked great! So that gave me the courage I needed to take it down during our first dive.

You can scuba dive with a CGM receiver in a waterproof bag

The waterproof case had a strap where you could wear it around your neck, which is what I did. That ended up being annoying occasionally (because the bag would float above you during the die, and sometimes got caught on my snorkel), but it worked. (For future trips I’d probably find a stretchy cord to attach it to my BCD where it was accessible but didn’t have to float or be hung around my neck.)

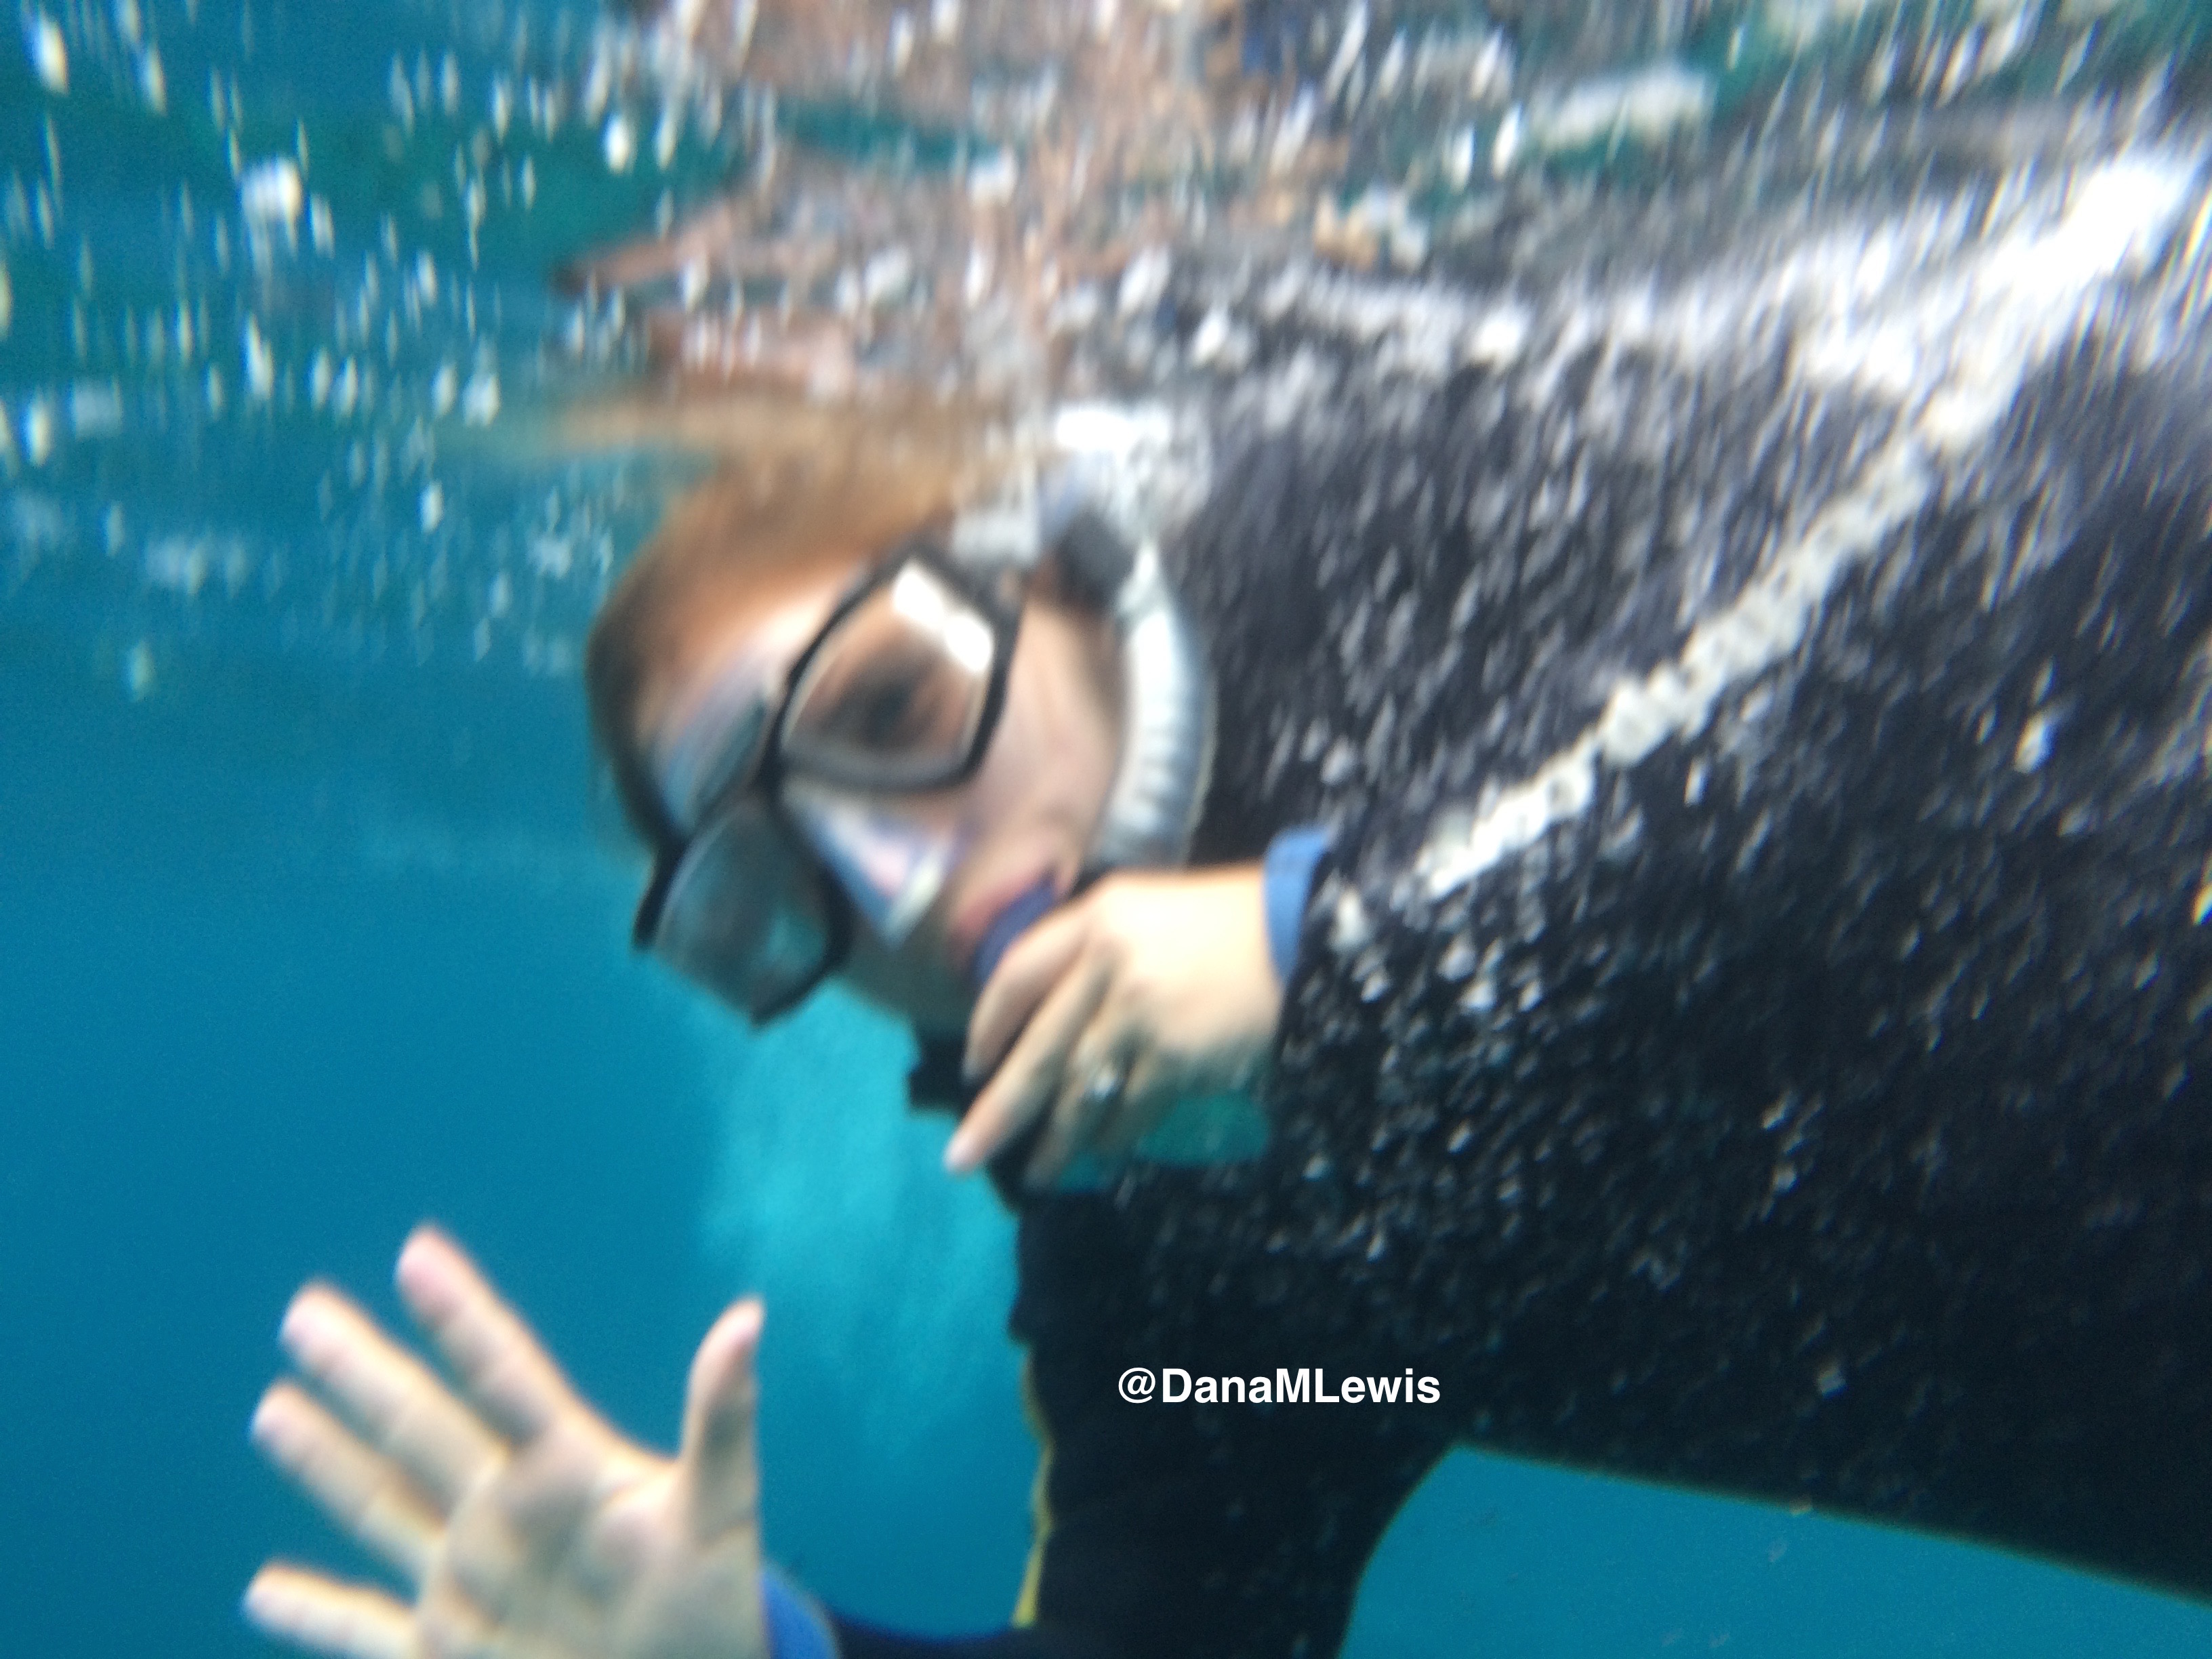
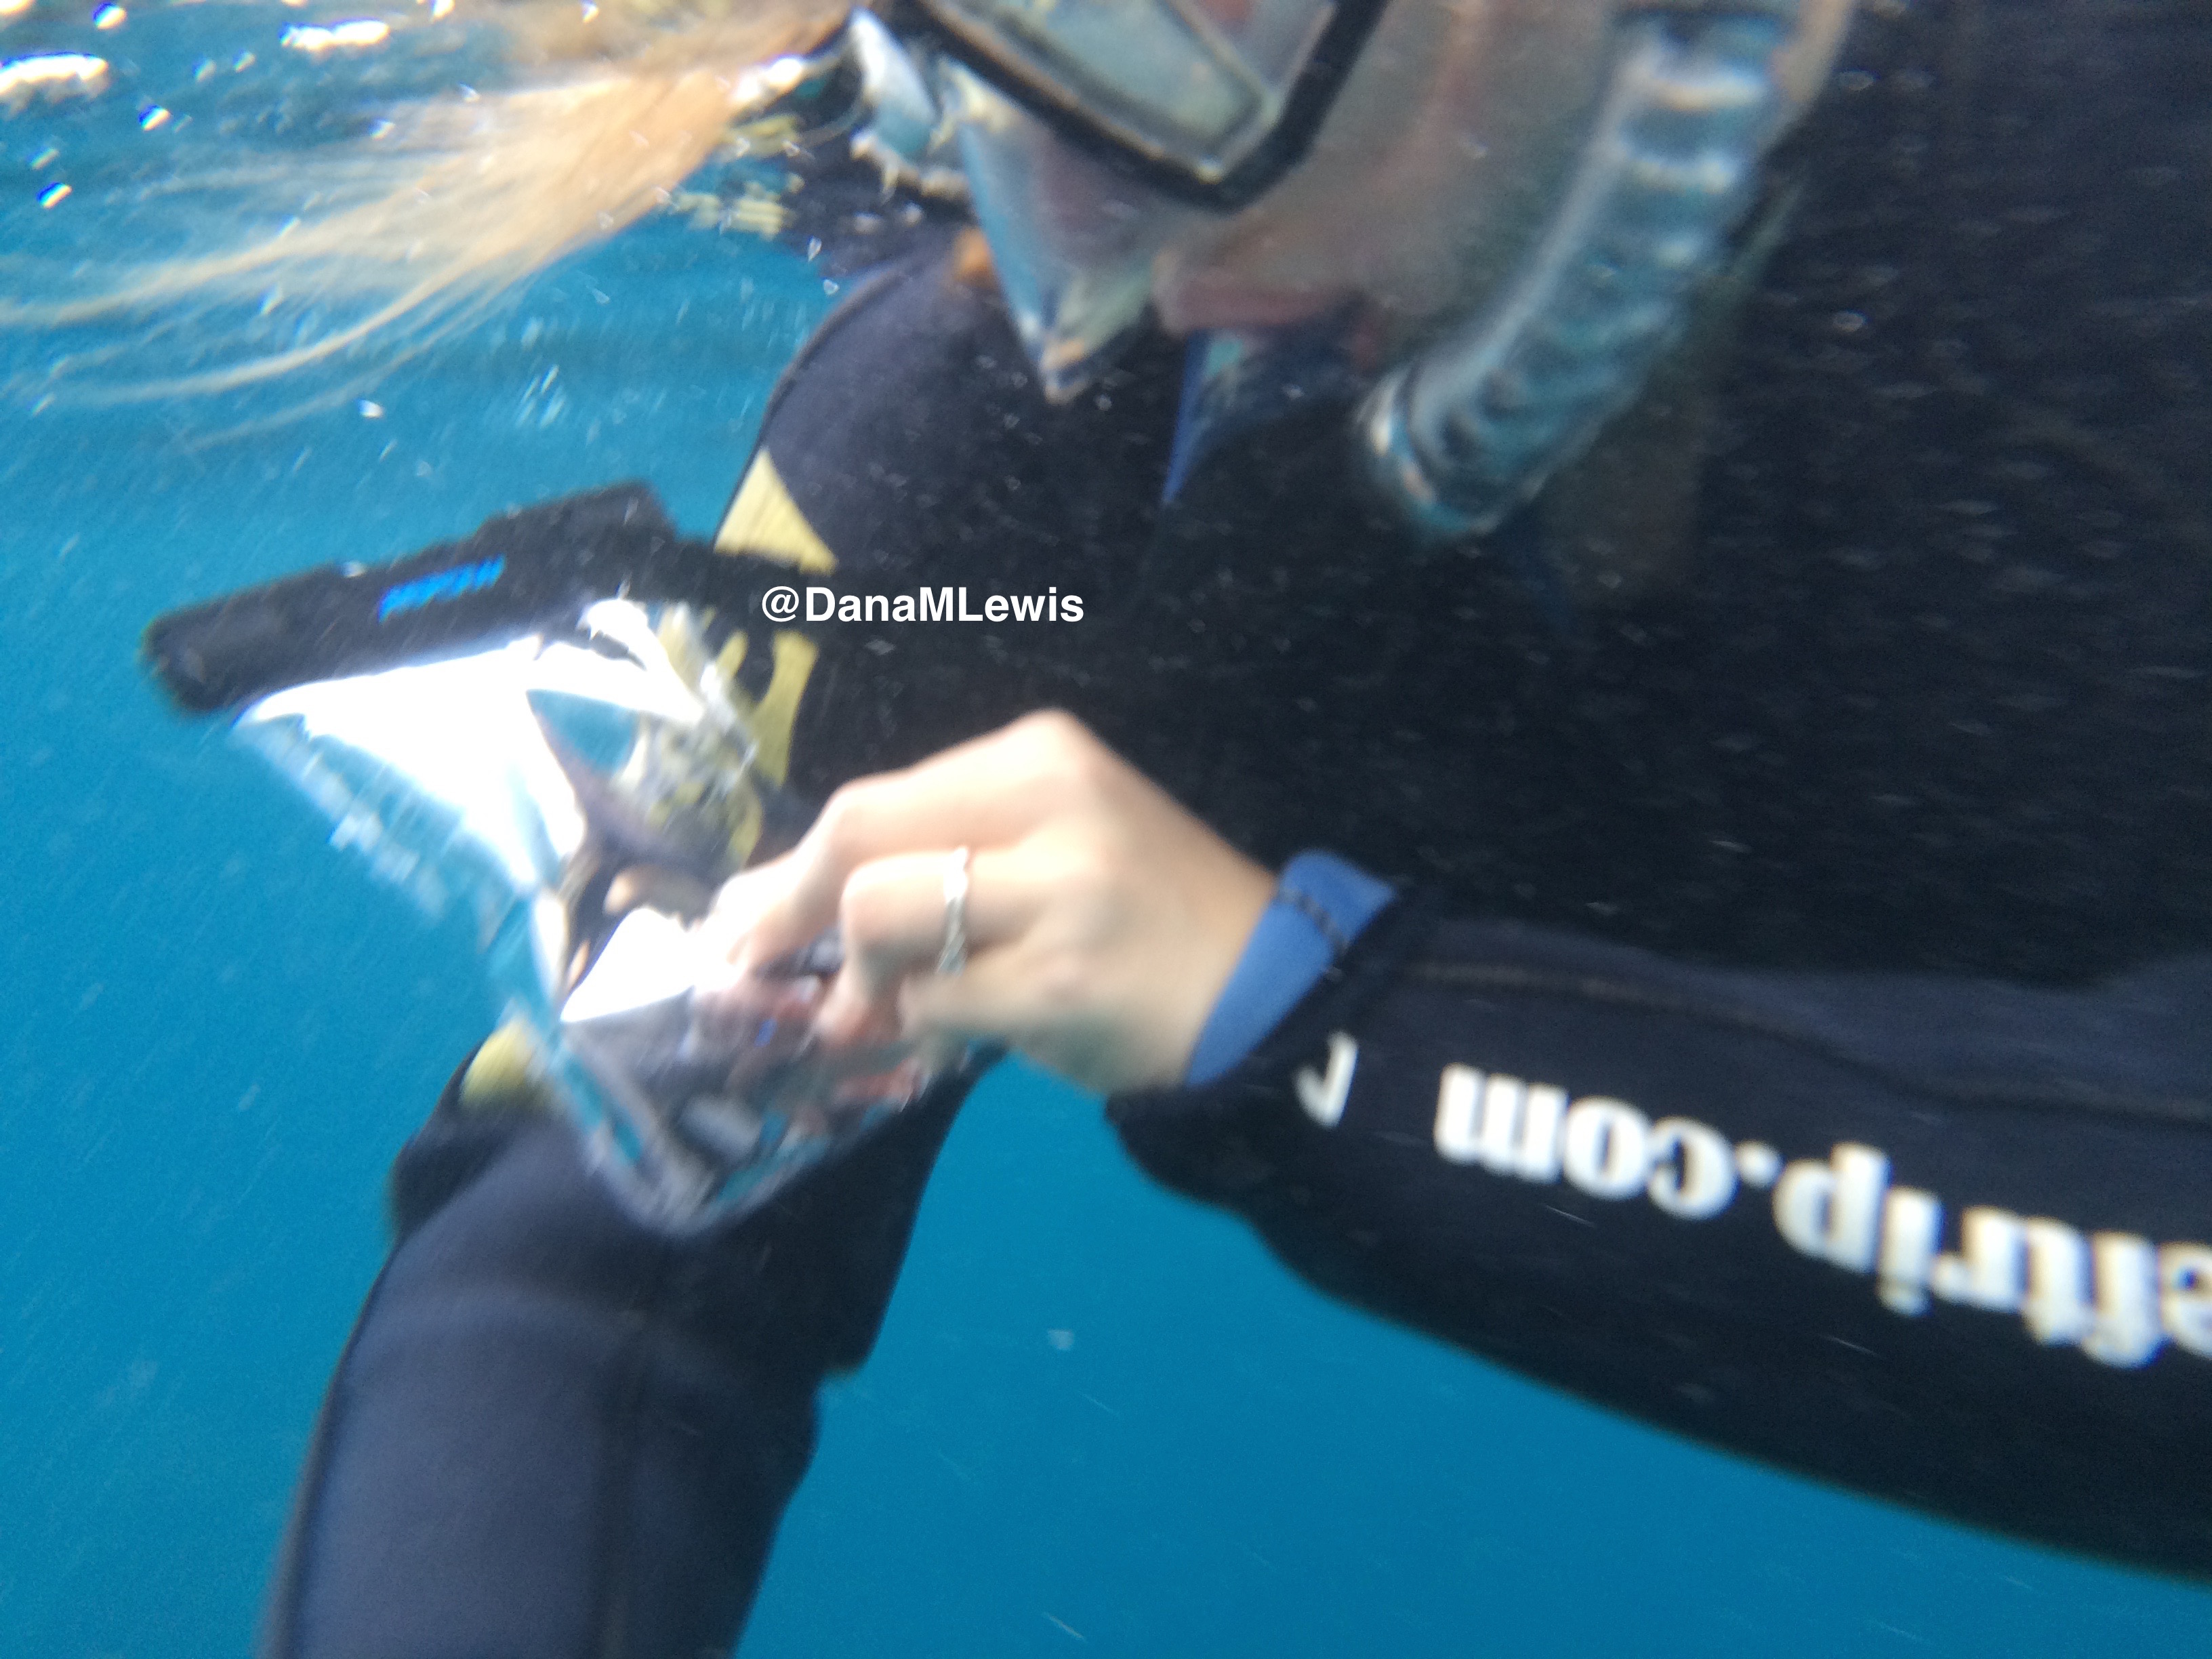
I wore two wetsuits (I get cold easily!), and even with two layers of wetsuit; the waterproof case; and you know, the water – I was still able to easily press the button on the Libre receiver through the bag, swipe it over my arm, and pick up a BG reading! It was super cool for it to work. The hardest part: finding the Libre sensor under 2 layers of wetsuit on my arm.

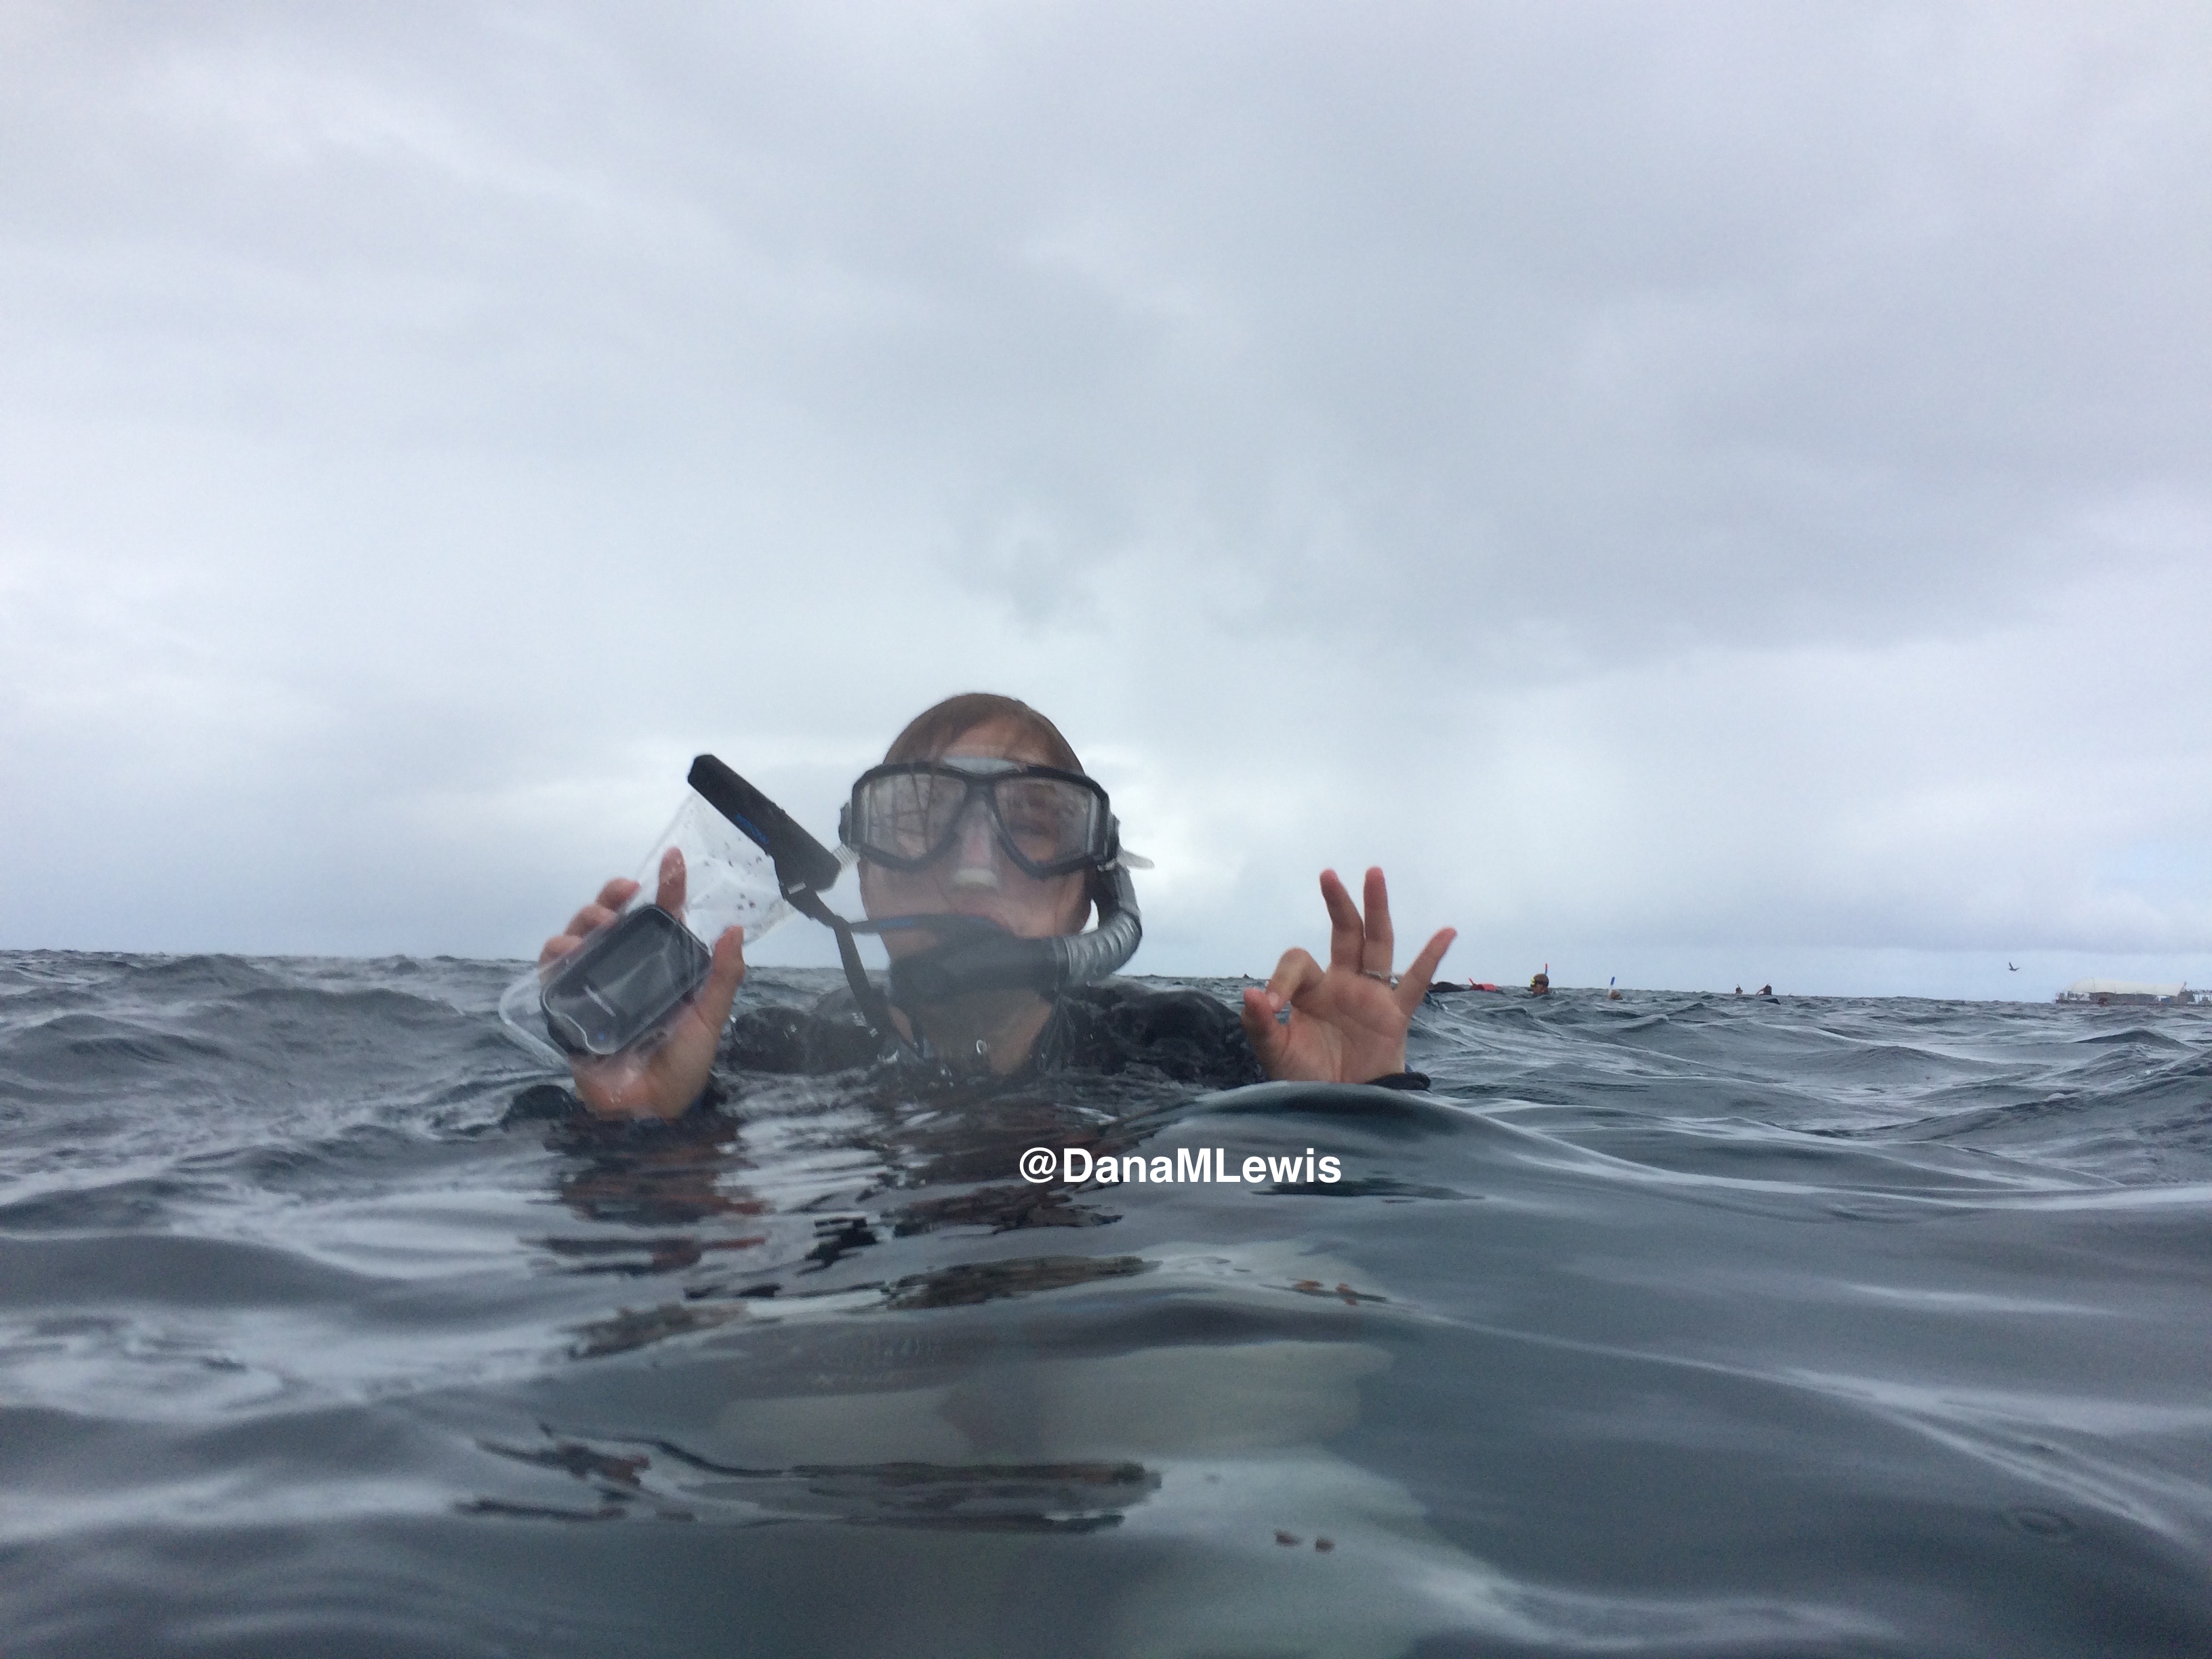
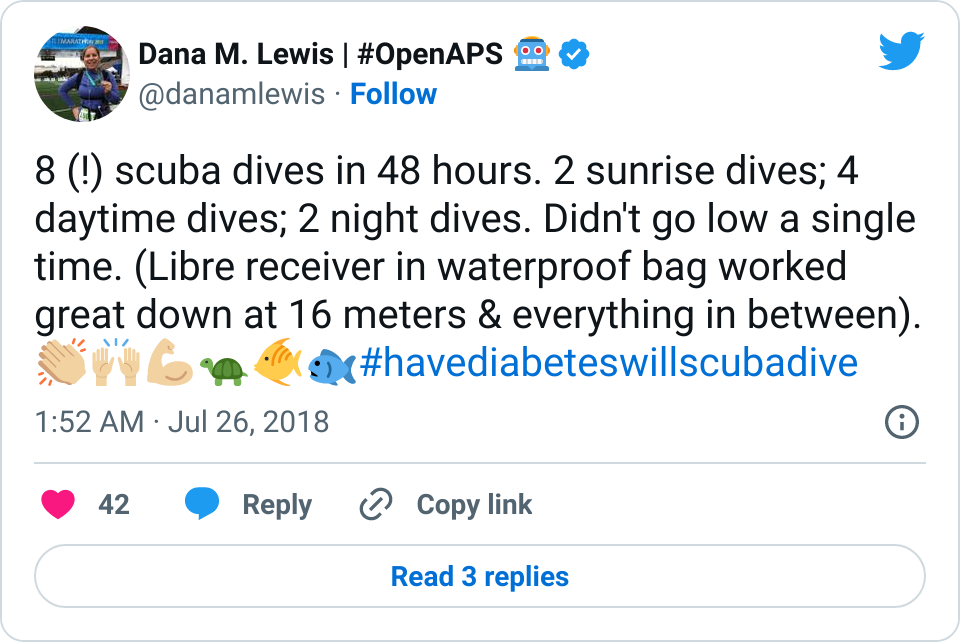
The first few dives were somewhat shallow – 9-12 meters of depth, but over the course of all my dives, I ended up testing it down to 16 meters. I also tested it on 9 total sessions – 1 snorkel, 2 morning sunrise dives, 2 night dives (whoa), and 4 daytime dives. The bag did fine throughout each submersion and never leaked.

We did 8 scuba dives in 48 hours, all with a CGM that worked in the water

I was also expecting the sensor to peel up, so I did four strips of flexifix tape (like I do to my CGM sensor) around the outside edges of the sensor. The tape itself didn’t end up peeling up, and the sensor stayed on just fine! (It probably helped that I wasn’t sunscreening the edges of the tape, since I was pretty much in 2 layers of wetsuit every time I was out in the water and in the sun.) If the sensor ripped out, that would have been a pain as the one I have is the original one approved in the US that requires a 12 hour warmup (ugh) – thankfully, that didn’t happen, and also thankfully, the day we got off the boat we heard that the Libre is now approved in the US for 14 day wear (instead of 10) and now only ONE hour warmup (yay!). That’ll make it nice and easy (if I get the updated sensors) for future dive trips if a sensor rips off.

In terms of accuracy and sensor performance:

My first Libre sensor that I had tried at home a few months ago when we got it ran low pretty consistently, and ran REALLY low when my BG was normal. That drove me nuts and I was pretty sure that I wouldn’t want to rely on it the way some people do. So I was planning to not be able to rely on the numbers, and just use it for trends when diving. However, this second sensor (that I did all my scuba diving with) was spot on, even when high and low. I cross checked with finger sticks before and after the first dive, but quickly tailed off fingersticks (other than calibrating my CGM) for the most part, and was able to rely on Libre to double-check my CGM. (As expected, because of the waterlogging, the CGM ran falsely high, sometimes 100 mg/dL off, for about an hour after the dive.)

I left the Libre on even beyond the dive boat part of our trip, and it’s been spot on alongside my CGM (which is also spot on) compared to fingersticks.

So to summarize my experience: Libre is great for scuba diving. I tested it down to 16 meters and was happy with how it worked underwater! I loved being able to check mid-dive and see my trends. I never had a low during my 8 dives in 48 hours, and I never worried about going low since I wasn’t diving “blind” to my BGs. I definitely plan to use this for future scuba diving trips, and would also consider using it for any beach/water-based activities. The convenience is worth (for me) paying out of pocket cash for a few sensors to be able to access my BGs easily during these activities.

Various views from our scuba diving trip

* One final note: Australia has some of the strictest diving laws in the world regarding your health. If you have type 1 diabetes, you have to have a very particular Australian dive medical form filled out before any company will let you dive. Now, many companies will tell you to just show up in Cairns and use the dive medical centers for a cheap and easy dive medical. HOWEVER: we called three of them in advance. One said “NOPE” out of hand to approving a (perfectly healthy) person with type 1, solely because that person (me) has type 1. The second wasn’t sure and asked us to email a full medical history to give us an opinion. They never responded to the email. The third didn’t answer phone or email. Ugh. So: my advice is, get the form, and go talk **in person** to your physician of choice about this and the necessary information needed to have a physician fill out this form. I stressed a lot about this; but once I handed in the special form along with the standard medical form everyone has to fill out – they didn’t say a word to me, ask me about diabetes, or prevent me from diving. So my advice is to go prepared with your form!

Presentations and poster content from @DanaMLewis at #2018ADA

DanaMLewis_ADA2018As I mentioned, I am honored to have two presentations and a co-authored poster being presented at #2018ADA. As per my usual, I plan to post all content and make it fully available online as the embargo lifts. There will be three sets of content:

  • Poster 79-LB in Category 12-A Detecting Insulin Sensitivity Changes for Individuals with Type 1 Diabetes using “Autosensitivity” from OpenAPS’ poster, co-authored by Dana Lewis, Tim Street, Scott Leibrand, and Sayali Phatak.
  • Content from my presentation Saturday, The Data behind DIY Diabetes—Opportunities for Collaboration and Ongoing Research’, which is part of the “The Diabetes Do-It-Yourself (DIY) Revolution” Symposium!
  • Content from my presentation Monday, Improvements in A1c and Time-in-Range in DIY Closed-Loop (OpenAPS) Users’, co-authored by Dana Lewis, Scott Swain, and Tom Donner.

First up: the autosensitivity poster!

Dana_Scott_ADA2018_autosens_posterYou can find the full write up and content of the autosensitivity poster in a post over on OpenAPS.org. There’s also a twitter thread if you’d like to share this poster with others on Twitter or elsewhere.

Summary: we ran autosensitivity retrospectively on the command line to assess patterns of sensitivity changes for 16 individuals who had donated data in the OpenAPS Data Commons. Many had normal distributions of sensitivity, but we found a few people who trended sensitive or resistant, indicating underlying pump settings could likely benefit from a change.
2018 ADA poster on Autosensitivity from OpenAPS by DanaMLewis


Presentation:
The Data behind DIY Diabetes—Opportunities for Collaboration and Ongoing Research’

This presentation was a big deal to me, as it was flanked by 3 other excellent presentations on the topic of DIY and diabetes. Jason Wittmer gave a great overview and context setting of DIY diabetes, ranging from DIY remote monitoring and CGM tools all the way to DIY closed loops like OpenAPS. Jason is a dad who created OpenAPS rigs for his son with T1D. Lorenzo Sandini spoke about the clinician’s perspective for when patients come into the office with DIY tools. He knows it from both sides – he’s using OpenAPS rigs, and also has patients who use OpenAPS. And after my presentation, Joyce Lee also spoke about the overarching landscape of diabetes and the role DIY plays in this emerging technology space.

Why did I present as part of this group today? One of the roles I’ve taken on in the last few years in the OpenAPS community (among others) is a collaborator and facilitator of research with and about the community. I put together the first outcomes study (see here in JDST or here in a blog post form on OpenAPS.org) in 2016. We presented a poster on Autotune last year at ADA (see here in a blog post form on OpenAPS.org). I’ve also worked to create and manage the OpenAPS Data Commons, as well as build tools for researchers to use this data, so individuals can easily and anonymously donate their DIY closed loop data for other research projects, lowering the friction and barriers for both patients and researchers. And, I’ve co-led or led several research projects with the community’s data as a result.

My presentation was therefore about setting the stage with background on OpenAPS & how we ended up creating the OpenAPS Data Commons; presenting a selection of research projects that have utilized data from the community; highlighting other research projects working with the OpenAPS community; announcing a new international collaboration (OPEN – more coming on that in the future!) for research with the DIY community; and hopefully encouraging other diabetes researchers to think about sharing their work, data, methods, tools, and insights as openly possible to help us all move forward with improving the lives of people with diabetes.

That is, of course, quite an abbreviated summary! I’ve shared a thread on Twitter that goes into detail on each of the key points as part of the presentation, or there’s a version of this Twitter/presentation content also written below.

If you’re someone who wants to do research with retrospective data from the OpenAPS Data Commons, you can find out more about it here (including instructions on how to request data). And if you’re interested in prospective research, please do reach out as well!

Full content for those who don’t want to read Twitter:

Patients are often seen as passive recipients of care, but many of us PWDs have discovered that problems are opportunities to change things. My journey to DIY began after I was frustrated by my inability to hear CGM alarms at night. 4 years ago, there was no way for me to access my own device data in real time OR retrospectively. Thanks to John Costik for sharing his code, I was able to get my CGM data & send it to the cloud and down to my phone, creating a louder alarm. Scott and I created an algorithm to push notifications to me to take action. This was an ‘open loop’ system we called #DIYPS. With Ben West’s help, we realized could combine our algorithm with small, off-the-shelf hardware & a radio stick to automate insulin delivery. #OpenAPS was thus created, open sourcing all components of DIY closed loop system so others could close the loop, too. An #OpenAPS rig consists of a small computer, radio chip, & battery. The hardware is constantly evolving. Many of us also use Nightscout to visualize our closed loop data, and share with loved ones.

2018ADA_slide12018ADA_slide 42018ADA_slide 32018ADA_Slide 2


I closed the loop in December of 2015. As people learned about it, I got pushback: “It works for you, but how do you know it’s going to work for others?” I didn’t, and I said so. But that didn’t mean I shouldn’t share what was working for me.

Once we had dozens of users of #OpenAPS, we presented a research study at #2016ADA, with 18 individuals sharing outcomes data on A1c, TIR, and QOL improvements. (See that publication here: https://twitter.com/danamlewis/status/763782789070192640 ). I was often asked to share my data for people to analyze, but I’m not representative of entire #OpenAPS community. Plus, the community has kept growing: we estimate there are more than (n=1)*710+ (as of June 2018) people worldwide using different kinds of DIY APs. (Note: if you’d like to keep track of the growing #OpenAPS community, the count of loopers worldwide is updated periodically at  https://openaps.org/outcomes ).  I began to work with Open Humans to build the #OpenAPS Data Commons, enabling individuals to anonymously upload their data and consent to share it with the Data Commons.

2018ADA_Slide 52018ADA_Slide 62018ADA_Slide 72018ADA_Slide 8


Criteria for using the #OpenAPS Data Commons:

  • 1) share insights back with the community, especially if you find something about an individual’s data set where we should notify them
  • 2) publish in an accessible (and preferably open) manner

I’ve learned that not many are prepared to take advantage of the rich (and complex) data available from #OpenAPS users; and many researchers have varying background and skillsets.  To aid researchers, I created a series of open source tools (described here: http://bit.ly/2l5ypxq, and tools available at https://github.com/danamlewis/OpenHumansDataTools ) to help researchers & patients working with data.

2018ADA_Slide 10 2018ADA_Slide 9


We have a variety of research projects that have leveraged the anonymously donated, DIY closed loop data from the #OpenAPS Data Commons.

  • 2018ADA_Slide 112018ADA_Slide 12One research project, in collaboration with a Stanford team, evaluated published machine learning model predictions & #OpenAPS predictions. Some models (particularly linear regression) = accurate predictions in short term, but less so longer term when insulin peaks. This study is pending publication, but I’d like to note the challenge of more traditional research keeping pace with DIY innovation: the code (and data) studied was from January 2017. #OpenAPS prediction code has been updated 2x since then.
  • In response to the feedback from the #2016ADA #OpenAPS Outcomes study we presented, a follow up study on #OpenAPS outcomes was created in partnership with a team at Johns Hopkins. That study will be presented on Monday, 6-6:15pm (352-OR).
  • 2018ADA_Slide 13Many people share publicly online their outcomes with DIY closed loops. Sulka Haro has shared his script to evaluate the reduction in daily manual diabetes interventions after they began using #OpenAPS. Before: 4.5/day manual corrections; now they treat <1/day.
  • #OpenAPS features such as autosensitivity automatically detect sensitivity changes and insulin needs, improving outcomes. (See above at the top of this post for the full poster content).
  • If you missed it at #2017ADA (see here: http://bit.ly/2rMBFmn) , Autotune is a tool for assessing changes to basal rates, ISF, and carb ratio. Developed for #OpenAPS users but can also be used by traditional pumpers (and some MDI users also utilize it).

I’m also thrilled to share a new tool we’ve created: an #OpenAPS simulator to allow us to more easily back-test and compare settings changes & feature changes in #OpenAPS code.
2018ADA_Slide 14

  • Screen Shot 2018-06-22 at 4.48.06 PM2018ADA_Slide 16  We pulled a recent week of data for n=1 adult PWD who does no-bolus, rough carb entry meal announcements, and ran the simulator to predict what the outcomes would be for no-bolus and no meal-announcement.


  • 2018ADA_Slide 172018ADA_Slide 18 We also ran the simulator on n=1 teen PWD who does no-bolus and no-meal-announcement in real life. The simulator tracked closely to his actual outcomes (validated this week with a lab-A1c of 6.1)


The new #OpenAPS simulator will allow us to better test future algorithm changes and features across a diverse data set donated by DIY closed loop users.

There are many other studies & collaborations ongoing with the DIY community.

  • Michelle Litchman, Perry Gee, Lesly Kelly, and myself have a paper pending review analyzing social-media-reported outcomes & themes from DIY community.
  • 2018ADA_Slide 19There are also multiple other posters about DIY outcomes here at #2018ADA:
  • 2018ADA_Slide 20 There are many topics of interest in DIY community we’d like to see studies on, and have data for. These include: “eating soon” (optimal insulin dosing for lesser post-prandial spikes); and variability in sensitivity for various ages, pregnancy, and menstrual cycle.
  • 2018ADA_Slide 21I’m also thrilled to announce funding will be awarded to OPEN (a new collaboration on Outcomes of Patients’ Evidence, with Novel, DIY-AP tech), a 36-month international collaboration assessing outcomes, QOL, further development, access of real-world AP tech, etc. (More to come on this soon!)

In summary: we don’t have a choice in living with diabetes. We *do* have a choice to DIY, and also to research to learn more and improve knowledge and availability of tools for us PWDs, more quickly. We would love to partner and collaborate with anyone interested in working with the DIY community, whether that is utilizing the #OpenAPS Data Commons for retrospective studies or designing prospective studies. If you take away one thing today: let it be the request for us to all openly share our tools, data, and insights so we can all make life with type 1 diabetes better, faster.

2018ADA_Slide 222018ADA_Slide 23


A huge thank you as always to the community: those who have donated and shared data; those who have helped develop, test, troubleshoot, and otherwise help power the #OpenAPS and other DIY diabetes communities.

2018ADA_Slide 24

Presentation:
Improvements in A1c and Time-in-Range in DIY Closed-Loop (OpenAPS) Users

(full tweet thread available here; or a description of this presentation below)

#OpenAPS is an open and transparent effort to make safe and effective Artificial Pancreas System (APS) technology widely available to reduce the burden of Type 1 diabetes. #OpenAPS evolved from my first DIY closed loop system and our desire to openly share what we’ve learned living with DIY closed loops. It takes a small, off-the-shelf computer; a radio; and a battery to communicate with existing insulin pumps and CGMs. As a PWD, I care a lot about safety: the safety reference design is the first thing in #OpenAPS that was shared, in order to help set expectations around what a DIY closed loop can (and cannot) do.

ADA2018_Slide 23ADA2018_Slide 24As I shared about my own DIY experience, people questioned whether it would work for others, or just me. At #2016ADA, we presented an outcomes study with data from 18 of the first 40 DIY closed loop users. Feedback on that study included requests to evaluate CGM data, given concerns around accuracy of self-reported outcomes.

This 2018 #OpenAPS outcomes study was the result. We performed a retrospective cross-over analysis of continuous BG readings recorded during 2-week segments 4-6 weeks before and after initiation of OpenAPS.

ADA2018_Slide 26For this study, n=20 based on the availability of data that met the stringent protocol requirements (and the limited number of people who had both recorded that data and donated it to the #OpenAPS Data Commons in early 2017).  Demographics show that, like the 2016 study, the people choosing to #OpenAPS typically have lower A1C than the average T1D population; have had diabetes for over a decade; and are long-time pump and CGM users. Like the 2016 study, this 2018 study found mean BG and TIR improved across all time categories (overall, day, and nighttime).

ADA2018_Slide 28ADA2018_Slide 29ADA2018_Slide 30ADA2018_Slide 31ADA2018_Slide 32

Overall, mean BG (mg/dl) improved (135.7 to 128.3); mean estimated HbA1c improved (6.4 to 6.1%). TIR (70-180) increased from 75.8 to 82.2%. Overall, time spent high and low were all reduced, in addition to eAG and A1c reduction. Overnight (11pm-7am) had smaller improvement in all categories compared to daytime improvements in these categories.

Notably: although this study primarily focused on a 4-6 week time frame pre-looping vs. 4-6 weeks post-looping, the improvements in all categories are sustained over time by #OpenAPS users.

ADA2018_Slide 33 ADA2018_Slide 34

ADA2018_Slide 35Conclusion: Even with tight initial control, persons with T1D saw meaningful improvements in estimated A1c, TIR, and a reduction in time spent high and low, during the day and at night, after initiating #OpenAPS. Although this study focused on BG data from CGM, do not overlook additional QOL benefits when analyzing benefits of hybrid closed loop therapy or designing future studies! See these examples shared from Sulka Haro and Jason Wittmer as example of quality of life impacts of #OpenAPS.

A huge thank you to the community: those who have donated and shared data; those who have helped develop, test, troubleshoot, and otherwise help power the #OpenAPS and other DIY diabetes communities.

And, special thank you to my co-authors, Scott Swain & Tom Donner, for the collaboration on this study. Lewis_Donner_Swain_ADA2018

Hormones, CGM preferences, DIY, and why so many things are YDMV even when #WeAreNotWaiting

I posted one of my Nightscout graphs yesterday, showing a snapshot of my morning:

Example of how getting out of bed - rather than dawn phenomenon hormones - can increase BG levels.

I hadn’t eaten, and my blood sugar still spiked up. I’ve noticed this happens in the mornings sometimes. When I have mentioned it over the years, people are quick to tell me my basal rates are wrong, and I should adjust them because dawn phenomenon. But actually, this isn’t dawn phenomenon. This happens after I physically get up and start moving for the day, whether that happens at 4am, or 6am, or 10am, or even waking up after noon. So, it’s not a basal thing, and modifying my basal rates doesn’t fix it. (And this is why I wanted to add wake-up mode to my suite of tools, to help address this.)

To me, this is a great example, (as I mentioned in my Twitter thread), of why diabetes is so hard: sooooo many things impact BG levels, and in many cases, we PWDs just have to roll with it and respond the best we can. In my case, #OpenAPS did a great job responding to the spike and bringing me back down within an hour or so.

One of the questions that popped up yesterday in response to that graph, though, was about the BG line: how did I have two BG lines?

The answer: I wear a G4 sensor, and usually have 2 receivers running off the same transmitter and sensor. One receiver is Share-d to my phone, and uploads to NS via the interwebz. The other receiver, although Share-capable, doesn’t (because the company only allows you to pair one receiver and upload via Share). I leave that CGM plugged into a rig to enable it to be a backup for offline looping. When online, this rig with the plugged in CGM uploads BGs from that receiver to NS.

Sometimes, because of different start/stop times and therefore differing calibration records, the receivers “drift” from each other, making it obvious on the graph when that happens.

Because if you give a mouse a cookie, other questions come up, someone had also asked me why I’m using G4, and why not G5. Someone else asked me in a different channel why I’m not using G5 and xDrip+ (a DIY option that doesn’t use Dexcom app or a Dexcom receiver for receiving the data or processing it), or another DIY tool to process my CGM data.

Now, as always, what I chose to use is my personal preference. It’s colored by my preference for what equipment I’m willing to carry; what phone I want to use; what data I want to have; my safety backup preferences; what my insurance covers and what I can afford; where I live; etc. So, just because I use this method, doesn’t mean I expect anyone else to want to do it. It’s just what I do. I don’t try to convince other people to use this method, and I also hope others can share info about what works for them without trying to hammer me over the head because what I’m doing is different. This is where YDMV (your diabetes may vary) comes in. It’s so true, and even within “people who DIY”, there’s a ton of variation – and that’s a good thing! I adore having options to find what works for me, and I want to have other people have options and choices to choose what works for them.

That being said, here’s the answer to how I run my CGMs and some of the things that have factored into my choice to not DIY CGM receivers/data processing most of the time:

  • With two G4 receivers, I can keep one in my pocket, paired to my phone and uploading via Share. When I’m out and about in the city or usually during the day, this is what I carry. When I run, I take the Share receiver.
  • But, I also like emergency back-ups. I like keeping a receiver plugged into an #OpenAPS rig so that if connectivity goes out/down, I can keep looping without a break in my stride. So, I could keep my Share receiver plugged into the rig, but that would involve me unplugging and replugging fairly frequently when I run errands or actually go for a short run, and meh. Hassle. So I keep “non-Share” receiver as the one that’s usually plugged into my ‘offline’ rig.
  • Having the G4 receiver plugged into the rig enables me to see raw data. Raw data is nice for a couple of things: assessing the health of my sensor (if it gets jumpy compared to the filtered data, I know the quality of the sensor is decreasing, and that helps me decide when to change it); giving me a clue to what’s going on when the filtered data goes to ??? or during the start up of a new sensor; and actually being able to run my rig and loop off some* of the raw data when I need to. (*With OpenAPS, you can choose to loop off of it within a certain range, and there’s an option to only set a certain amount of correction for a proportion of what otherwise would be proposed, with a higher level of raw data.)
  • With two receivers running, that also gives me more flexibility around sensor changes. Technically, the sensor is approved for 7 days. At the end of the 7 days, the receiver stops giving you data and forces you to “start” a new sensor session. That could be by inserting a new sensor; or it could be the same sensor on your body. But either way, theoretically it’s a 2 hour ‘warm up’ period from that session where you can’t see data. With 2 receivers, I can stagger the end and start of sensor sessions. I usually set a calendar alarm to restart one of the receivers on the night of the 6th day of the session, allowing me more flexibility on day 7 to choose when to restart or change my sensor.
  • This also means I can choose to “hot swap” when actually changing a sensor. I may choose to not hit ‘stop’ and ‘start’ on a sensor session on one of the receivers, but rather shut it off for about 30 minutes, and just do the stop/start on the other receiver (leaving it plugged into a rig to upload raw data to NS, and be able to see where the new sensor’s readings come in compared to the old one). When I power the non-restarted receiver back on about 30m after swapping the transmitter over to the new receiver (as soon as the raw readings have flattened out), it usually either goes to “no signal” for a few minutes, and then comes back with some data, an hour or more before the restarted sensor allows me to calibrate it and get data. There are downsides to this method: the data on the receiver that didn’t get restarted can be fairly inaccurate, as it’s still using the calibrations from the old sensor. So I don’t always do that, but when it’s more important to me to be able to see relative trend of where BG is (flat, or dropping or spiking), it’s nice to have that option. And since I often soak my new CGM sensors, the data from “day 1” of the sensor after a session “start” on the receiver is often better than if it was truly day 1 of the sensor being in my body.

Phew. Maybe that sounds like a lot of work, but the above setup works well for me for a variety of reasons, and also allows me the flexibility and choice for when I change sensors, when I am forced to be without data or potentially not loop, etc. Given that my schedule varies a lot, it helps since I’m not consistently in the same time zone and what works for starting or changing sensors one week in one part of the world doesn’t always align with convenience exactly 168 hours (7 days) later in another part of the world that I’m in, doing something differently.

Some of the reasons I haven’t switched to G5 include the fact that the transmitters only last for ~3 months instead of 6+ months; I’ve observed many people being frustrated by sensor not talking to the phone even when it’s right beside them; there’s no raw data on G5; you can’t have multiple receivers paired with your transmitter; etc.

Now, you might say, but that’s using Dexcom’s app, etc. With DIY solutions, those limitations don’t apply! And that’s true, to a degree – savvy folks in the community have figured out how to make it so you don’t *have* to use Dexcom’s app to display or process the data; you can replace the batteries on the transmitter; etc. But, just like my method above of using raw data isn’t necessarily going to work for everyone or might not be something someone else choose to do, the DIY options that go with G5 (or even G4 in some cases), aren’t something I believe is the right thing to do for me.

A lot of it comes down to safety. When we first started designing my DIY closed loop, we spent eons discussing how we could do this safely for me. And that evolved into further discussions about how other people could do this safely, too. A core of the OpenAPS Reference Design is that we are using already approved and vetted devices that exist on the market (e.g. existing pumps and CGMs). Those devices include approved and vetted methods for CGM data processing, too, which is even more important when the CGM data is being used to dose insulin as in OpenAPS. Now – this is not a requirement we can enforce: people can do what they want, and some people are even using non-CGMs (such as the Libre, a “Flash Glucose Monitoring” solution, plus a DIY NFC reader) as a CGM source for looping. But, whether it’s a DIY app or algorithm on CGM data, or a different glucose measuring device that’s not a CGM, that’s choice has some safety implications that I hope people are aware of.

First, the background for those who aren’t familiar: the CGM companies display a processed (“filtered”) version of the CGM data. That’s part of their proprietary stuff, but there’s reasons behind it: the raw data can be hectic and weird, and individual readings aren’t the point, anyway. The beauty of CGM is you can see the trends in addition to the estimated BG number.  In some scenarios, such as during sensor starts, during error messages that are displayed as ???, etc, the companies/FDA decided that the CGM should not show data, and instead show an error message/symbol, to help prevent anyone from making incorrect treatment decisions based off of confusing or misleading data.  That’s good enough most of the time.  As mentioned above, there are edge cases when seeing the raw is helpful, but most of the time, I’m happy with the filtered data.

But to me, there’s a difference between using raw or DIY-calibrated data for edge cases, vs. using them all the time. I’ve seen several cases in just the past few days with a newer “DIY CGM app”, which uses its own calibration algorithm for processing the unfiltered CGM readings.  These people have reported the app displaying normal BGs (say, 90 mg/dL), while they found themselves in the 40’s (rather low). It’s not clear whether that is due to the app’s calibration algorithm, something the user did in testing and calibrating, or if it’s just a bad sensor, and since most of them are not using the official receiver/app in parallel, that’s difficult to figure out.  But regardless, it’s happened enough times across numerous people for me to be concerned about a DIY CGM app being used as the primary source of CGM data. There are limitations to using company-built apps or physical devices for CGMs, but in the case where people can afford it, for safety I think it is important to at least use the approved and vetted receiver/app in parallel, to provide a backup and baseline level of alerting and alarming. The FDA & the companies have worked to create something that can be reliable for alarming when your BG is actually low (say <55 mg/dl) and alerting a human that something is going on. This is important regardless of whether people are looping or not, but it’s perhaps even more important when people are looping, since that data is driving insulin dosing decisions. Additionally, the company-created devices have been designed to deal with miscalibrations that aren’t in line with what the data from the receiver is showing, and have safety measures in place to “reject” calibrations and request new ones when necessary. Sure: there are times where that’s frustrating, but those features truly are “there for safety”, and are important for avoiding the rare but potentially serious outcomes that could be caused by incorrect CGM readings. Since safety is what we prioritize and design around in DIY closed looping, I hope people will consider that ,and prioritize safety first when choosing what to use as their primary data source.

Tl;dr – YDMV. I currently use G4 with two receivers, for the reasons described above. I think it’s important to prioritize safety over convenience most of the time, and understand the limitations of the solution that you choose (DIY or commercial). But everyone’s different, and their situation, preferences, etc. may drive different decision making. And did I mention YDMV?

Exploring other sensors that could be used with #OpenAPS and for diabetes in general

Nobody appeared to notice the other day when I tweeted about going through airport security with 13 pieces of adhesive on my body. Which is amusing to me, because normally I sport two: my insulin pump site, and my continuous glucose monitor (CGM) sensor. That particular day, I added another diabetes-related piece of adhesive (I was giving the Freestyle Libre, a flash aka not quite continuous glucose monitor, a try), and 10 pieces of adhesive not directly related to diabetes. Or maybe, it will be in the future – and that’s what I’m trying to figure out!

Last fall, my program officer from RWJF (for my role as PI on this RWJF-funded grant – read more about it here if you don’t know about my research work) made an introduction to a series of people who may know other people that I should speak to about our project’s work. One of these introductions was to a researcher at UCSD, Todd Coleman. I happened to be in San Diego for a meeting, so my co-PI Eric Hekler and I stopped by to meet Todd. He shared about his lab’s work to develop an ambulatory GI sensor to measure gastric (stomach) activity and my brain immediately started drooling over the idea of having a sensor to better help assess our methods in the DIY closed looping community for articulating dynamic carb absorption, aka how slow or fast carbs are absorbing and therefore impacting blood glucose levels. I took over part of the white board in his office, and started drawing him examples of the different data elements that we have #OpenAPS (my DIY hybrid closed loop “artificial pancreas”) calculate every 5 minutes, and how it would be fantastic to wear the GI sensor and graph the gastric activity data alongside this detailed level of diabetes data.

I immediately was envisioning a number of things:

  • Assessing basic digestion patterns and figuring out if the dynamic carb absorption models in OpenAPS were reasonable. (Right now, we’re going off of observations and tweaking the model based on BG data and manual carb entry data from humans. Finding ways to validate these models would be awesome.)
  • Seeing if we can quantify, or use the data to better predict, how post-meal activity like walking home after dinner impacts carb absorption. (I notice a lot of slowed digestion when walking home from dinner, which obviously impacts how insulin can and should be dosed if I know I’ll be walking home from dinner or not. But this is something I’ve learned from a lot of observation and trial and error, and I would love to have a more scientific assessment of this impact).
  • Seeing if this could be used as a tool to help people with T1D and gastroparesis, since slowed digestion impacts insulin dosing, and can be unpredictable and frustrating. (I knew gastroparesis was “common”, but have since learned that 40-50% of PWDs may experience gastroparesis or slowed digestion, and it’s flabbergasting how little is talked about in the diabetes community and how few resources are focused on coming up with new strategies and methods to help!)
  • Learning exactly what happens to digestion when you have celiac disease and get glutened.
  • Etc.

Fast forward a few months, where Todd and his post-doctoral fellow Armen Gharibans, got on a video call to discuss potentially letting me use one of their GI sensors. I still don’t know what I said to convince them to say yes, but I’m thrilled they did! Armen shipped me one of the devices, some electrodes, and a set of lipo batteries.

Here’s what the device looks like – it’s a 3D printed gray box that holds an open source circuit board with connectors to wearable electrodes. (With American chapstick and unicorn for scale, of course.)

DanaMLewis EGG for scale

And here’s what it looked like on me:

DanaMLewis wearing an ambulatory EGG

The device stores data on an SD card, so I had many flash backs to my first OpenAPS rig and how I managed to bork the SD cards pretty easily. Turns out, that’s not just a Pi thing, because I managed to bork one of my first EGG SD cards, too. Go figure!

Sticky notes with data scratched out and a USB stick with data from non-diabetes science experiments

And this device is why I went through airport security the other day with 10 electrodes on. (I disconnected the device, put it in my bag alongside my OpenAPS rigs, and they all went through the x-ray just fine, as always.)

Just like OpenAPS, this device is obviously not waterproof, and neither are the electrodes, so there are limitations to when I can wear it. Generally, I’ve been showering at night as usual, then applying a fresh set of electrodes and wearing the device after that, until the next evening when I take a shower. Right now, hard core activity (e.g. running or situps) generates too much noise in the stomach for the data to be usable during those times, so I’ve been wearing it on days when I’ve not been running and when I’ve not been traveling so Scott can help me apply and connect the right electrodes in the right places.

This device is straight from a lab, too, so like with #OpenAPS I’ve been an interesting guinea pig for the research team, and have found even low-level activity like bending over to put shoes on can trigger the device’s reset button. That means I’ve had to pay attention to “is the light still on and blinking” (which is hard since it’s on my abdomen under my shirt), so thankfully Armen just shipped me another version of the board with the reset button removed to see if that makes it less likely to reset. (Resetting is a problem because then it stops recording data, unless I notice it and hit the “start recording” button again, which drives me bonkers to have to keep looking at it periodically to see if it’s recording.) I just got the new board in the mail, so I’m excited to wear it and see if that resolves the reset problem!

Data-wise, it’s been fascinating to get a peek into my stomach activity and compare it to the data I have from OpenAPS around net insulin activity levels, dynamic carb absorption activity, expectations on what my BG *should* be doing, and what actually ended up happening BG-wise. I wore it one night after a 4 mile run followed by a big dinner, and I had ongoing digestion throughout the night, paired with increased sensitivity from the run so I needed less insulin overall despite still having plenty of digestion happening (and picture-perfect BGs that night, which I wasn’t expecting). I only have a few days worth of data, but I’m excited to wear it more and see if there are differences based on daily activity patterns, the influences of running, and the impact of different types of meals (size, makeup of meal, etc).

A huge thanks to Todd, Armen (who’s been phenomenal about getting me the translated GI data back in super fast turnaround time), and the rest of the group that developed the sensor. They just put out a press release about a publication with data from one of their GI studies, and this press release is a great read if you’re curious to learn more about the GI sensor, or this news piece. I’m excited to see what I can learn from it, and how we can potentially apply some of these learnings and maybe other non-diabetes sensors to help us potentially  improve daily diabetes management!

RIP, original looping pump

In 2014, a lightbulb went off. We could use Ben’s code to read and write to a particular version of an old pump. We had built an algorithm to take is input carb, BG, and insulin dosing data, and to output recommendations for action. If we hooked those together, we could close the loop. We could close the loop? Cool! We should try that. But wait – I didn’t have a compatible pump..

This is another place social media played a role in the story that is #OpenAPS. I posted on Facebook asking if anyone had one of these older model pumps sitting around unused, because we wanted to use it for research and try to close the loop. Would anyone dust off the dust bunnies on one and share? The answer turned out to be yes. A very kind person sent me the pump, we put it into play, and we closed the loop. I put the pump on, and the rest is history. Yay!

A year ago, I noticed a broken piece of blue plastic on the carpet of a hotel room. “Hey, that looks like my pump color…” “!!!! A piece of my pump broke off!”. Luckily, it was the upper edge of the reservoir; it did not impact usability of the pump; I taped it back on and continued to tape it over time. I thought eventually this, or other cracks or other physical broken pieces, would be what eventually would be the cause of failure of this beloved, well-used second-generation pump.

The edge of my pump's reservoir section broke off and I tried to tape it back on.

Some history for those who don’t know the backstory: we’re talking about using older generation pumps because it was discovered that someone (if in range, and with the right equipment) could remotely command the dosing of the pump. This was discovered by a security researcher, and the FDA had the manufacturer fix this in a future version. Thus, more modern pumps you couldn’t remotely set temp basals on, or remotely bolus. Turns out, that “hole” is what enabled us to close the loop: the ability to remotely set temporary basal rates. That is a risk. Some people don’t like that risk, and choose not to DIY closed loop because they don’t want to accept that risk. That’s fine. Other people decide that the reduction in the baseline risks of diabetes due to DIY closed looping outweigh any additional risk, and with appropriate safety guards like backup alarms, hardware and software dosing limits, etc. decide to use these pumps regardless. “YDMV” (your diabetes may vary) applies to what devices and systems you choose to help you with your diabetes, too. I personally choose to use these devices to close the loop, but acknowledge not everyone wants to – and that it shouldn’t have to be this choice that drives (for some people) whether or not to DIY loop. That is why I’ve had active conversations with every pump manufacturer for going on 4 years now about the need to have secure but documented communication protocols: I would love for people (including myself) to be able to have a secure, safe in-warranty pump with which to close the loop. Now: I’m only one person. I haven’t been able to move the needle on this myself. I’ve asked and encouraged (see this visual in the OpenAPS docs) members of the community to also take up and advocate for this. And people have. But I think it’s going to take the resources of something like the JDRF Open Protocol Initiative to really get companies to finally focus on this. And hopefully this will make the infrastructure changes needed to make it possible to achieve the vision of having a secure, in-warranty modern pump (and one that comes with the ability to choose your preferred CGM and preferred closed loop algorithm, too!).

I’ve continued to cut and apply sensor tape “pump bandaids” over the last year. But something changed about a month ago: suddenly, with normal AAA battery changes of the pump, the pump started losing the time settings with every battery change. (And battery changes happen more frequently with DIY closed looping because we communicate so frequently with the pump; mine go around ~6+ days). At first I thought I was just too slow in changing the battery. But even with a lightning quick battery change, the pump would lose the settings. No big deal…except that every time it required me to reset the clock, rewind, and reprime. Which meant drops of lost insulin (ugh), and a hassle overall.

I lasted about a month before I decided to give up. Not only was the change and reset process a pain, but because the internal battery that maintains settings when you change the AAA is apparently dying, it also means that some of the history gets wiped from the pump. Again – not a big deal because I’m uploading everything from the pump to multiple places every 5 minutes, but it is still annoying. It makes it hard to skim back through the last month on the pump to analyze how much insulin I’m using on average, when every 6 days two days get blotted off the pump’s record.

@DanaMLewis switches pumpsAnd so, I threw in the towel (sadly) last night on this beautiful, long-lasting work horse of a pump that I’ve been using for 3.5+ years. I have such an emotional tie to it because it’s what enabled me to close the loop. It’s what led us to be able to share DIY closed looping with the world. And because of the reality of using (mostly*) second hand pumps for DIY closed looping, throwing the towel on a partially busted but still-kind-of-usable loopable pump feels wrong when there are lots of people who are desperately looking for pumps so they can close the loop for themselves.

* I say mostly, because there are in fact other kinds of DIY-compatible looping pumps – they’re just not approved or available in the U.S. where I live. The DANA*R or DANA*RS pumps (made by SOOIL, they have nothing to do with me!) have bluetooth capabilities built in, so they can communicate with an Android phone. They’re very popular and usable in places like Europe & Asia, where they’re in-warranty and on the market. They can be used with AndroidAPS (which uses OpenAPS’s oref0 algorithms for looping). Because of the bluetooth comms, no extra device is needed, and the phone with AndroidAPS can communicate to the pump directly. Additionally, the AndroidAPS dev team has also been working hard on evaluating other pumps, and the Roche Combo was recently established as another pump that would be compatible with AndroidAPS; again due to built-in bluetooth capabilities.

Sadly, the DANA*R(S) is not FDA approved in the US and thus not available; and the Combo pump is no longer being actively distributed by Roche in the US (even though it’s approved) – so there are fewer pump options in the U.S. right now. But again, I’m hopeful for more change and more options in the future as the pump companies begin to leverage resources from the Open Protocol Initiative.

Vitamin D and insulin sensitivity

tl;dr – for me, Vitamin D hugely influences insulin sensitivity.

After the flu, I continued to be sick. We did the usual song and dance many people do around “hey, do you have pneumonia?”. Which, luckily, I didn’t, but I was still pretty sick and my after visit summary sheet said bronchitis. Also, my average BGs were going up, which was weird. After all, when I had the flu, I had spectacular BGs throughout. So I was pretty concerned when my time in range started dropping and my average BG started rising.

In diabetes, there are a lot of things that influence BGs. It can be a bad pump site; a bad bottle of insulin; stress; sickness; etc etc. that causes out of range BGs. Most of these are helped by having a DIY closed loop like OpenAPS. So, when your BGs start to rise above (your) normal and stay there, it’s indicative of something else going on. And because I was sick, that’s what I thought it was. But as I continued to gradually heal, I noticed something else: not only were my BG averages continuing to rise (not normal), but I also was needing a lot more insulin. Like, 20-30u more per day than usual. And that wasn’t just one day, it was 4 days of that much insulin being required. Yikes. That’s not normal, either.

So, I was thinking that I was hitting the Fiasp plateau, which made me really sad. I’ve been using Fiasp for many months now with good results. (For those of you who haven’t been tuned into the diabetes community online, while many people like Fiasp because it’s slightly faster, many people also have experienced issues with it, ranging from pump sites dying much faster than on other insulins; having issues with prolonged high BGs where “insulin acts like water”, etc.) But, I was prepared mentally to accept the plateau as the likely cause. I debated with Scott whether I should switch back to my other insulin for 2-3 sites and reservoirs to give my body a break, and try again. But I was still sick – so maybe I should wait until I was not clearing gunk out of my lungs. Or I was also pretty convinced that it was correlated with my absolute ZERO level of activity. (I had some rising BG averages briefly over Christmas where I was fearing the plateau, but turns out it was related to my inactivity, and getting more than zero steps a day resolved that.) I knew I would be moving around more the next week as I gradually felt better, so it should hopefully self-resolve. But making changes in diabetes sometimes feels like chicken and egg, with really complicated chickens and eggs – there’s a lot of variables and it’s hard to pin down a single variable that’s causing the root of the problem.

One other topic came up in our discussion – vitamin D. Scott asked me, “when was the last time you saw the sun?”. Which, because I’d been sick for weeks, and traveled for a week before that, AND because we live in Seattle and it’s winter, meant I couldn’t remember the last time I had seen the sun directly on my skin. (That sounds depressing, doesn’t it? Sheesh.)

So, I decided I would not switch back to the previous insulin I was using, and I would give it some time before I tried that, and I would focus on taking my vitamin D (because I hadn’t been taking it) and also trying to get at least SOME activity every day. I took vitamin D that night, went to bed, and….

…woke up with perfect BGs. But I didn’t hold my breath, because I was having ok nights but rough days that required the extra 30 units of insulin. But by the end of the day, I still had picture-perfect BGs (my “normal”), and I was back to using my typical average amount of insulin. PHEW. Day 2 also yielded great BG levels (for me, regardless of sickness) and around average level of insulin needed for the day time. Double phew. Day 3 is also going as expected BG and total insulin usage wise.

You might find yourself thinking, “how can it be as simple as Vitamin D? There’s probably something else going on.” I would think that – except for I have enough data to know that, when I’m vitamin D deficient, getting some vitamin D (either via pill or via natural form from sunlight) can pack a punch for insulin sensitivity. In 2014, Scott and I went out in February even when it was cold to sit in a park and get some sunshine. After about an hour of sitting and doing nothing, with no extra insulin on board, WHOOOSH. I went mega-low. I’ve had several other experiences where after being likely vitamin D deficient, and then spending an hour or so in sunlight, WHOOSH. And same for when there was no sunlight, but I took my vitamin D supplements after a while of not taking them. And no, they’re not mixed with cinnamon 😉 (That’s a diabetes joke, cinnamon does not cure diabetes. Nothing cures type 1 diabetes.)

So tl;dr – my insulin sensitivity is influenced by vitamin D, and I’ll be trying to do a better job to take my vitamin D regularly in the winters from now on!

Making changes in diabetes is hard by DanaMLewis

Makers gonna make…a book about diabetes devices? Kids book written by @DanaMLewis

book inspirationLast year after Christmas, I was running around my parents’ backyard with my niece when she spotted my CGM sensor on my arm and asked what it was. I’m always struck when my niece and nephews have noticed my diabetes devices, and am interested to see what “new” humans think about and how they encounter things and what they mean. In this case, I explained the CGM and we went back to running around, but it stuck in my mind for a few days.

I also remember the excitement and attention any time a kids’ book has a character with diabetes in it, or a storyline of diabetes, because there’s just not much out there. I was diagnosed at 14, but I love seeing PWDs in the wild and like the idea of more diabetes inclusion in materials for all ages.

So, I wrote a kids book, with the goal of introducing the concept of diabetes devices and more broadly, how people are different in different ways. I talked my incredible artist aunt into illustrating this book. :)

This book is primarily for me and my niece and nephews, but I know there might be a few other people who like the idea, too (even as there may be a few people who sniff at the idea*). I investigated the publishing options and decided to go with self-publishing, which would allow for:

  • The cheapest copies for me as the author, to be able to give to my various family members who want them.
  • The ability to make it available to other people who want copies.
  • The ability to price said copies so it’s accessible and reasonable to order easily.
  • (It’s actually cheaper for you to order this on Amazon directly to your house, than it is for you to ask me for an author-priced copy and for me to go through the hoopla of getting it to ship.)
  • Every two copies purchased via Amazon yields an author-priced copy that I plan to donate to libraries, hospitals, etc. (If you’d like to sponsor 10+ books for a library system, feel free to ping me about the easiest way to do that.) I’m planning to use any “profits” from the book to pay for copies that I’m donating.

I’ve been working on it off and on for the past few months as my aunt illustrated it, and got to give a copy to my brother and niece as a total surprise to read when we were in Alabama this past weekend. So now that the cat is out of the bag, the book is available online! The book, “Carolyn’s Robot Relative” (that’s me!), is available on Amazon here (note that’s an Amazon affiliate link). (There’s also now a German-translated copy with the title, “Ist Carolyns Tante ein Roboter?” – see the German version on Amazon.de here!)

robot illustration @DanaMLewisI also *love* the robot illustration that my aunt made with the CGM as the main body of the robot.  I reached out to someone on Etsy who does custom “stuffies” – and it turns out, she has a diabetes connection, too! So, you can get a stuffed CGM robot if you or your kids like it, for $20. Here is the link to the listing on Etsy. (I don’t make any money from this; I paid $20 for my first one, but had worked with her on pricing so it would be reasonable for people to get if they liked it!)

CGM robot stuffy from Carolyn's Robot Relative by DanaMLewisCGM robot stuffy from Carolyn's Robot Relative by DanaMLewisThe stuffy with the book – it’s an awesome sized stuffy!

And because I have also been playing with code fabric on Spoonflower (see tweet thread here, or this blog post here) and know they do fabric as well as gift wrap…I uploaded the CGM robot there so I could turn it into wrapping paper, too. Here’s the link to see it on Spoonflower.

CGM robot giftwrap preview! available on Spoonflower as fabric, gift wrap/wrapping paper, or wallpaper

I learned a lot in the research process about self-publishing options and the route I took that I wanted to share here, especially for anyone who sniffs and goes troll on me about putting this out there.

*Tl;dr – self-publishing is easy, and if you don’t like my book, go make a better one yourself! :) The more books, the better!

Some background on the publishing process & how I made the book:

I chose self-publishing with CreateSpace on Amazon. They now have this new “Kindle Direct Publishing” (KDP) program that’s similar, but less tested than CreateSpace, and seems to be higher cost for author copies. I never figured out what the benefits are of that, and chose CS.

I generally Google’d a bunch of questions and ended up on the CS forums, too, and read up on different programs to use to create the book, etc.

My process:

  • I wrote the book test in Microsoft Word, then translated it into a Google spreadsheet so I could visualize the left/right layout of the flow of text, as well as start to identify where I had ideas about what images to use.
    Example_storyflow_spreadsheet_Dana_Lewis
  • My aunt began illustrating, and sending me pictures. Fun fact – all of the images in the book are put in via iPhone photos -> AirDrop -> my computer -> inserted! No fancy graphics. (Although I did open a few of the images in Preview and change the white balance, since each photo was taken in different lighting, in a weak attempt to balance the colors of the pictures side by side.)
  • I started dropping them into a Microsoft Word document. The one thing the CS forums warned about was making sure the images were high enough res. The images were…but later in the upload process, it complained about the DPI being low. I switched to Microsoft PowerPoint (doing the same thing I did in Word to create the custom page size to work with bleed, trim, etc.) and dropped the images in the same way, and PPT doesn’t compress the images and it was fine. Word was problematic. It didn’t take much time to switch back and forth, but if I did it again, I’d start with PPT because they generally seem to get that images need to be full sized.
  • (A workaround if you take screenshots and need to insert images – you can use Preview to go in and adjust the size and make it >300 DPI that CS prefers, before inserting the images into PPT).
  • I placed text boxes on top of the images.
  • Once done, I saved as a PDF, and then went to upload to CS. I uploaded and tweaked and viewed the Digital Proofreader tool about a dozen times the first day I did it, as I wanted to move text a tad up or down, and as I resolved the complaints about DPI not being great.
  • (You do the same process for the cover image, and CS is pretty good about telling you how to calculate your spine size for the number of pages in the book, and adding that in to the front/back cover size to calculate what you need. You can also get a sized template from them, and then use images and cover it up so it’s sized perfectly.)
  • Once you’re happy with what’s uploaded to the system, you submit to CS for review (takes 24 hours). You then get to review another digital proof, and a PDF version, and then get the chance to order a physical proof copy!

Tl;dr version 2 – it was actually super easy, even for someone who’s not a graphic designer, to do this. This was a great method to work with an illustrator with simple iPhone photos of awesome illustrations and turn them into a book. You could probably also scan and do all kinds of fancy stuff…but for a basic book, the basic process described above works great. It actually doesn’t take much time in terms of placing text or uploading and tweaking your file.

The hardest part was calculating the size of the pages and deciding on whether to do with bleed or without bleed.

The other hardest part was keeping the topic of the book a secret from my mom for 10 months, because I thought she’d get a bigger kick out of being surprised with the book’s topic and contents when she had a finished copy in her hands. Sorry, Mom! Hopefully you thought it’s worth it. :)

front and back of "Carolyn's Robot Relative" by @DanaMLewis

Next generation #OpenAPS hardware work in progress – Pi HATs

tl;dr – No, they’re not here yet, but this is coming soon! Yay for new & more hardware options! See here to pre-order an Explorer HAT, eta of April 2018

Over the years, people have had a lot of awesome ideas on how

to improve the hardware that can be used with DIY closed looping. One such example, Oskar’s work with mmeowlink, led us to later work on smaller computer boards with built-in radio stick, aka the Edison/Explorer Board rig. We started working on that last fall; they were produced and available around November, and the community has been using those widely ever since.

However, like all things, the Edison/Explorer is not without it’s downsides. One of which is – there’s no screen. You historically have needed to plug in cables, or remote login to the rig, or have connectivity via your phone, to see what it’s doing. Sometimes this is more annoying than others.

Patrick Kelly, who has a daughter with T1D and began experimenting with OpenAPS, was one of the folks who wanted a screen on the rig. He suggested the idea, which Scott and I thought was awesome – but we don’t have the expertise to build that kind of hardware. Luckily, Patrick and his dad Jack Kelly, *do* have that expertise! They began exploring some of the options around creating a rig with a screen.

(This is one of my favorite parts of the OpenAPS community, where people bring in various types of expertise and we’re all able to collaborate to make everything from hardware and software and usability improvements!)

And at the same time…the rumors became reality, and we learned that Intel has decided to discontinue the Edison module. SAD PANDA. (Intel, if you’re reading this, please bring it back! We love the Edison!) That expedited the need to find the next generation hardware. Luckily, Patrick and Jack had been progressing on the screen, focusing on incorporating it into a “HAT” (board) for the Raspberry Pi. So after discussion with others in the community about pros/cons and availability about various other computing options other than the Pi, given the widespread availability of different types of Pi’s, we’ve decided to move forward with the Pi and a HAT (board) being the most usable option for the next round of hardware that we’ll be recommending to the community.

What exactly does a Pi HAT look like?

I’m so glad you asked 😉 Here is the Pi HAT with screen on a “Pi Zero W” (which I sometimes type as “Pi0” or “Pi 0”) and a “Pi 3” (pi three), compared to the Edison/Explorer Board. My trusty Chapstick is my unit of measurement, but given some of my international friends claim to not understand that yardstick, I threw in some Euro coins on the right as another measurement stick .;)

OpenAPS_hardware_development_Oct_2017_DanaMLewis
The Pi 0 is flipped on it’s back like a turtle – but the same Pi HAT can be used for the Pi 0 and the Pi 3. The HAT is bigger than the Pi so the radio stick doesn’t get blocked.

It’s the same radio as the Edison-based Explorer block, so same expected range.

What’s the point of the screen?

With a screen, you can easily see the logs of what the loop is doing: Pi_HAT_screen_OpenAPS_example_DanaMLewis

YOU CAN EASILY ADD AN OPEN WIFI NETWORK ON THE GO! (Yea, that all caps was intentional! :)). You can also see which wifi network it is on, check for IP address, etc.

Pi HAT adding wifi exampleWe’re still working on adding to the menus and playing around with what’s possible and what’s worthwhile for displaying on the menus by default.

You can do all kinds of fun stuff – which Scott found out after asking me one day, “what else should we add to the menu?” and I promptly said “a unicorn”. Scott said, “these don’t have emoji’s, though”.

Five minutes later, we have a DIY diabetes/OpenAPS unicorn built in ASCII, because why not? 😉

Pi_HAT_screen_unicorn_closeup_DanaMLewis

Ahem. Back to technical topics.

How is this board/HAT going to be made and when is it going to be available?

Like the Edison-based Explorer, the Pi’s Explorer HAT is an open source hardware design, and ERD (who sold the Explorer for the Edison) will also be doing the Pi HAT.

Timeline is not 100% nailed down yet, but it will probably be another month or so. (Which is about a year after the Edison Explorer was first ready…crazy how time flies in the open source community!) We’ll of course, as always, shout from the rooftops when it’s ready for ordering & experimenting with. We’ll also be updating the OpenAPS docs to reflect the new gear recommended to buy, the steps for getting it up and running, troubleshooting, etc.

What about Edison/Explorer boards? Will that rig type still be supported by OpenAPS? Should I get any more of those?

Yep. Edison/EB will still be supported & widely used. There are some still left.

  • But – if you already have an Edison/EB rig – I would make your next rig purchase a HAT for one of the Pi’s.
  • If you’re new to the OpenAPS community and supply still exists, I’d still consider grabbing the parts for an Edison/Explorer rig – they’re still great, and we’ll continue to use the ones we have for a long time, and will still be supported in documentation. But you’ll likely want a HAT for a Pi rig of some sort, too, to take advantage of the screen & all the features that go with that for ease of use.

What about battery life for the Pi0/Pi3? How fast does it run? AND YOU HAVEN’T ANSWERED ALL OF MY OTHER QUESTIONS?!?!

One of the downsides of our (Scott/my) approach of getting everything to the community as fast as possible – both hardware and software – means that sometimes (every time) we share things that are works in progress. (And we are testing a whole lot of stuff on software, too.) The new hardware is no different. We don’t have all the answers yet, and we’ll hope you’ll help us figure things out as we go! Here’s some of the pending questions we have:

  • Cost. (Pi’s are cheaper than Edison’s. Explorer HATs with screens are slightly more expensive. However, we’re expecting in sum that the HAT+screen rigs with Pi of choice will likely be cheaper than an Edison/Explorer.)
  • Battery life. We know the Pi0 itself is not as efficient as the Edison, so it’ll likely require a bigger battery for the same run time. (No idea exactly how much bigger because I’m not using these rigs in the real world 100% of time yet, because…)
  • Some Pi optimizations still need to be done. (The current code works just fine on a Pi3, but the Pi0 needs some optimization work done. The Pi 0, as you can see from the picture, is smaller, and will likely be the ‘mobile’ rig for many folks, while the Pi 3 might be a backpack/home rig.)
  • Other options for “HATs” that don’t have a screen. (Eric has also been prototyping another Pi HAT, that doesn’t have a screen, and it’ll be great to test and see how that works as a potential option, too. Hop into the openaps/hardware-dev channel to chat with him if you have questions about his approach. )

As we work on the optimizations (great place to dive in if you’re looking for a place to help out!) and updating the scripts and the docs to reflect the Pi suite of options, I’ll begin carrying this kind of rig and doing my usual break-everything-in-the-real-world-and-fix-all-the-things testing approach.

I’m excited. It’s so great to have this kind of collaboration with expertise in so many areas, with everyone centered on the goal of making life with diabetes easier and safer! Shout out to the Kelly family & their colleagues for all the work on the screen & HATs; to Scott for a lot of development work on both hardware and software side; to Morgan & ERD for continuing to be a part of making great open hardware more widely available; and many other people who are working on bits and pieces to make everything possible!

January 2018 update: rigs are still evolving! You can pre-order an Explorer HAT, eta of shipping is April 2018.

Showing the size of the Explorer "HAT" board next to chapstick for size comparison

See the openaps-menu software code here; and the Explorer HAT hardware repo is here.

More open innovation coming soon?

This is a big deal: JDRF just announced funding for companies to open up their device protocols, with an explicit mention of projects including OpenAPS.

This is something we’ve been asking companies for over many years, but even the most forward-thinking diabetes device companies are still limiting patients to read-only retrospective access to the patient’s own data. That’s a start, but it isn’t enough.  We need all device makers to take the next step toward full and open interoperability: participating in open-protocol development of pumps and AP systems. If funding from a major organization like JDRF is what will be needed to prioritize this, great: we’re really excited to see them doing so.

Many of us in the diabetes community have chosen to accept the risk of a flawed device, because of the net risk reduction -and quality of life improvements – that come from being able to DIY closed loop. But that doesn’t mean we’re 100% happy with that.

  • We shouldn’t have to bandaid our pumps – literally – with tape.
  • We shouldn’t have to buy them second hand.
  • We should be able to use in-warranty devices that aren’t physically broken.

In order to use our medical devices in the safest and most effective way possible, we need the ability to remotely and safely control our devices – and understand them – as we see fit.  That means the makers of the medical devices we rely on need to openly document the communications protocols their devices use, so that any informed patient, or any company or organization operating on their behalf, can safely interact with the device.

It’s a big deal for JDRF to put resources into helping companies figure out how to do this, and ease liability and regulatory concerns. Thanks to everyone who’s been a vocal advocate in the DIY community; in organizations like JDRF; and individuals advocating at the medical device companies as well.  And props to the FDA, who last month released official guidance encouraging device makers to “design their devices with interoperability as an objective” and “clearly specify the relevant functional, performance, and interface characteristics to the user.”

We all have the same goals – to make life better, and safer, for those of us living with type 1 diabetes. I’m excited to see more efforts like this that further align all of our activities toward these goals.

To the diabetes device companies: we’ve long said we are happy to help if you want to figure out how to do this. Hopefully, you already have ideas about how to do this smartly and safely. But if you need help, let us know – we’re happy to help, because #WeAreNotWaiting and neither should you.


How I change pump sites

Last year, I wrote about how I “pre-soak” CGM sensors for better first-day BGs. That’s something I started doing years ago whenever possible.

Similarly, in the last few years, I’ve also changed how I change my pump sites with similar goals of improved outcomes, whenever possible.

What I used to do (i.e. for 12+ years):

  • Pull out pump site
  • Take shower
  • Put in new pump site
  • If the pump site didn’t work, spend all night high, or the next hours high while I debated whether it was just “slow” or if I needed a second new site. Ugh.

What I decided to start doing and have done ever since (unless a site gets pulled out by accident):

  • On day 3 when I decide to change my pump site, I do not take my “old” pump site out before my shower.
  • After my shower, I leave in the old pump site and put the new pump site on. Which means I am wearing TWO pump sites.
  • Put the tubing on the new site etc. as expected. But because I have the old site on, if I start to see BGs creep up, I can do one of two things:
    • 1) Swap tubing back to old site, give a bolus or a prime on the old site, then switch tubing back to new site. (I do this if I think the new site is working but “slow”)
    • 2) Swap tubing back to old site, ditch the new site, and then insert a second “new” site (or wait until the next morning to do so when I feel like it)
  •  Otherwise, if BGs are fine, I pull the “old” site out once I confirm the new site is good to go.

Is this method perfect? Nope. Does it usually help a lot when I have a new site that is kinked or otherwise a dud? Yup.

To me, it’s worth keeping the old site on for a few (or even ~12) hours. I know many people may not like the idea of “wearing two sites”. But it’s not wearing two sites for 3 days. And if you find yourself having a lot of kinked sites – that’s why and when I switched over to this approach.

YDMV, always. But hope this (post-soaking?) of pump sites, like the idea of pre-soaking CGM sensors, is helpful to someone else.