More than 3 years of DIY closed looping with #OpenAPS

I’ve been using a DIY closed loop (OpenAPS) for 1,152 days. That’s over three years (from December 2014) of looping. That’s 1,152 nights of being able to sleep without worrying about dying in my sleep. That’s 1,152 mornings of getting to text my mom because – and when – I want to, not because it’s the thing that keeps her from worrying that I’m dead. It’s immeasurable peace of mind, in addition to the best outcomes I’ve ever had in 15 years of diabetes. And it’s gotten better since the very beginning.

Here’s where we started, and where we’ve come since then:

Here’s what hasn’t changed:

  • It is 100% do it yourself (aka, DIY). There’s no company or entity who will hand you a fully functional DIY closed loop. You get to build it yourself, which is why (among other reasons) comparing the costs of a DIY system to the cost of a potential commercial system is like apples and horseradish. But it also means you have ultimate control over your system, your algorithm, how it works, and what settings it has. There’s ultimate transparency, not just in what you’re using, but in understanding the path any feature or tool took in development from initial idea, all the way to it being a piece of code that the community is actively using. And you get to choose which pieces you use.
  • It’s driven by the spirit of paying it forward. In code and in documentation, in the interactions among the community across numerous online channels, you see incredible gratitude and appreciate sharing between members of the community. Because we can remember what it’s like to not have this technology, and we see the difference it makes. You hear stories of people succeeding at all day soccer camps or in running marathons; at school; at work; people having healthy pregnancies; and all other number of beautiful stories framed in gratitude for having technology that helps make life more about life, and less about diabetes. As Cameron said last night, “I’ve gotten use[d] to the day to day normalcy of OpenAPS, but it’s the “this is gonna be bad” and then “oh. Maybe not” that get me now. :)”

I’ve been looping for 1,152 days and I’m still blown away with appreciation for everyone in this community who codes, collaborates, documents, shares, troubleshoots, and together help us all overcome some of the many challenges in living well with diabetes. Without this community, there wouldn’t now be >500+ people worldwide accessing DIY closed loop technology. And that’s worth more to me than my own closed looping. <3

3 years of closed looping with #OpenAPS by @DanaMLewis

Quantified sickness when you have #OpenAPS and the flu

Getting “real people sick*” is the worst. And it can be terrifying when you have type 1 diabetes, and know the sickness is both likely to send your blood sugars rocketing sky high, as well as leave you exhausted and weak and that much harder to deal with a plummeting low.

*(Scott hates this term because he doesn’t like the implication that PWD’s aren’t real. We’re real, all right. But I like the phrase because it differentiates between feeling bad from blood sugar-related reasons, and the kind of sickness that anyone can get.)

In February 2014, Scott got home from a conference on Friday, and on Saturday complained about being tired with a headache. By Sunday, I started feeling weary with a sore throat. By Monday morning, I had a raging fever, chills, and the bare minimum of energy required to drag myself into the employee health clinic and get diagnosed with the flu. And since they knew I was single and lived by myself, the conversation went from “here’s your prescription for Tamiflu” to “but you can’t be by yourself, maybe we should find a bed for you in the hospital” because of how sick I was. Luckily, I called Scott and asked him to come pick me up and let me stay at his place. And there I stayed in complete misery for several days, the sickest I’d ever been. I remember at one point on the second day, waking up from a fitful doze and seeing Scott standing across the room with his laptop on a dresser, using it as a standing desk because he was so worried about me that he didn’t want to leave the room at that point. It was that bad.

Luckily, I survived. (And good thing, right, given that we went on to build OpenAPS, yes? ;)) This year’s flu experience was different. This year I was real-people sick, but without the diabetes-related fear that I’d so often experienced in the past. My blood sugars were perfectly managed by OpenAPS. I didn’t go low. It didn’t matter if I didn’t eat, or did eat (potato soup, ice cream, and frozen fruit bars were the foods of choice). My BGs stayed almost entirely in range. And because they were so in range that it was odd, I started watching the sensitivity ratio that is calculated by autosensitivity to see how my insulin sensitivity was changing over the course of the sickness. And by day 5, I finally felt good enough to share some of that data (aka, tweet). Here’s what I found from this year’s flu experience:

  • Night 1 was terrible, because I got hardly any deep sleep (45 minutes, whereas 2+h is my usual average per night) and kept waking up coughing. I also was 40% insulin resistant all night long and into Day 2, meaning it took 40% more insulin than usual to keep my BGs at target.
  • Night 2 was even worse – ZERO deep sleep. Ahhhh! It was terrible. Resistance also nudged up to 50%.
  • Night 3 – hallelujah, deep sleep returned. I ended up getting 4h53m of deep sleep, and also was able to sleep for closer to 2 hour blocks at a time, with less coughing. Also, going into night 3 was pretty much the only “high” I had of being sick – up around 180 for a few hours. Then it fell off a cliff and whooshed down to the bottom of my target, marking the drastic end of insulin resistance. After that, insulin sensitivity was fairly normal.
  • Night 4 yielded more deep sleep (>5 hours), and a tad bit of insulin sensitivity (~10%), but it’s unclear whether that’s totally sickness related or more related to the fact that I wasn’t eating much in day 3 and day 4.
  • Night 5 felt like I was going backward – 1h36m of deep sleep, tons of coughing, and interestingly a tad bit of insulin resistance (~20%) again. Night 6 (last night) I supposedly got plenty of deep sleep again (>4h), but didn’t feel like it at all due to coughing. BGs are still perfectly in range, and insulin sensitivity back to usual.

This was all done still with no-bolus, and just carb announcement when I ate whatever it was I was eating. In several cases there was negative IOB on board, but I didn’t have the usual spikes that I would normally see from that. I had 120 carbs of gluten free biscuits and gravy yesterday, and I didn’t go higher than 130mg/dl.

In-range BGs shown on CGM graph thanks to OpenAPS

It’s a weird feeling to have been this sick, and have perfectly normal blood sugars. But that’s why it’s so interesting to be able to look at other data beyond average, time in range, and A1c – we now have the tools and the data to be able to dive in and really understand more about what our bodies are doing in sick situations, whether it’s norovirus or the flu.

I’m thinking if everyone shared their data from when they had the flu, or norovirus, or strep throat, or whatever – we might be able to start to analyze and detect patterns of resistance and otherwise sensitivity changes over the course of typical illness. This way, when someone gets sick with diabetes, we’d know generally “expect around XX% resistance for Days 1-3, and then expect a drop off that looks like this on Day 4”, etc.

That would be way better than the traditional ways of just bracing yourself for sky-high highs and terrible lows with no understanding or ability to make things better during illness. The peace of mind I had during the flu this year was absolutely priceless. Some people will be able to get that with DIY closed loop technology; but as with so many other things we have learned and are learning from this community, I bet we can find ways to help translate these insights to be of benefit for all people with diabetes, regardless of which therapies they have access to or decide to use.

Want to help? Been sick? Consider donating your data to my diabetes sick-day analysis project. What you should do:

  1. If you’re using a closed loop, donate your data to the OpenAPS Data Commons. You can do all your data (yay!), or just the time frame you’ve been sick. Use the “message the project owner” feature to anonymously message and share what kind of illness you had, and the dates of sickness.
  2. Not using a closed loop, but have Nightscout? Donate your data to the Nightscout Data Commons, and do the same thing: Use the “message the project owner” feature to anonymously message and share what kind of illness you had, and the dates of sickness.

As we have more people who identify batches of sick-day data, I’ll look at what insights we can find around sensitivity changes before, during, and after sickness, plus other insights we can learn from the data.

The last set of book/CGM-robot-related surprises :)

As I mentioned when I wrote about the process of writing my children’s book about diabetes devices and how all people are different – I had to keep a lot of secrets. The topic of the book was a surprise from my mom. The fact that I wrote a book at all was a secret from my brother, sister-in-law, and niece.

As I started to add other fun things, like turning the CGM-robot into a “stuffy” (which you can get on Etsy), I also wanted to do something special as a surprise for my aunt. After all, she is  the one who donated her time and her efforts for the beautiful illustrations in the book!

robot illustration @DanaMLewisI love the CGM robot so much, because it’s such a cute illustration, and it also was something that was 100% my aunt’s idea (I just asked for some kind of illustration for the opening page, and it’s totally her creation). So when I was speaking at an event and they happened to be giving out found-object robots as awards, I knew I had found my gift idea.


Robot sculptures that inspired my robot CGM character

So, I almost immediately tweeted and began looking for a dead/broken CGM receiver. I had to be vague about it, though, given the topic of the book being a secret for my mom. I told the people who were reaching out with offers of busted receivers that this was for an “art project”, not hacking, so they didn’t get their hopes up about anything else!

I had reached out to the creator of the found-object robots, but she wasn’t available until January. Ouch. I knew that timeline wouldn’t work. I started thinking if maybe I could find someone local to help me create the robot. Then Scott had the idea of trying to do it with Lego’s. So on a cold, rainy, typical Seattle Friday night, off to the Lego store we went!

Let’s just say, an adult couple without kids is not the typical Lego store customer. However, I started poking around at the bins of for-sale Lego pieces, looking for pieces to help build the shapes that I wanted. The Lego store employees sidled up and said, “do you mind if we ask what you’re making?” and also began to help scout the right size and type of pieces after I showed them the illustration of the CGM robot.

And so it began to come together:

CGM robot build of legos by DanaMLewisCGM robot build of legos by DanaMLewisCGM robot build of legos by DanaMLewisWe bought a container of Lego pieces, plus some spares because why not, and brought them home. I played around with my receiver (blue) while I was waiting for the broken receiver someone had kindly donated to arrive.

CGM lego robot in blue by DanaMLewisThen the broken receiver arrived, and the robot was finished! While the Lego store will never ever tell you to glue Lego pieces, our helpful Lego store staffer passed on what other customers have told him for keeping pieces connected – a bit of super glue. So we (thanks, Scott! ;)) used super glue to attach the receiver to the back support piece and for all the major joints, so it wouldn’t fall apart in transit.

CGM lego robot in black by DanaMLewisWhen I went to see my family, taking the books and the stuffy, I also took the robot in bubble wrap, and sent it home with my mom. My mom went to take the signed copy of the book to my aunt today, and surprised her with the robot!

So, the last secret is out :).

Makers gonna make…a book about diabetes devices? Kids book written by @DanaMLewis

book inspirationLast year after Christmas, I was running around my parents’ backyard with my niece when she spotted my CGM sensor on my arm and asked what it was. I’m always struck when my niece and nephews have noticed my diabetes devices, and am interested to see what “new” humans think about and how they encounter things and what they mean. In this case, I explained the CGM and we went back to running around, but it stuck in my mind for a few days.

I also remember the excitement and attention any time a kids’ book has a character with diabetes in it, or a storyline of diabetes, because there’s just not much out there. I was diagnosed at 14, but I love seeing PWDs in the wild and like the idea of more diabetes inclusion in materials for all ages.

So, I wrote a kids book, with the goal of introducing the concept of diabetes devices and more broadly, how people are different in different ways. I talked my incredible artist aunt into illustrating this book. :)

This book is primarily for me and my niece and nephews, but I know there might be a few other people who like the idea, too (even as there may be a few people who sniff at the idea*). I investigated the publishing options and decided to go with self-publishing, which would allow for:

  • The cheapest copies for me as the author, to be able to give to my various family members who want them.
  • The ability to make it available to other people who want copies.
  • The ability to price said copies so it’s accessible and reasonable to order easily.
  • (It’s actually cheaper for you to order this on Amazon directly to your house, than it is for you to ask me for an author-priced copy and for me to go through the hoopla of getting it to ship.)
  • Every two copies purchased via Amazon yields an author-priced copy that I plan to donate to libraries, hospitals, etc. (If you’d like to sponsor 10+ books for a library system, feel free to ping me about the easiest way to do that.) I’m planning to use any “profits” from the book to pay for copies that I’m donating.

I’ve been working on it off and on for the past few months as my aunt illustrated it, and got to give a copy to my brother and niece as a total surprise to read when we were in Alabama this past weekend. So now that the cat is out of the bag, the book is available online! The book, “Carolyn’s Robot Relative” (that’s me!), is available on Amazon here (note that’s an Amazon affiliate link). (There’s also now a German-translated copy with the title, “Ist Carolyns Tante ein Roboter?” – see the German version on Amazon.de here!)

robot illustration @DanaMLewisI also *love* the robot illustration that my aunt made with the CGM as the main body of the robot.  I reached out to someone on Etsy who does custom “stuffies” – and it turns out, she has a diabetes connection, too! So, you can get a stuffed CGM robot if you or your kids like it, for $20. Here is the link to the listing on Etsy. (I don’t make any money from this; I paid $20 for my first one, but had worked with her on pricing so it would be reasonable for people to get if they liked it!)

CGM robot stuffy from Carolyn's Robot Relative by DanaMLewisCGM robot stuffy from Carolyn's Robot Relative by DanaMLewisThe stuffy with the book – it’s an awesome sized stuffy!

And because I have also been playing with code fabric on Spoonflower (see tweet thread here, or this blog post here) and know they do fabric as well as gift wrap…I uploaded the CGM robot there so I could turn it into wrapping paper, too. Here’s the link to see it on Spoonflower.

CGM robot giftwrap preview! available on Spoonflower as fabric, gift wrap/wrapping paper, or wallpaper

I learned a lot in the research process about self-publishing options and the route I took that I wanted to share here, especially for anyone who sniffs and goes troll on me about putting this out there.

*Tl;dr – self-publishing is easy, and if you don’t like my book, go make a better one yourself! :) The more books, the better!

Some background on the publishing process & how I made the book:

I chose self-publishing with CreateSpace on Amazon. They now have this new “Kindle Direct Publishing” (KDP) program that’s similar, but less tested than CreateSpace, and seems to be higher cost for author copies. I never figured out what the benefits are of that, and chose CS.

I generally Google’d a bunch of questions and ended up on the CS forums, too, and read up on different programs to use to create the book, etc.

My process:

  • I wrote the book test in Microsoft Word, then translated it into a Google spreadsheet so I could visualize the left/right layout of the flow of text, as well as start to identify where I had ideas about what images to use.
    Example_storyflow_spreadsheet_Dana_Lewis
  • My aunt began illustrating, and sending me pictures. Fun fact – all of the images in the book are put in via iPhone photos -> AirDrop -> my computer -> inserted! No fancy graphics. (Although I did open a few of the images in Preview and change the white balance, since each photo was taken in different lighting, in a weak attempt to balance the colors of the pictures side by side.)
  • I started dropping them into a Microsoft Word document. The one thing the CS forums warned about was making sure the images were high enough res. The images were…but later in the upload process, it complained about the DPI being low. I switched to Microsoft PowerPoint (doing the same thing I did in Word to create the custom page size to work with bleed, trim, etc.) and dropped the images in the same way, and PPT doesn’t compress the images and it was fine. Word was problematic. It didn’t take much time to switch back and forth, but if I did it again, I’d start with PPT because they generally seem to get that images need to be full sized.
  • (A workaround if you take screenshots and need to insert images – you can use Preview to go in and adjust the size and make it >300 DPI that CS prefers, before inserting the images into PPT).
  • I placed text boxes on top of the images.
  • Once done, I saved as a PDF, and then went to upload to CS. I uploaded and tweaked and viewed the Digital Proofreader tool about a dozen times the first day I did it, as I wanted to move text a tad up or down, and as I resolved the complaints about DPI not being great.
  • (You do the same process for the cover image, and CS is pretty good about telling you how to calculate your spine size for the number of pages in the book, and adding that in to the front/back cover size to calculate what you need. You can also get a sized template from them, and then use images and cover it up so it’s sized perfectly.)
  • Once you’re happy with what’s uploaded to the system, you submit to CS for review (takes 24 hours). You then get to review another digital proof, and a PDF version, and then get the chance to order a physical proof copy!

Tl;dr version 2 – it was actually super easy, even for someone who’s not a graphic designer, to do this. This was a great method to work with an illustrator with simple iPhone photos of awesome illustrations and turn them into a book. You could probably also scan and do all kinds of fancy stuff…but for a basic book, the basic process described above works great. It actually doesn’t take much time in terms of placing text or uploading and tweaking your file.

The hardest part was calculating the size of the pages and deciding on whether to do with bleed or without bleed.

The other hardest part was keeping the topic of the book a secret from my mom for 10 months, because I thought she’d get a bigger kick out of being surprised with the book’s topic and contents when she had a finished copy in her hands. Sorry, Mom! Hopefully you thought it’s worth it. :)

front and back of "Carolyn's Robot Relative" by @DanaMLewis

Why Open Humans is an essential part of my work to change the future of healthcare research

I’ve written about Open Humans before; both in terms of how we’re creating Data Commons there for people using Nightscout and DIY closed loops like OpenAPS to donate data for research, as well as building tools to help other researchers on the Open Humans platform. Madeleine Ball asked me to share some more about the background of the community’s work and interactions with Open Humans, along with how it will play into the Opening Pathways grant work, so here it is! This is also posted on the OpenHumans blog. Thanks, Madeleine, and Open Humans!


So, what do you like about Open Humans?

Health data is important to individuals, including myself, and I think it’s important that we as a society find ways to allow individuals to be able to chose when and how we share our data. Open Humans makes that very easy, and I love being able to work with the Open Humans team to create tools like the Nightscout Data Transfer uploader tool that further anonymizes data  uploads. As an individual, this makes it easy to upload my own diabetes data (continuous glucose monitoring data, insulin dosing data, food info, and other data) and share it with projects that I trust. As a researcher, and as a partner to other researchers, it makes it easy to build Data Commons projects on Open Humans to leverage data from the DIY artificial pancreas community to further healthcare research overall.

Wait, “artificial pancreas”? What’s that?

I helped build a DIY “artificial pancreas” that is really an “automated insulin delivery system”. That means a small computer & radio device that can get data from an insulin pump & continuous glucose monitor, process the data and decide what needs to be done, and send commands to adjust the insulin dosing that the insulin pump is doing. Read, write, read, rinse, repeat!

I got into this because, as a patient, I rely on my medical equipment. I want my equipment to be better, for me and everyone else. Medical equipment often isn’t perfect. “One size fits all” really doesn’t fit all. In 2013, I built a smarter alarm system for my continuous glucose monitor to make louder alarms. In 2014, with the partnership of others like Ben West who is also a passionate advocate for understanding medical devices, I “closed the loop” and built a hybrid closed loop artificial pancreas system for myself. In early 2015, we open sourced it, launching the OpenAPS movement to make this kind of technology more broadly accessible to those who wanted it.

You must be the only one who’s doing something like this

Actually, no. There are more than 400+ people worldwide using various types of DIY closed loop systems – and that’s a low estimate! It’s neat to live during a time when off the shelf hardware, existing medical devices, and open source software can be paired to improve our lives. There’s also half a dozen (or more) other DIY solutions in the diabetes community, and likely other examples (think 3D-printing prosthetics, etc.) in other types of communities, too. And there should be even more than there are – which is what I’m hoping to work on.

So what exactly is your project that’s being funded?

I created the OpenAPS Data Commons to address a few issues. First, to stop researchers from emailing and asking me for my individual data. I by no means represent all other DIY closed loopers or people with diabetes! Second, the Data Commons approach allows people to donate their data anonymously to research; since it’s anonymized, it is often IRB-exempt. It also makes this data available to people (patient researchers) who aren’t affiliated with an organization and don’t need IRB approval or anything fancy, and just need data to test new algorithm features or investigate theories.

But, not everyone implicitly knows how to do research. Many people learn research skills, but not everyone has the wherewithal and time to do so. Or maybe they don’t want to become a data science expert! For a variety of reasons, that’s why we decided to create an on-call data science and research team, that can provide support around forming research questions and working through the process of scientific discovery, as well as provide data science resources to expedite the research process. This portion of the project does focus on the diabetes community, since we have multiple Data Commons and communities of people donating data for research, as well as dozens of citizen scientists and researchers already in action (with more interested in getting involved).

What else does Open Humans have to do with it?

Since I’ve been administering the Nightscout and OpenAPS Data Commons, I’ve spent a lot of time on the Open Humans site as both a “participant” of research donating my data, as well as a “researcher” who is pulling down and using data for research (and working to get it to other researchers). I’ve been able to work closely with Madeleine and suggest the addition of a few features to make it easier to use for research and downloading large data sets from projects. I’ve also been documenting some tools I’ve created (like a complex json to csv converter; scripts to pull data from multiple OH download files and into a single file for analysis; plus writing up more details about how to work with data files coming from Nightscout into OH), also with the goal of facilitating more researchers to be able to dive in and do research without needing specific tool or technical experience.

It’s also great to work with a platform like Open Humans that allows us to share data or use data for multiple projects simultaneously. There’s no burdensome data collection or study procedures for individuals to be able to contribute to numerous research projects where their data is useful. People consent to share their data with the commons, fill out an optional survey (which will save them from having to repeat basic demographic-type information that every research project is interested in), and are done!

Are you *only* working with the diabetes community?

Not at all. The first part of our project does focus on learning best practices and lessons learned from the DIY diabetes communities, but with an eye toward creating open source toolkit and materials that will be of use to many other patient health communities. My goal is to help as many other patient health communities spark similar #WeAreNotWaiting projects in the areas that are of most use to them, based on their needs.

How can I find out more about this work?
Make sure to read our project announcement blog post if you haven’t already – it’s got some calls to action for people with diabetes; people interested in leading projects in other health communities; as well as other researchers interested in collaborating! Also, follow me on Twitter, for more posts about this work in progress!

Next generation #OpenAPS hardware work in progress – Pi HATs

tl;dr – No, they’re not here yet, but this is coming soon! Yay for new & more hardware options! See here to pre-order an Explorer HAT, eta of April 2018

Over the years, people have had a lot of awesome ideas on how

to improve the hardware that can be used with DIY closed looping. One such example, Oskar’s work with mmeowlink, led us to later work on smaller computer boards with built-in radio stick, aka the Edison/Explorer Board rig. We started working on that last fall; they were produced and available around November, and the community has been using those widely ever since.

However, like all things, the Edison/Explorer is not without it’s downsides. One of which is – there’s no screen. You historically have needed to plug in cables, or remote login to the rig, or have connectivity via your phone, to see what it’s doing. Sometimes this is more annoying than others.

Patrick Kelly, who has a daughter with T1D and began experimenting with OpenAPS, was one of the folks who wanted a screen on the rig. He suggested the idea, which Scott and I thought was awesome – but we don’t have the expertise to build that kind of hardware. Luckily, Patrick and his dad Jack Kelly, *do* have that expertise! They began exploring some of the options around creating a rig with a screen.

(This is one of my favorite parts of the OpenAPS community, where people bring in various types of expertise and we’re all able to collaborate to make everything from hardware and software and usability improvements!)

And at the same time…the rumors became reality, and we learned that Intel has decided to discontinue the Edison module. SAD PANDA. (Intel, if you’re reading this, please bring it back! We love the Edison!) That expedited the need to find the next generation hardware. Luckily, Patrick and Jack had been progressing on the screen, focusing on incorporating it into a “HAT” (board) for the Raspberry Pi. So after discussion with others in the community about pros/cons and availability about various other computing options other than the Pi, given the widespread availability of different types of Pi’s, we’ve decided to move forward with the Pi and a HAT (board) being the most usable option for the next round of hardware that we’ll be recommending to the community.

What exactly does a Pi HAT look like?

I’m so glad you asked 😉 Here is the Pi HAT with screen on a “Pi Zero W” (which I sometimes type as “Pi0” or “Pi 0”) and a “Pi 3” (pi three), compared to the Edison/Explorer Board. My trusty Chapstick is my unit of measurement, but given some of my international friends claim to not understand that yardstick, I threw in some Euro coins on the right as another measurement stick .;)

OpenAPS_hardware_development_Oct_2017_DanaMLewis
The Pi 0 is flipped on it’s back like a turtle – but the same Pi HAT can be used for the Pi 0 and the Pi 3. The HAT is bigger than the Pi so the radio stick doesn’t get blocked.

It’s the same radio as the Edison-based Explorer block, so same expected range.

What’s the point of the screen?

With a screen, you can easily see the logs of what the loop is doing: Pi_HAT_screen_OpenAPS_example_DanaMLewis

YOU CAN EASILY ADD AN OPEN WIFI NETWORK ON THE GO! (Yea, that all caps was intentional! :)). You can also see which wifi network it is on, check for IP address, etc.

Pi HAT adding wifi exampleWe’re still working on adding to the menus and playing around with what’s possible and what’s worthwhile for displaying on the menus by default.

You can do all kinds of fun stuff – which Scott found out after asking me one day, “what else should we add to the menu?” and I promptly said “a unicorn”. Scott said, “these don’t have emoji’s, though”.

Five minutes later, we have a DIY diabetes/OpenAPS unicorn built in ASCII, because why not? 😉

Pi_HAT_screen_unicorn_closeup_DanaMLewis

Ahem. Back to technical topics.

How is this board/HAT going to be made and when is it going to be available?

Like the Edison-based Explorer, the Pi’s Explorer HAT is an open source hardware design, and ERD (who sold the Explorer for the Edison) will also be doing the Pi HAT.

Timeline is not 100% nailed down yet, but it will probably be another month or so. (Which is about a year after the Edison Explorer was first ready…crazy how time flies in the open source community!) We’ll of course, as always, shout from the rooftops when it’s ready for ordering & experimenting with. We’ll also be updating the OpenAPS docs to reflect the new gear recommended to buy, the steps for getting it up and running, troubleshooting, etc.

What about Edison/Explorer boards? Will that rig type still be supported by OpenAPS? Should I get any more of those?

Yep. Edison/EB will still be supported & widely used. There are some still left.

  • But – if you already have an Edison/EB rig – I would make your next rig purchase a HAT for one of the Pi’s.
  • If you’re new to the OpenAPS community and supply still exists, I’d still consider grabbing the parts for an Edison/Explorer rig – they’re still great, and we’ll continue to use the ones we have for a long time, and will still be supported in documentation. But you’ll likely want a HAT for a Pi rig of some sort, too, to take advantage of the screen & all the features that go with that for ease of use.

What about battery life for the Pi0/Pi3? How fast does it run? AND YOU HAVEN’T ANSWERED ALL OF MY OTHER QUESTIONS?!?!

One of the downsides of our (Scott/my) approach of getting everything to the community as fast as possible – both hardware and software – means that sometimes (every time) we share things that are works in progress. (And we are testing a whole lot of stuff on software, too.) The new hardware is no different. We don’t have all the answers yet, and we’ll hope you’ll help us figure things out as we go! Here’s some of the pending questions we have:

  • Cost. (Pi’s are cheaper than Edison’s. Explorer HATs with screens are slightly more expensive. However, we’re expecting in sum that the HAT+screen rigs with Pi of choice will likely be cheaper than an Edison/Explorer.)
  • Battery life. We know the Pi0 itself is not as efficient as the Edison, so it’ll likely require a bigger battery for the same run time. (No idea exactly how much bigger because I’m not using these rigs in the real world 100% of time yet, because…)
  • Some Pi optimizations still need to be done. (The current code works just fine on a Pi3, but the Pi0 needs some optimization work done. The Pi 0, as you can see from the picture, is smaller, and will likely be the ‘mobile’ rig for many folks, while the Pi 3 might be a backpack/home rig.)
  • Other options for “HATs” that don’t have a screen. (Eric has also been prototyping another Pi HAT, that doesn’t have a screen, and it’ll be great to test and see how that works as a potential option, too. Hop into the openaps/hardware-dev channel to chat with him if you have questions about his approach. )

As we work on the optimizations (great place to dive in if you’re looking for a place to help out!) and updating the scripts and the docs to reflect the Pi suite of options, I’ll begin carrying this kind of rig and doing my usual break-everything-in-the-real-world-and-fix-all-the-things testing approach.

I’m excited. It’s so great to have this kind of collaboration with expertise in so many areas, with everyone centered on the goal of making life with diabetes easier and safer! Shout out to the Kelly family & their colleagues for all the work on the screen & HATs; to Scott for a lot of development work on both hardware and software side; to Morgan & ERD for continuing to be a part of making great open hardware more widely available; and many other people who are working on bits and pieces to make everything possible!

January 2018 update: rigs are still evolving! You can pre-order an Explorer HAT, eta of shipping is April 2018.

Showing the size of the Explorer "HAT" board next to chapstick for size comparison

See the openaps-menu software code here; and the Explorer HAT hardware repo is here.

More open innovation coming soon?

This is a big deal: JDRF just announced funding for companies to open up their device protocols, with an explicit mention of projects including OpenAPS.

This is something we’ve been asking companies for over many years, but even the most forward-thinking diabetes device companies are still limiting patients to read-only retrospective access to the patient’s own data. That’s a start, but it isn’t enough.  We need all device makers to take the next step toward full and open interoperability: participating in open-protocol development of pumps and AP systems. If funding from a major organization like JDRF is what will be needed to prioritize this, great: we’re really excited to see them doing so.

Many of us in the diabetes community have chosen to accept the risk of a flawed device, because of the net risk reduction -and quality of life improvements – that come from being able to DIY closed loop. But that doesn’t mean we’re 100% happy with that.

  • We shouldn’t have to bandaid our pumps – literally – with tape.
  • We shouldn’t have to buy them second hand.
  • We should be able to use in-warranty devices that aren’t physically broken.

In order to use our medical devices in the safest and most effective way possible, we need the ability to remotely and safely control our devices – and understand them – as we see fit.  That means the makers of the medical devices we rely on need to openly document the communications protocols their devices use, so that any informed patient, or any company or organization operating on their behalf, can safely interact with the device.

It’s a big deal for JDRF to put resources into helping companies figure out how to do this, and ease liability and regulatory concerns. Thanks to everyone who’s been a vocal advocate in the DIY community; in organizations like JDRF; and individuals advocating at the medical device companies as well.  And props to the FDA, who last month released official guidance encouraging device makers to “design their devices with interoperability as an objective” and “clearly specify the relevant functional, performance, and interface characteristics to the user.”

We all have the same goals – to make life better, and safer, for those of us living with type 1 diabetes. I’m excited to see more efforts like this that further align all of our activities toward these goals.

To the diabetes device companies: we’ve long said we are happy to help if you want to figure out how to do this. Hopefully, you already have ideas about how to do this smartly and safely. But if you need help, let us know – we’re happy to help, because #WeAreNotWaiting and neither should you.


How I change pump sites

Last year, I wrote about how I “pre-soak” CGM sensors for better first-day BGs. That’s something I started doing years ago whenever possible.

Similarly, in the last few years, I’ve also changed how I change my pump sites with similar goals of improved outcomes, whenever possible.

What I used to do (i.e. for 12+ years):

  • Pull out pump site
  • Take shower
  • Put in new pump site
  • If the pump site didn’t work, spend all night high, or the next hours high while I debated whether it was just “slow” or if I needed a second new site. Ugh.

What I decided to start doing and have done ever since (unless a site gets pulled out by accident):

  • On day 3 when I decide to change my pump site, I do not take my “old” pump site out before my shower.
  • After my shower, I leave in the old pump site and put the new pump site on. Which means I am wearing TWO pump sites.
  • Put the tubing on the new site etc. as expected. But because I have the old site on, if I start to see BGs creep up, I can do one of two things:
    • 1) Swap tubing back to old site, give a bolus or a prime on the old site, then switch tubing back to new site. (I do this if I think the new site is working but “slow”)
    • 2) Swap tubing back to old site, ditch the new site, and then insert a second “new” site (or wait until the next morning to do so when I feel like it)
  •  Otherwise, if BGs are fine, I pull the “old” site out once I confirm the new site is good to go.

Is this method perfect? Nope. Does it usually help a lot when I have a new site that is kinked or otherwise a dud? Yup.

To me, it’s worth keeping the old site on for a few (or even ~12) hours. I know many people may not like the idea of “wearing two sites”. But it’s not wearing two sites for 3 days. And if you find yourself having a lot of kinked sites – that’s why and when I switched over to this approach.

YDMV, always. But hope this (post-soaking?) of pump sites, like the idea of pre-soaking CGM sensors, is helpful to someone else.

Not bolusing for meals (Fiasp, 0.6.0 algorithm in oref0 dev branch, and more)

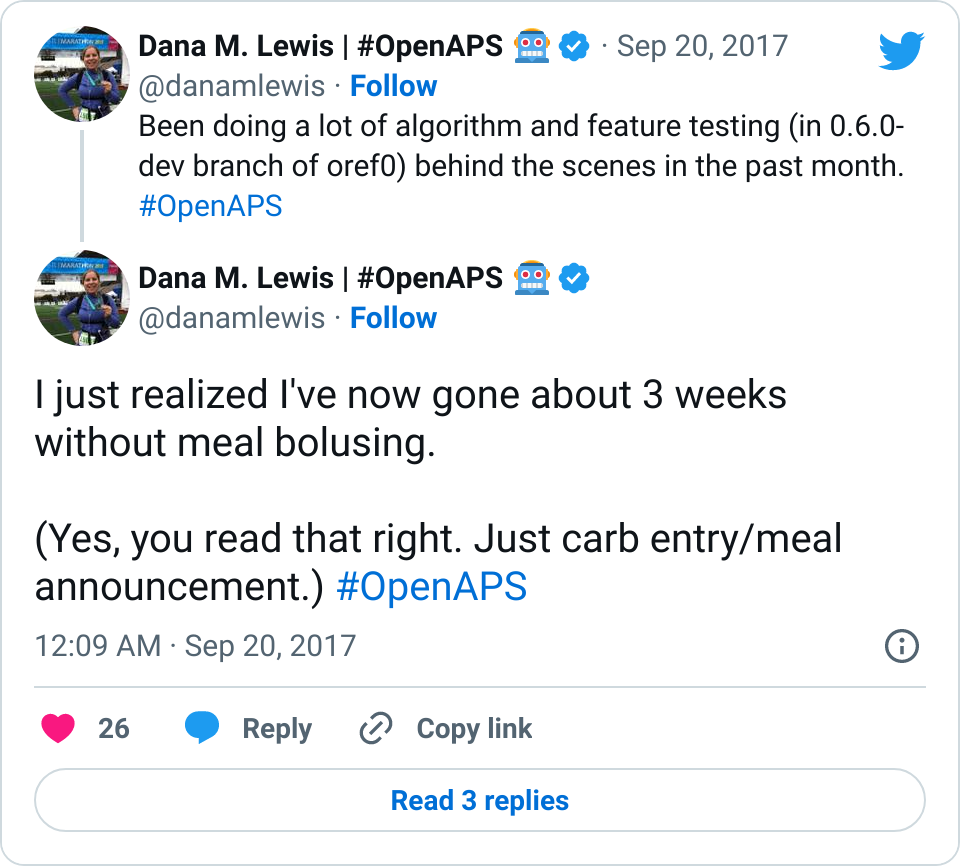
I tweeted last week+, “I just realized I’ve now gone about 3 weeks without meal bolusing.” That means just a meal announcement (i.e. carb entry estimate, a la 30 carbs or 60 carbs or whatever, based on my IFTTT buttons). No manual bolus.

Highlighting 3 weeks without meal bolusing, and just doing a carb announcement, with good outcomes thanks to OpenAPS

I kind of keep waiting for the other shoe to drop, because it sounds to good to be true. I’m sure you’re skeptical reading this.

I bet she’s doing SOME bolus.

Well, she must not be eating any carbs.

She must be having worse outcomes, bad post-meal BGs, etc.

Nope, nope, and nope.

  • While I started testing this new set of features with partial boluses and worked my way down (see more below on the testing topic), I’m now literally doing no manual meal bolus. I start eating, and press one button on my watch for a carb estimate entry (that via IFTTT goes to Nightscout and my rig).
  • I eat carbs. I’ve eaten 120 grams of carbs of gluten free biscuits and gravy; 60-90 grams of pasta; dinner followed by a few gluten free cookies, etc.
  • More nuanced details below, but:
    • My 70-180 time in range has stayed the same (93+%) compared to the versions I was testing before with manual meal boluses.
    • My 70-150 and 80-160 time in ranges have decreased slightly compared to manual meal boluses, but…
    • My average blood sugar has actually dropped down (as has my a1c to match).
    • (So this means I’m having a few more spikes above 160, usually topping off in 160-170 whereas before my manual meal boluses would have me top off around 150, when all was well.)

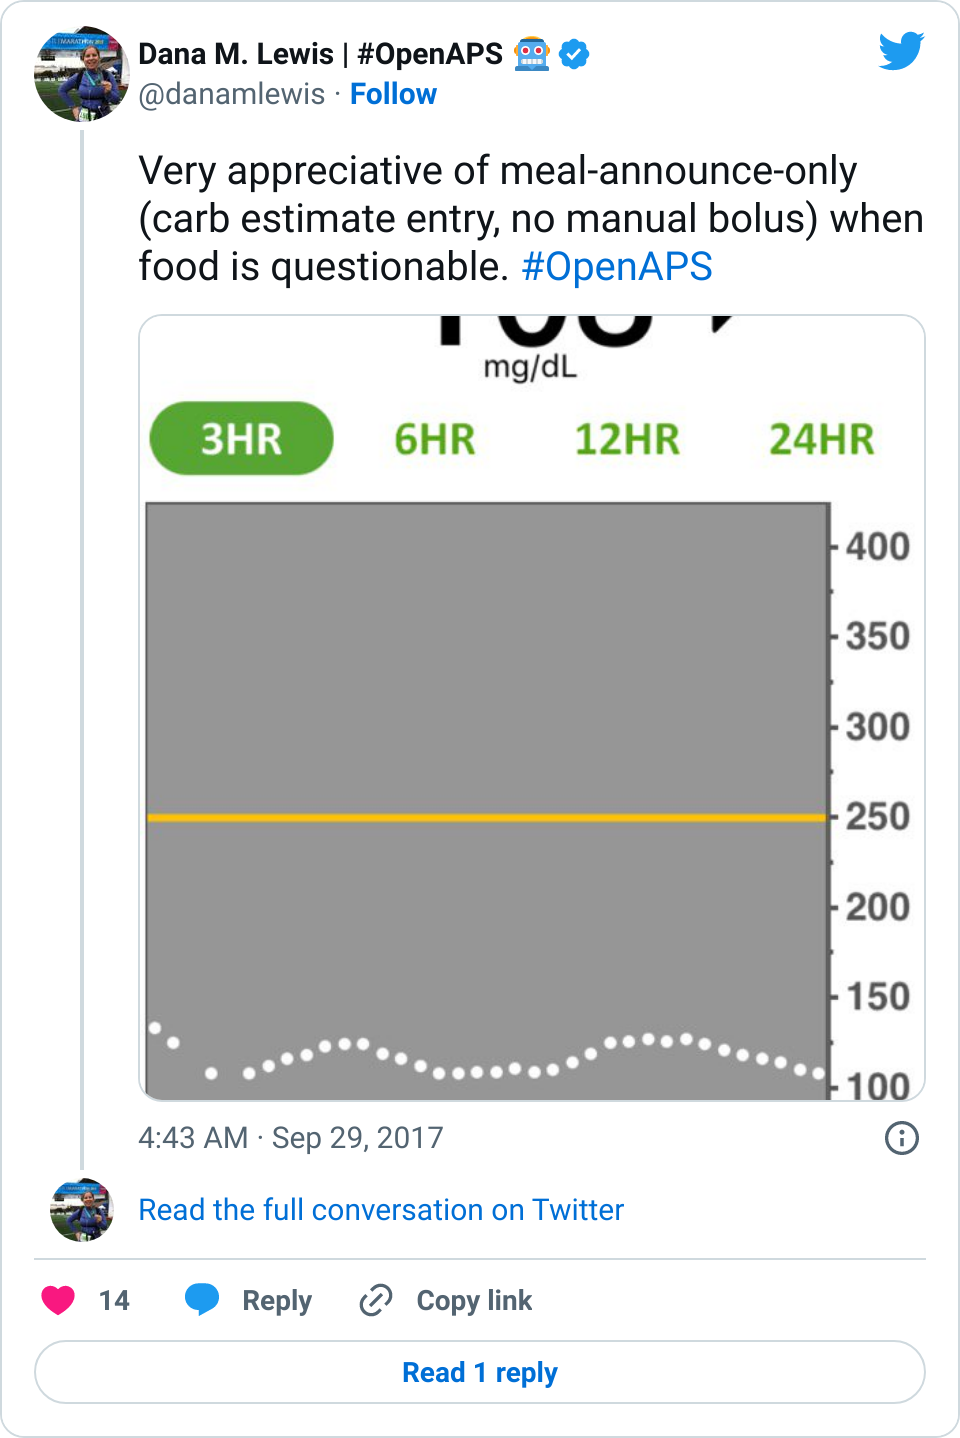
Also note – no eating soon required. No early bolus or pre-bolus. Just single button press as I stick food in my mouth.

Wow.

(See where I said, waiting for the other shoe to drop?)

That’s why I waited a while to even tweet about it. Maybe it’s a fluke. Maybe it won’t work for other people. Maybe, maybe, maybe. Who knows. It’s still fairly early to tell, but as other people are beginning to test the current dev branch of oref0 with 0.6.0-related features, other people are starting to see improvements as well. (And that could be some of the many other features we are adding to 0.6.0, ranging from exponential curves for insulin activity, to allowing SMBs to do more, to carb-ratio-tuned-autosensitivity, to huge autotune improvements, etc.) 

So while I don’t want to over-hype – and never do, what works for me will not work for everyone – I do want to share my cautious excitement over continuing to be able to push the envelope on algorithms and what might be possible outcome-wise for this kind of technology.

Suggesting no meal bolus means we can quit arguing about the name "artificial pancreas"

Here’s what is enabling me to be in the no-bolus zone for now well over a month, with still (to me) great outcomes worth the tradeoffs described above:

  1. Faster insulin. Thanks to our lovely looping friends in Germany/Austria, we came back from Europe with a few vials of Fiasp to try. I was HIGHLY skeptical about this. Some of our European friends saw great results right away, others didn’t. I didn’t get great results on it at first. Some of that may be due to natural changes between insulin types and not knowing exactly how to adjust my manual bolus strategy to the faster insulin action, but until we did some code changes to allow SMB‘s to do more and added some other features to what’s now 0.6.0, I wasn’t thrilled and in fact after about two weeks of it was about to switch off of it. So that brings me to #2.
  2. More improvements to the algorithm, which is now what will become the 0.6.0 release of oref0. There’s a whole lot of stuff packed in there. Exponential curves. Different carb absorption decay calculations. Allowing SMB to do more. Additional safety guards since we ramped SMB up.

How we started testing no-bolus approach:

  • I have always known that about 6u of insulin (thanks to testing dating back to my early DIYPS days, many many many moons ago) is about as much as I should bolus at any time. So, even if I ate 120 carbs, I usually did about a 6u bolus up front, and let the rig pick up the rest as needed over more hours. I started doing ~75% or something like that of boluses, based on wherever I felt like rounding to with my easy bolus buttons.
  • Whether I did 75% or 100%, I didn’t see a ton of difference at first…
  • ..so I took a leap and tried no-bolus with some SMB adjustments to allow it to ramp up faster with carb entry. Behaviorally, I find it a lot easier to do nothing 😀 vs. figure out the right amount of up front bolus. And outcomes wise (see above) it was very similar.

It definitely was an interesting approach to test. Between the Fiasp and the no-bolus up front, in some meals it matched really well and I had practically no rise. Due to incoming netIOB, food type, etc, sometimes I did have a rise – but while it spiked slightly higher (160-170 usually vs my earlier 150s with manual bolus), it was only up there for 2-3 data points and then came sharply down, leveling out smoothly in my preferred post-meal range. So an important lesson I learned was not to over-react to just the BG curve going up, without looking at the predictions to see where I was going to come just back down. (And as I had more than one meal where the spike and drop back to normal happened, it was very easy to adjust to the BG graph and not get that emotional tug to “do more” with a quick short rise like that).

Obviously, starting BG makes a difference. I’m usually starting <130 mg/dL when I see these spikes cap out at 170 or lower. I’ve started higher, and seen higher rises, too. They’re not all perfect: with occasional pump site issues, carb underestimates, unplanned carb stacking, and all the randomness of diabetes and a non-structured lifestyle (including live-testing bleeding edge algorithm changes), I’ve spent 12% of the last month >160 mg/dL, which is about the same as the 3 months before that. But in most cases (I’d say 95%), the no-bolus approach has actually yielded better outcomes than I expected AND has avoided post-meal lows better than I would have achieved with a manual bolus.

This is huge when you think about the QOL aspect of not having to do as much math at a meal; and when you think about all the complicating factors related to food – timing (do you bolus when you order, or when the food arrives, or earlier than that?), and the gluten factor. I have celiac disease, so if I’m eating out (which we do a lot, and especially since I travel frequently), bolusing prior to setting eyes on the food (knowing they didn’t plate it with bread, causing them to have to go back and start all over again) just isn’t smart. That’s why eating soon historically worked so well for me vs. traditional pre-boluses, because I could set the target entering the restaurant, bolus when I laid eyes on my hopefully safe food, and get reasonable (150 topping out) meal outcomes.

It also worked really well in the case where a restaurant cooked my gluten free pasta in the same pasta cooker and water as regular pasta, but didn’t inform me until after I found stray gluten noodles in the bottom of my pasta dish and started asking how that was possible since they (used to) do gluten free well. (Now, I pick up heaps of pasta, and sort pasta noodles one by one to make sure they all match before ever eating gluten free pasta. It makes waiters look at you very worriedly as you wave pasta around in the air, but better safe than glutened (again).) So, I was majorly glutened, and my digestion system was all out of sorts (isn’t that a nice polite way to describe getting glutened?) for many days, which of course impacted BG and insulin right then and for the days afterward. But because I had done carb entry and no-bolus, I was able to edit the carb entry down, and I didn’t have that much insulin stacked, and didn’t end up low after glutening, which is usually what happens.

Is that a super regular situation for most people? No. But it was super nice. And also helped me face pasta again last night, so I could put in a (very low in case of gluten) carb estimate, match my noodles, eat pasta, and let the SMBs ramp up to match absorption. It works very well for me.

Example BG graph from only announcing, not bolusing for, a meal with OpenAPS

Whether you have celiac or not, for many reasons (insert yours here), it’s nice to not to have to commit to the bolus up front. It’s closer to approaching what I think non-PWDs do at mealtimes: just eat.

(I haven’t done much testing (yet? TBD) for no-carb-entry and no-meal-bolus scenario, I expect I would have higher spikes but would be interesting to see if it would still come down reasonably fast. Probably wouldn’t be my go-to strategy because I don’t mind a general meal size estimate one button push, but would be nice to know what that curve shape would look like. If I test that, it’ll start with small snacks and ramp my way up.)

The questions I always get:

  1. Q: HOW DO I GET THIS?
    A: Caution: like all things OpenAPS but especially always true for the development branch, 0.6.0 is NOT released yet to master and is still highly experimental. I wouldn’t install dev unless you want to pay lots of close attention to it, and are willing to update multiple times over the course of the week, because Scott and I are merging features and tweaks almost daily to it.

    Got the disclaimers down? Ok. It’s in the dev branch of oref0. You should read this PR with notes on some more detail of what’s included, but you should also review the code diff to see all that’s changed, because it’s not all documented yet. Also, follow the instructions at the bottom to be able to install it without git. Hop into Gitter if you have questions about it!

    (Big huge thanks to folks like Tim and Matthias for early testing of 0.6.0; and to Tim for writing up about the initial rounds of 0.6.0-dev here (note that we’ve made further changes since this post), and others who’ve been testing & providing feedback and input into the dev branch!)

  2. Q: When will this get “released” to master?
    A: It depends. This is still a highly active dev branch, and we’re making a lot of changes and tweaking and testing things. The more people who test now and provide feedback will enable us to get to the final “prepare for release” testing stage. Lots and lots of testing, and things depend on how much existing needs tweaked, and what else we decide should go with this release. So, there’s never any specific release date.
  3. Q: What is Fiasp?
    A: Faster acting insulin that was only approved in Europe and Canada…until today. Convenient timing. I asked a PR person who messaged me about it, and they said it’s estimated to be available in U.S. pharmacies by late December/earlier Q1. As previously stated, available elsewhere in other parts of the world.

    Fiasp peaks sooner (say, ~45 minutes) with the same tail as everything else. It’s not instantaneous. For your million and one questions about whether it’s approved for your use in a tree, on a plane, at the zoo, and all other extrapolations – please ask Google/your doctor/the manufacturer, and not me. I don’t know. :)

  4. Q: Will any of this work for people NOT on Fiasp?
    A: Nothing is guaranteed (even for other people on Fiasp), but the folks who’ve started testing 0.6.0 even without Fiasp (on Humalog or Novolog/Novorapid, etc.) have been happier on it vs. earlier versions, too.

    I don’t expect Fiasp to work super well forever for me, given what I’ve heard from other people with months of experience on it…and given my first two weeks of Fiasp not being spectacular, I want people to not expect miracles. (Sorry, this blog post does not promise miracles, so sorry if you got super excited at the above. No miracles! This is not a cure! We still have diabetes!) Like all things artificial pancreas, I think it’s better to be cautiously hopeful with realistic expectations that things *might* be a little bit better than before, but as always, YDMV (your diabetes may/will always vary), your body will vary, and life happens, etc. so who knows.

Just 4 months ago, we published a blog post pointing out that the new features had allowed us to achieve 4 out of 5 of: no bolus; not counting carbs, medium/high carb meals, 80%+ time in range; and no hypoglycemia.  With Fiasp and  0.6.0 (currently what’s in the dev branch), we’ve now achieved all 5 simultaneously: I can eat large high-carb meals, enter very vague guesstimates of 60 or 90 carbs (no need for actual carb counting, just general size-based meal announcement), and still achieve 80%+ time in range 70-150 mg/dL without ever going <55 mg/dL.  Does that mean that OpenAPS with Fiasp finally meets the definition of a “real” Artificial Pancreas (step 5 on JDRF’s 6-step AP development pathway)?  We think it does.

So, tl;dr (because long post is long): with Fiasp and 0.6.0-dev branch, I’m able to not bolus for meals, and just enter a very generally sized meal estimate. It’s working well for me, and like all things, we’re working to make it available to other people via OpenAPS for others who want to try similar features/approaches. It may not work well for everyone. If it helps one other person, though, like everything else it’ll be worth it. Big thanks to Scott for LOTS of development in 0.6.0 and partnership in design of these features; too many people to name for testing and providing feedback and helping iterate on these features; and to the entire community for being awesome and helping us to continue to push the envelope on what might be possible for those of us with type 1 diabetes. :)

Why a non-academic (patient) publishes in academic journals

Today I was able to share that my Letter to the Editor was published in the Journal of Diabetes Science and Technology. It’s on why we need to set expectations to help patients successfully adopt hybrid closed loop/artificial pancreas/automated insulin delivery system technology. (You can read it via image copies in the first link.)

JDST_screenshot_LTE_expectationsI’ve published a few times in academic journals. Last year, Scott and I published another Letter to the Editor in JDST with the OpenAPS outcomes study we had presented at the 2016 ADA Scientific Sessions conference.

But, I’m sure people are wondering why I choose to do so – especially as I am 1) a patient and 2) a non-academic. (Although in case you missed it – I’m now the Principal Investigator on a grant-funded study!)

While there are many healthcare providers, researchers, industry employees, FDA staff, etc. who read blogs like this and are up to speed on the bleeding edge of diabetes technology… there are easily 10x the number that do not.

And if they don’t know about the existence of this world, they won’t know about the valuable lessons we’re learning and won’t be able to share those lessons and knowledge with other healthcare providers and the patients that they treat.

So, in my pursuit to find more ways to share knowledge from our community with the rest of the diabetes community, this is why we submit abstracts for posters and presentations to conferences like ADA’s Scientific Sessions. Our abstracts are evaluated just like the abstracts from traditional healthcare providers (as far as they can tell, I’m just another academic, albeit one with fewer credentials ;)), and I’m proud that they’re evaluated and deemed worthy of poster presentations alongside mainstream researchers. Ditto for our written publications, whether they be letters to the editor or other types of articles submitted to journals and publications.

We need to find more ways to share and distribute knowledge with the “traditional” medical and academic research world. And I’d love to do more – so please share ideas if you have them. And if you’re someone who bridges the gap to the traditional world, I appreciate your help sharing these types of articles and conversations with your colleagues.