Write It Do It: Tips for Troubleshooting DIY Diabetes Devices (#OpenAPS or otherwise)

When I was in elementary school, I did Science Olympiad. (Are you surprised? Once a geek, always a geek…) One of my favorite “events” was “Write It Do It”, where one person would get a sculpture/something constructed (could be Legos, could be other stuff) and you had to write down instructions for telling someone else how to build it. Your partner got your list of instructions, the equipment, and was tasked with re-building the structure.

Building open source code and tools is very similar, now that I look back on the experiences of having built #DIYPS and then working on #OpenAPS. First step? Build the structure. Second step? Figure out how to tell someone ELSE how to do it. (That’s what the documentation is). But then when someone takes the list of parts and your instructions off elsewhere, depending on how they interpreted the instructions…it can end up looking a little bit different. Sometimes that’s ok, if it still works. But sometimes they skip a step, or you forget to write down something that looks obvious to you (but leaves them wondering how one part got left out) – and it doesn’t work.

Unlike in Science Olympiad, where you were “scored” on the creation and that was that, in DIY diabetes this is where you next turn to asking questions and troubleshooting about what to change/fix/do next.

But, sometimes it’s hard.

If you’re the person building a rig:

  • You know what you’re looking at, what equipment you used to get here, what step you’re on, what you’ve tried that works and what hasn’t worked.
  • You either know “it doesn’t work” or “I don’t know what to do next.”

If you’re the troubleshooter:

  • You only know generally how it can/should work and what the documentation says to do; but you only know as much about the specific problem is shared with you in context of a question.

As someone who spends a lot of time in the troubleshooter role these days, trying to answer questions or assist people in getting past where they’re stuck, here are my tips to help you if you’re building something DIY and are stuck.

Tips_online_troubleshooting_DIY_diabetes_DanaMLewis

DO:

  1. Start by explaining your setup. Example: “I’m building an Edison/Explorer Board rig, and am using a Mac computer to flash my Edison.”
  2. Explain the problem as specifically as you can. Example: “I am unable to get my Edison flashed with jubilinux.”
  3. Explain what step you’re stuck on, and in which page/version of the docs. Example: “I am following the Mac Edison flashing instructions, and I’m stuck on step 1-4.” Paste a URL to the exact page in the docs you’re looking at.  Clarify whether your problem is “it doesn’t work” or “I don’t know what to do next.”
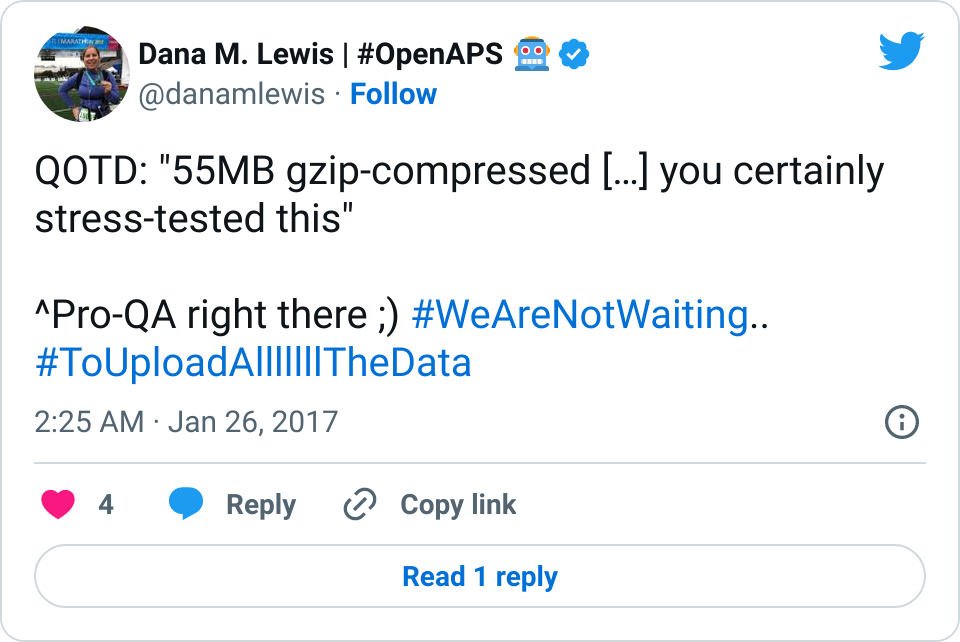
  4. Explain what it’s telling you and what you see. Pro tip: Copy/paste the output that the computer is telling you rather than trying to summarize the error message. Example: “I can’t get the login prompt, it says “can’t find a PTY”.”
    (This is ESPECIALLY important for OpenAPS’ers who want help troubleshooting logs when they’ve finished the setup script – the status messages in there are very specific and helpful to other people who may be helping you troubleshoot.)
  5. Be patient! You may have tagged someone with an @mention; and they may be off doing something else. But don’t feel like you must tag someone with an @mention – if you’re posting in a specific troubleshooting channel, chances are there are numerous people who can (and will) help you when they are in channel and see your message.
  6. Be aware of what channel you’re in and pros/cons for what type of troubleshooting happens where.
    My suggestions:

    1. Facebook – best for questions that don’t need an immediate fix, or are more experience related questions. Remember you’re also at the mercy of Facebook’s algorithm for showing a post to a particular group of people, even if someone’s a member of the same group. And, it’s really hard to do back-and-forth troubleshooting because of the way Facebook threads posts. However, it IS a lot easier to post a picture in Facebook.
    2. Gitter – best for detailed, and hard, troubleshooting scenarios and live back-and-forth conversations. It’s hard to do photos on the go from your mobile device, but it’s usually better to paste logs and error output messages as text anyway (and there are some formatting tricks you can learn to help make your pasted text more readable, too). Those who are willing to help troubleshoot will generally skim and catch up on the channel when they get back, so you might have a few hours delay and get an answer later, if you still haven’t resolved or gotten an answer to your question from the people in channel when you first post.
    3. Email groups – best for if no one in the other channels knows the questions, or you have a general discussion starter that isn’t time-constrained
  7. Start with the basic setup, and come back and customize later. The documentation is usually written to support several kinds of configurations, but the general rule of thumb is get something basic working first, and then you can come back later and add features and tweaks. If you try to skip steps or customize too early, it makes it a lot harder to help troubleshoot what you’re doing if you’re not exactly following the documentation that’s worked for dozens of other people.
  8. Pay it forward. You may not have a certain skill, but you certainly have other skills that can likely help. Don’t be afraid to jump in and help answer questions of things you do know, or steps you successfully got through, even if you’re not “done” with your setup yet. Paying it forward as you go is an awesome strategy J and helps a lot!

SOME THINGS TO TRY TO AVOID:

  1. Avoid vague descriptions of what’s going on, and using the word “it”. Troubleshooter helpers have no idea which “it” or what “thing” you’re referring to, unless you tell them. Nouns are good :) . Saying “I am doing a thing, and it stopped working/doesn’t work” requires someone to play the game of 20 questions to draw out the above level of detail, before they can even start to answer your question of what to do next.
  2. Don’t get upset at people/blame people. Remember, most of the DIY diabetes projects are created by people who donated their work so others could use it, and many continue to donate their time to help other people. That’s time away from their families and lives. So even if you get frustrated, try to be polite. If you get upset, you’re likely to alienate potential helpers and revert into vagueness (“but it doesn’t work!”) which further hinders troubleshooting. And, remember, although these tools are awesome and make a big difference in your life – a few minutes, or a few hours, or a few days without them will be ok. We’d all prefer not to go without, which is why we try to help each other, but it’s ok if there’s a gap in use time. You have good baseline diabetes skills to fall back on during this time. If you’re feeling overwhelmed, turn off the DIY technology, go back to doing things the way you’re comfortable, and come back and troubleshoot further when you’re no longer feeling overwhelmed.
  3. Don’t go radio silent: report back what you tried and if it worked. One of the benefits of these channels is many people are watching and learning alongside you; and the troubleshooters are also learning, too. Everything from “describing the steps ABC way causes confusion, but saying XYZ seems to be more clear” and even “oh wow, we found a bug, 123 no longer is ideal and we should really do 456.” Reporting back what you tried and if it resolved your issue or not is a very simple way to pay it forward and keep the community’s knowledge base growing!
  4. Try not to get annoyed if someone helping out asks you to switch channels to continue troubleshooting. Per the above, sometimes one channel has benefits over the other. It may not be your favorite, but it shouldn’t hurt you to switch channels for a few minutes to resolve your issue.
  5. Don’t wait until you’re “done” to pay it forward. You definitely have things to contribute as you go, too! Don’t wait until you’re done to make edits (PRs) to the documentation. Make edits while they’re fresh in your mind (and it’s a good thing to do while you’re waiting for things to install/compile ;)).

These are the tips that come to mind as I think about how to help people seek help more successfully online in DIY diabetes projects. What tips would you add?

Making it possible for researchers to work with #OpenAPS or general Nightscout data – and creating a complex json to csv command line tool that works with unknown schema

This is less of an OpenAPS/DIYPS/diabetes-related post, although that is normally what I blog about. However, since we created the #OpenAPS Data Commons on Open Humans, to allow those of us who desire to donate our diabetes data to research, I have been spending a lot of time figuring out the process from uploading your data to how data is managed and shared securely with researchers. The hardest part is helping researchers figure out how to handle the data – because we PWDs produce a lot of data :) . So this post explains some of the challenges of the data management to get it to a researcher-friendly format. I have been greatly helped over the years by general purpose open-source work from other people, and one of the things that helps ME the most as a non-traditional programmer is plain language posts explaining the thought process by behind the tools and the attempted solution paths. Especially because sometimes the web pages and blog posts pop higher in search than nitty gritty tool documentation without context. (Plus, I’ve been taking my own advice about not letting myself hold me back from trying, even when I don’t know how to do things yet.) So that’s what this post is!

OH that I "certainly stress tested" a tool with lots of data

Background/inspiration for the project and the tools I had to build:

We’re using Nightscout, which is a remote data-viewing platform for diabetes data, made with love and open source and freely available for anyone with diabetes to use. It’s one of the best ways to display not only continuous glucose monitor (CGM) data, but also data from our DIY closed loop artificial pancreases (#OpenAPS). It can store data from a number of different kinds and brands of diabetes devices (pumps, CGMs, manual data entries, etc.), which means it’s a rich source of data. As the number of DIY OpenAPS users are growing, we estimate that our real-world use is overtaking the amount of total hours of data from clinical trials of closed loop artificial pancreas systems.  In the #WeAreNotWaiting spirit of moving quickly (rather than waiting years for research teams to collect and analyze their own data) we want to see what we can learn from OpenAPS usage, not only by donating data to help traditional researchers speed up their work, but also by co-designing research studies of the things of most value to the diabetes community.

Step 1: Data from users to Open Humans

I thought Step 1 would be the hardest. However, thanks to Madeleine Ball, John Costik, and others in the Nightscout community, a simple Nightscout Data Transfer App was created that enables people with Nightscout data to pop it into their Open Humans accounts. It’s then very easy to join different projects (like the OpenAPS Data Commons) and share your data with those projects. And as the volunteer administrator of the OpenAPS Data Commons, it’s also easy for me to provide data to researchers.

The biggest challenge at this stage was figuring out how much data to pull from the API. I have almost 3 years worth of DIY diabetes data, and I have numerous devices over time uploading all at once…which makes for large chunks of data. Not everyone has this much data (or 6-7 rigs uploading constantly ;)). Props to Madeleine for the patience in working with me to make sure the super users with large data sets will be able to use all of these tools!

Step 2: Sharing the data with researchers

This was easy. Yay for data-sharing tools like Dropbox.

Step 3: Researchers being able to use the data

Here’s where thing started to get interesting. We have large data files that come in json format from Nightscout. I know some researchers we will be working with are probably very comfortable working with tools that can take large, complex json files. However…not all will be, especially because we also want to encourage independent researchers to engage with the data for projects. So I had the belated realization that we need to do something other than hand over json files. We need to convert, at the least, to csv so it can be easily viewed in Excel.

Sounds easy, right?

According to basic searches, there’s roughly a gazillion ways to convert json to csv. There’s even websites that will do it for you, without making you run it on the command line. However, most of them require you to know the types of data and the number of types, in order to therefore construct headers in the csv file to make it readable and useful to a human.

This is where the DIY and infinite possibility nature of all the kinds of diabetes tools anyone could be using with Nightscout, plus the infinite ways they can self-describe profiles and alarms and methods of entering data, makes it tricky. Just based on an eyeball search between two individuals, I was unable to find and count the hundred+ types of data entry possibilities. This is definitely a job for the computer, but I had to figure out how to train the computer to deal with this.

Again, json to csv tools are so common I figured there HAD to be someone who had done this. Finally, after a dozen varying searches and trying a variety of command line tools, I finally found one web-based tool that would take json, create the schema without knowing the data types in advance, and convert it to csv. It was (is) super slick. I got very excited when I saw it linked to a Github repository, because that meant it was probably open source and I can use it. I didn’t see any instructions for how to use it on the command line, though, so I message the author on Twitter and found out that it didn’t yet exist and was a not-yet-done TODO for him.

Sigh. Given this whole #WeAreNotWaiting thing (and given I’ve promised to help some of the researchers in figuring this out so we can initiate some of the research projects), I needed to figure out how to convert this tool into a command line version.

So, I did.

  • I taught myself how to unzip json files (ended up picking `gzip -cd`, because it works on both Mac and Linux)
  • I planned to then convert the web tool to be able to work on the command line, and use it to translate the json files to csv.

But..remember the big file issue? It struck again. So I first had to figure out the best way to estimate the size and splice or split the json into a series of files, without splitting it in a weird place and messing up the data. That became jsonsplit.sh, a tool to split a json file based on the size you give it (and if you don’t specify, it defaults to something like 100000 records).

FWIW: 100,000 records was too much for the more complex schema of the data I was working with, so I often did it in smaller chunks, but you can set it to whatever size you prefer.

So now “all” I had to do was:

  • Unzip the json
  • Break it down if it was too large, using jsonsplit.sh
  • Convert each of these files from json to csv

Phew. Each of these looks really simple now, but took a good chunk of time to figure out. Luckily, the author of the web tool had done much of the hard json-to-csv work, and Scott helped me figure out how to take the html-based version of the conversion and make it useable in the command line using javascript. That became complex-json2csv.js.

Because I knew how hard this all was, and wanted other people to be able to easily use this tool if they had large, complex json with unknown schema to deal with, I created a package.json so I could publish it to npm so you can download and run it anywhere.

I also had to create a script that would pass it all of the Open Humans data; unzip the file; run jsonsplit.sh, run complex-json2csv.js, and organize the data in a useful way, given the existing file structure of the data. Therefore I also created an “OpenHumansDataTools” repository on Github, so that other researchers who will be using Nightscout-based Open Humans data can use this if they want to work with the data. (And, there may be something useful to others using Open Humans even if they’re not using Nightscout data as their data source – again, see “large, complex, challenging json since you don’t know the data type and count of data types” issue. So this repo can link them to complex-json2csv.js and jsonsplit.sh for discovery purposes, as they’re general purpose tools.) That script is here.

My next TODO will be to write a script to take only slices of data based on information shared as part of the surveys that go with the Nightscout data; i.e. if you started your DIY closed loop on X data, take data from 2 weeks prior and 6 weeks after, etc.

I also created a pull request (PR) back to the original tool that inspired my work, in case he wants to add it to his repository for others who also want to run his great stuff from the command line. I know my stuff isn’t perfect, but it works :) and I’m proud of being able to contribute to general-purpose open source in addition to diabetes-specific open source work. (Big thanks as always to everyone who devotes their work to open source for others to use!)

So now, I can pass researchers json or csv files for use in their research. We have a number of studies who are planning to request access to the OpenAPS Data Commons, and I’m excited about how work like this to make diabetes data more broadly available for research will help improve our lives in the short and long term!

Autotune (automatically assessing basal rates, ISF, and carb ratio with #OpenAPS – and even without it!)

What if, instead of guessing needed changes (the current most used method) basal rates, ISF, and carb ratios…we could use data to empirically determine how these ratios should be adjusted?

Meet autotune.

What if we could use data to determine basal rates, ISF and carb ratio? Meet autotune

Historically, most people have guessed basal rates, ISF, and carb ratios. Their doctors may use things like the “rule of 1500” or “1800” or body weight. But, that’s all a general starting place. Over time, people have to manually tweak these underlying basals and ratios in order to best live life with type 1 diabetes. It’s hard to do this manually, and know if you’re overcompensating with meal boluses (aka an incorrect carb ratio) for basal, or over-basaling to compensate for meal times or an incorrect ISF.

And why do these values matter?

It’s not just about manually dosing with this information. But importantly, for most DIY closed loops (like #OpenAPS), dose adjustments are made based on the underlying basals, ISF, and carb ratio. For someone with reasonably tuned basals and ratios, that’s works great. But for someone with values that are way off, it means the system can’t help them adjust as much as someone with well-tuned values. It’ll still help, but it’ll be a fraction as powerful as it could be for that person.

There wasn’t much we could do about that…at first. We designed OpenAPS to fall back to whatever values people had in their pumps, because that’s what the person/their doctor had decided was best. However, we know some people’s aren’t that great, for a variety of reasons. (Growth, activity changes, hormonal cycles, diet and lifestyle changes – to name a few. Aka, life.)

With autosensitivity, we were able to start to assess when actual BG deltas were off compared to what the system predicted should be happening. And with that assessment, it would dynamically adjust ISF, basals, and targets to adjust. However, a common reaction was people seeing the autosens result (based on 24 hours data) and assume that mean that their underlying ISF/basal should be changed. But that’s not the case for two reasons. First, a 24 hour period shouldn’t be what determines those changes. Second, with autosens we cannot tell apart the effects of basals vs. the effect of ISF.

Autotune, by contrast, is designed to iteratively adjust basals, ISF, and carb ratio over the course of weeks – based on a longer stretch of data. Because it makes changes more slowly than autosens, autotune ends up drawing on a larger pool of data, and is therefore able to differentiate whether and how basals and/or ISF need to be adjusted, and also whether carb ratio needs to be changed. Whereas we don’t recommend changing basals or ISF based on the output of autosens (because it’s only looking at 24h of data, and can’t tell apart the effects of basals vs. the effect of ISF), autotune is intended to be used to help guide basal, ISF, and carb ratio changes because it’s tracking trends over a large period of time.

Ideally, for those of us using DIY closed loops like OpenAPS, you can run autotune iteratively inside the closed loop, and let it tune basals, ISF, and carb ratio nightly and use those updated settings automatically. Like autosens, and everything else in OpenAPS, there are safety caps. Therefore, none of these parameters can be tuned beyond 20-30% from the underlying pump values. If someone’s autotune keeps recommending the maximum (20% more resistant, or 30% more sensitive) change over time, then it’s worth a conversation with their doctor about whether your underlying values need changing on the pump – and the person can take this report in to start the discussion.

Not everyone will want to let it run iteratively, though – not to mention, we want it to be useful to anyone, regardless of which DIY closed loop they choose to use – or not! Ideally, this can be run one-off by anyone with Nightscout data of BG and insulin treatments. (Note – I wrote this blog post on a Friday night saying “There’s still some more work that needs to be done to make it easier to run as a one-off (and test it with people who aren’t looping but have the right data)…but this is the goal of autotune!” And as by Saturday morning, we had volunteers who sat down with us and within 1-2 hours had it figured out and documented! True #WeAreNotWaiting. :))

And from what we know, this may be the first tool to help actually make data-driven recommendations on how to change basal rates, ISF, and carb ratios.

How autotune works:

Step 1: Autotune-prep

  • Autotune-prep takes three things initially: glucose data; treatments data; and starting profile (originally from pump; afterwards autotune will set a profile)
  • It calculates BGI and deviation for each glucose value based on treatments
  • Then, it categorizes each glucose value as attributable to either carb sensitivity factor (CSF), ISF, or basals
  • To determine if a “datum” is attributable to CSF, carbs on board (COB) are calculated and decayed over time based on observed BGI deviations, using the same algorithm used by Advanced Meal Asssit. Glucose values after carb entry are attributed to CSF until COB = 0 and BGI deviation <= 0. Subsequent data is attributed as ISF or basals.
  • If BGI is positive (meaning insulin activity is negative), BGI is smaller than 1/4 of basal BGI, or average delta is positive, that data is attributed to basals.
  • Otherwise, the data is attributed to ISF.
  • All this data is output to a single file with 3 sections: ISF, CSF, and basals.

Step 2: Autotune-core

  • Autotune-core reads the prepped glucose file with 3 sections. It calculates what adjustments should be made to ISF, CSF, and basals accordingly.
  • For basals, it divides the day into hour long increments. It calculates the total deviations for that hour increment and calculates what change in basal would be required to adjust those deviations to 0. It then applies 20% of that change needed to the three hours prior (because of insulin impact time). If increasing basal, it increases each of the 3 hour increments by the same amount. If decreasing basal, it does so proportionally, so the biggest basal is reduced the most.
  • For ISF, it calculates the 50th percentile deviation for the entire day and determines how much ISF would need to change to get that deviation to 0. It applies 10% of that as an adjustment to ISF.
  • For CSF, it calculates the total deviations over all of the day’s mealtimes and compares to the deviations that are expected based on existing CSF and the known amount of carbs entered, and applies 10% of that adjustment to CSF.
  • Autotune applies a 20% limit on how much a given basal, or ISF or CSF, can vary from what is in the existing pump profile, so that if it’s running as part of your loop, autotune can’t get too far off without a chance for a human to review the changes.

(See more about how to run autotune here in the OpenAPS docs.)

What autotune output looks like:

Here’s an example of autotune output.

OpenAPS autotune example by @DanaMLewis

Autotune is one of the things Scott and I spent time on over the holidays (and hinted about at the end of my development review of 2016 for OpenAPS). As always with #OpenAPS, it’s awesome to take an idea, get it coded up, get it tested with some early adopters/other developers within days, and continue to improve it!

Highlighting someone successfully using Autotune to help adjust baseline settings

A big thank you to those who’ve been testing and helping iterate on autotune (and of course, all other things OpenAPS). It’s currently in the dev branch of oref0 for anyone who wants to try it out, either one-off or for part of their dev loop. Documentation is currently here, and this is the issue in Github for logging feedback/input, along with sharing and asking questions as always in Gitter!


OpenAPS feature development in 2016

It’s been two years since my first DIY closed loop and almost two years since OpenAPS (the vision and resulting ecosystem to help make artificial pancreas technology, DIY or otherwise, more quickly available to more people living with diabetes) was created.  I’ve spent time here (on DIYPS.org) talking about a variety of things that are applicable to people who are DIY closed looping, but also focusing on things (like how to “soak” a CGM sensorr and how to do “eating soon” mode) that may be (in my opinion) universally applicable.

OpenAPS feature development in 2016

However, I think it’s worth recapping some of the amazing work that’s been done in the OpenAPS ecosystem over the past year, sometimes behind the scenes, because there are some key features and tools that have been added in that seem small, but are really impactful for people living with DIY closed loops.

  1. Advanced meal assist (aka AMA)
    1. This is an “advanced feature” that can be turned on by OpenAPS users, and, with reliable entry of carb information, will help the closed loop assist sooner with a post-meal BG rise where there is mis-timed or insufficient insulin coverage for the meal. It’s easy to use, because the PWD only has to put carbs and a bolus in – then AMA acts based on the observed absorption. This means that if absorption is delayed because you walk home from dinner, have gastroparesis, etc., it backs off and wait until the carbs actually start taking effect (even if it is later than the human would expect).
    2. We also now have the purple line predictions back in Nightscout to visualize some of these predictions. This is a hallmark of the original iob-cob branch in Nightscout that Scott and I originally created, that took my COB calculated by DIYPS and visualized the resulting BG graph. With AMA, there are actually 3 purple lines displayed when there is carb activity. As described here in the OpenAPS docs, the top purple line assumes 10 mg/dL/5m carb (0.6 mmol/L/5m) absorption and is most accurate right after eating before carb absorption ramps up. The line that is usually in the middle is based on current carb absorption trends and is generally the most accurate once carb absorption begins; and the bottom line assumes no carb absorption and reflects insulin only. Having the 3 lines is helpful for when you do something out of the ordinary following a meal (taking a walk; taking a shower; etc.) and helps a human decide if they need to do anything or if the loop will be able to handle the resulting impact of those decisions.
  2. The approach with a “preferences” file
    1. This is the file where people can adjust default safety and other parameters, like maxIOB which defaults to 0 during a standard setup, ultimately creating a low-glucose-suspend-mode closed loop when people are first setting up their closed loops. People have to intentionally change this setting to allow the system to high temp above a netIOB = 0 amount, which is an intended safety-first approach.
    2. One particular feature (“override_high_target_with_low”) makes it easier for secondary caregivers (like school nurses) to do conservative boluses at lunch/snack time, and allow the closed loop to pick up from there. The secondary caregiver can use the bolus wizard, which will correct down to the high end of the target; and setting this value in preferences to “true” allows the closed loop to target the low end of the target. Based on anecdotal reports from those using it, this feature sounds like it’s prevented a lot of (unintentional, diabetes is hard) overreacting by secondary caregivers when the closed loop can more easily deal with BG fluctuations. The same for “carbratio_adjustmentratio”, if parents would prefer for secondary caregivers to bolus with a more conservative carb ratio, this can be set so the closed loop ultimately uses the correct carb amount for any needed additional calculations.
  3. Autosensitivity
    1. I’ve written about autosensitivity before and how impressive it has been in the face of a norovirus and not eating to have the closed loop detect excessive sensitivity and be able to deal with it – resulting in 0 lows. It’s also helpful during other minor instances of sensitivity after a few active days; or resistance due to hormone cycles and/or an aging pump site.
    2. Autosens is a feature that has to be turned on specifically (like AMA) in order for people to utilize it, because it’s making adjustments to ISF and targets and looping accordingly from those values. It also have safety caps that are set and automatically included to limit the amount of adjustment in either direction that autosens can make to any of the parameters.
  4. Tiny rigs
    1. Thanks to Intel, we were introduced to a board designer who collaborated with the OpenAPS community and inspired the creation of the “Explorer Board”. It’s a multipurpose board that can be used for home automation and all kinds of things, and it’s another tool in the toolbox of off-the-shelf and commercial hardware that can be used in an OpenAPS setup. It’s enabled us, due to the built in radio stick, to be able to drastically reduce the size of an OpenAPS setup to about the size of two Chapsticks.
  5. Setup scripts
    1. As soon as we were working on the Explorer Board, I envisioned that it would be a game changer for increasing access for those who thought a Pi was too big/too burdensome for regular use with a DIY closed loop system. I knew we had a lot of work to do to continue to improve the setup process to cut down on the friction of the setup process – but balancing that with the fact that the DIY part of setting up a closed loop system was and still is incredibly important. We then worked to create the oref0-setup script to streamline the setup process. For anyone building a loop, you still have to set up your hardware and build a system, expressing intention in many places of what you want to do and how…but it’s cut down on a lot of friction and increased the amount of energy people have left, which can instead be focused on reading the code and understanding the underlying algorithm(s) and features that they are considering using.
  6. Streamlined documentation
    1. The OpenAPS “docs” are an incredible labor of love and a testament to dozens and dozens of people who have contributed by sharing their knowledge about hardware, software, and the process it takes to weave all of these tools together. It has gotten to be very long, but given the advent of the Explorer Board hardware and the setup scripts, we were able to drastically streamline the docs and make it a lot easier to go from phase 0 (get and setup hardware, depending on the kind of gear you have); to phase 1 (monitoring and visualizing tools, like Nightscout); to phase 2 (actually setup openaps tools and build your system); to phase 3 (starting with a low glucose suspend only system and how to tune targets and settings safely); to phase 4 (iterating and improving on your system with advanced features, if one so desires). The “old” documentation and manual tool descriptions are still in the docs, but 95% of people don’t need them.
  7. IFTTT and other tool integrations
    1. It’s definitely worth calling out the integration with IFTTT that allows people to use things like Alexa, Siri, Pebble watches, Google Assistant (and just about anything else you can think of), to easily enter carbs or “modes” for OpenAPS to use, or to easily get information about the status of the system. (My personal favorite piece of this is my recent “hack” to automatically have OpenAPS trigger a “waking up” mode to combat hormone-driven BG increases that happen when I start moving around in the morning – but without having to remember to set the mode manually!)

..and that was all just things the community has done in 2016! :) There are some other exciting things that are in development and being tested right now by the community, and I look forward to sharing more as this advanced algorithm development continues.

Happy New Year, everyone!

Automating “wake up” mode with IFTTT and #OpenAPS to blunt morning hormonal rises

tl;dr – automate a trigger to your #OpenAPS rig to start “wake up” mode (or “eating soon”, assuming you eat breakfast) without you having to remember to do it.

Yesterday morning, I woke up and headed to my desk to start working. Because I’m getting some amazing flat line overnights now, thanks to my DIY closed loop (#OpenAPS), I’m more attuned to the fact that after I wake up and start moving around, my hormones kick in to help wake me up (I guess), and I have a small BG rise that’s not otherwise explained by anything else. (It’s not a baseline basal problem, because it happens after I wake up regardless of it being 6am or 8am or even 10:30am if I sleep in on a weekend. It’s also more pronounced when I feel sleep deprived, like my body is working even harder to wake me up.)

Later in the morning, I took a break to jot down my thoughts in response to a question about normal meal rises on #OpenAPS and strategies to optimize mealtimes. It occurred to me later, after being hyper attuned to my lunch results, that my morning wake-up rise up from 1oo perfectly flat to ~140 was higher than the 131 peak I hit after my lunchtime bowl of potato soup.

Hmm, I thought. I wish there was something I could do to help with those morning rises. I often do a temporary target down to 80 mg/dL (a la “eating soon” mode) once I spot the rise, but that’s after it’s already started and very dependent on me paying attention/noticing the rise.

I also have a widely varied schedule (and travel a lot), so I don’t like the idea of scheduling the temp target, or having recurring calendar events that is yet another thing to babysit and change constantly.

What I want is something that is automatically triggered when I wake up, so whether I pop out of the bed or read for 15 minutes first, it kicks in automatically and I (the non-morning person) don’t have to remember to do one more thing. And the best trigger that I could think of is when I end Sleep Cycle, the sleep tracking app I use.

I started looking online to see if there was an easy IFTTT integration with Sleep Cycle. (There’s not. Boo.) So I started looking to see if I could stick my Sleep Cycle data elsewhere that could be used with IFTTT. I stumbled across this blog post describing Sleep Cycle -> iOS Apple HealthKit -> UP -> Google Spreadsheet -> Zapier -> Add to Google Calendar. And then I thought I would add another IFTTT trigger for when the calendar entry was added, to then send “waking up” mode to #OpenAPS. But I don’t need all of the calendar steps. The ideal recipe for me then might be Sleep Cycle ->  iOS Health Kit -> UP -> IFTTT sends “waking up mode” -> Nightscout -> my rig. However, I then learned that UP doesn’t necessarily automatically sync the data from HealthKit, unless the app is open. Hmm. More rabbit holing. Thanks to the tweet-a-friend option, I talked to Ernesto Ramirez (long time QS guru and now at Fitabase), who found the same blog post I did (above) and when I described the constraints, then pointed me to Hipbone to grab Healthkit sleep data and stuff it into Dropbox.

(Why Sleep Cycle? It is my main sleep tracker, but there’s IFTTT integration with Fitbit, Jawbone Up, and a bunch of other stuff, so if you’re interested in this, figure out how to plug your data into IFTTT, otherwise follow the OpenAPS docs for using IFTTT to get data into Nightscout for OpenAPS, and you’ll be all set. I’m trying to avoid having to go back to my Fitbit as the sleep tracker, since I’m wearing my Pebble and I was tired of wearing 2 things. And for some reason my Pebble is inconsistent and slow about showing the sleep data in the morning, so that’s not reliable for this purpose. )

Here’s how I have enabled this “wake up” mode trigger for now:

  1. If you’re using Sleep Cycle, enable it to write sleep analysis data to Apple HealthKit.
  2. Download the Hipbone app for iPhone, connect it with your Dropbox, and allow Hipbone to read sleep data from HealthKit.
  3. Log in or create an account in IFTTT.com and create a recipe using Dropbox as the trigger, and Maker as the action to send a web request to Nightscout. (Again, see the OpenAPS docs for using IFTTT triggers to post to Nightscout, there’s all kinds of great things you can do with your Pebble, Alexa, etc. thanks to IFTTT.) To start, I made “waking up” soon a temporary target to 80 for 30 minutes.

Guess what? This morning, I woke up, ended sleep cycle, and ~10-11 minutes later got notifications that I had new data in Dropbox and checked and found “waking up” mode showing in Nightscout! Woohoo. And it worked well for not having a hormone-driven BG rise after I started moving around.

First "waking up" mode in #OpenAPS automation success

Ideally, this would run immediately, and not take 10-11 minutes, but it went automatically without me having to open Hipbone (or any other app), so this is a great interim solution for me until we find an app that will run more quickly to get the sleep data from HealthKit.

We keep finding great ways to use IFTTT triggers, so if you have any other cool ones you’ve added to your DIY closed loop ecosystem, please let me know!

Our take on how to DIY closed loop, safely

You will often see similar growth and evolution cycles across any type of online community, and the closed loop community is following this growth cycle as expected. Much like how Nightscout went from one very hard way to setup to get your CGM data in the cloud, to ultimately having dozens of DIY options and now more recently, multiple commercial options, closed looping is following similar trends. OpenAPS was the first open source option for people who wanted to DIY loop, and now there are a growing number of ways to build or run closed loops! And next year, there should be at least one commercial option publicly available in the U.S. followed by several more options in 2018 on the commercial market. Awesome! This is exactly the progress we were hoping to see, and facilitate happening more quickly, by making our work & encouraging others to make their work open source.

We’ve learned a lot (from building our own closed loop and watching others do so through OpenAPS) that we think is relevant to anyone who pursues DIY closed looping, regardless of the technology option they choose. This thought process and approach will likely also be relevant to those who switch to a closed loop commercial option in the future, so we wanted to document some of the thought process that may be involved.

Approaching closed looping safely

Before considering closed looping, people should know:

  • A (hybrid or even full) closed loop is not a cure. There will be a learning curve, much like switching to a pump for the first time.
  • Even after you get comfortable with a closed loop, there will still sometimes be high or low BGs, because we are still dealing with insulin that peaks in 60-90 minutes; we’ll still get kinked pump sites or pooled insulin; and we’ll still have hormones that drive our BGs up and down very rapidly in ways we can’t predict, but must react to. Closed looping helps a lot, but there’s still a lot that goes into managing diabetes.

Before using a DIY closed loop, people should consider:

  • Identifying or creating the method to visualize their data in a way they are comfortable with, both for real-time monitoring of loop activity and retrospective monitoring. This is a key component of DIY looping.
  • Running in “open loop” mode, where the system provides recommendations and you spend days or weeks analyzing and comparing those recommendations to how you would calculate and choose to take action manually.
  • Based on watching the “open loop” suggestions, decide your safety limits: you should set max basal and bolus rates, as well as max net IOB limits where relevant. Start conservative, knowing you can change them over time as you watch and validate how a particular DIY loop works with your body and your lifestyle.

Getting started with a DIY closed loop, people should think about the following:

  • Understand how it works, so you know how to fix it. Remember, by pursuing a DIY closed loop, you are responsible for it and the operation of it. No one is forcing you to do this; it’s one of many choices you can and will make with regards to how you personally choose to manage your diabetes.
  • But even more importantly, you need to understand how it works so you can choose if you need to step in and take manual action. You should understand how it works so you can validate “this is what it should be doing” and “I am getting the output and outcomes that I would expect if I were doing this decision making manually”.
  • Often, people will get frustrated by diabetes and take actions that the loop then has to compensate for. Or they’ll get lax on when they meal bolus, or not enter carbs into the system, etc. You will get much better results by putting better data into the system, and also by having a better understanding of insulin timing in your body, especially at meal times. Using techniques like “eating soon mode” will dramatically help anyone, with or without a closed loop, reduce and limit severity of meal spikes. Ditto goes for having good CGM “calibration hygiene” (h/t to Pete for this phrase) and ensuring you have thought about the ramifications of automating insulin dosing based on CGM data, and how you may or may not want to loop if you doubt your CGM data. (Like “eating soon”, ‘soaking’ a CGM sensor may yield you better first day results.)
  • Start with higher targets for the loop than you might correct to manually.
  • Move first from an “open loop” mode to a “low glucose suspend” type mode first, where max net IOB is 0 and/or max basal is set at or just above your max daily scheduled basal, so it low temps to prevent and limit lows, but does not high temp above bringing net IOB back to 0.
  • Gradually increase max net IOB above 0 (and/or increase max basal) every few days after several days without low BGs; similarly, adjust targets down 10 points for every few days gone without experiencing low BGs.
  • Test basic algorithms and adjust targets and various max rates before moving on to testing advanced features. (It will be a lot easier to troubleshoot, and learn how a new feature works, if you’re not also adjusting to closed looping in its entirety).
This is our (Dana & Scott‘s) take on things to think about before and when pursuing a closed loop option. But there’s about a hundred others running around the world with closed loops, too, so if you have input to share with people that they should consider before looping, leave a comment below! :) And if you’re looking to DIY closed loop before a commercial solution is available, you might also be interested in checking out the OpenAPS Reference Design and some FAQs related to OpenAPS.

How I designed a “DIY” closed loop artificial pancreas

This post was written months ago for Prescribe Design, and will also be posted/made available there as a collection of their stories by and about patients who design, but I am also posting here for anyone new to #DIYPS and/or wondering about how #OpenAPS came into existence.

About the author: Dana Lewis is the creator of #DIYPS, the Do-It-Yourself Pancreas System, and a founder of the #OpenAPS movement. (Learn more about the open source artificial pancreas movement at OpenAPS.org.)  Dana can be found online at @DanaMLewis, #DIYPS, and #OpenAPS on Twitter, and also on LinkedIn.

Diabetes is an invisible illness that’s not often noticeable, and may be considered to be “easy” compared to other diseases. After all, how hard can it be to track everything you eat, check your blood glucose levels, and give yourself insulin throughout the day?

What most people don’t realize is that managing diabetes is an extremely complex task; numerous variables influence your blood glucose levels throughout the day, from food to activity to sleep to your hormones. Some of these things are easier to measure than others, and some are easier to influence than others, as I’ve learned over the past 13 years of living with type 1 diabetes.

Dana Lewis finishing the Leavenworth half marathonDiabetes technology certainly helps – and those of us with access to insulin pumps and continuous glucose monitors are thankful that we have this technology to better help us manage our disease. But this technology is still not a cure. After I run a marathon, my blood sugar is likely to run low overnight for the next few nights. And the devices I use to help me manage still have major flaws.

For example, my continuous glucose monitor (CGM) gives me a reading of my blood glucose every 5 minutes – but I have to pay attention to it in order to see what is going on (pulling the device from my pocket and pressing a button to see my numbers). And what happens when I go to sleep? I am sleeping, rather than paying attention to my blood sugar.

Sure, you can set alarms, and if your blood glucose (BG) goes above or below your personal threshold, an alarm will sound. That’s great, unless you’re a sound sleeper like me who doesn’t always hear these sounds in my sleep – and unfortunately there’s no way on the device to make the alarms louder.

For years, I worried every night when I went to sleep that I would have a low blood sugar, not hear the alarm, and not wake up in the morning. And since I moved across the country for work, and lived by myself, it could potentially be hours before someone realized I didn’t show up for work, and days before someone decided to check on me inside my apartment.

I was worried about “going low” overnight, and I kept asking the device manufacturers for louder alarms. The manufacturers usually responded, “the alarms are loud enough, most people wake up to them!” This was frustrating, because clearly I’m not one of those people.

I realized that if only I could get my CGM data off my device in real-time, I could make a louder alarm by using my phone or my laptop instead of having to rely on the existing medical device volume settings. It would be as easy as using a basic service like IFTTT or an app like “Pushover” that allows you to  customize alerts on an iPhone.

However, for the longest time, I couldn’t get my data off of my device. (In fact, for years I had NO access to my own medical device data, because the FDA-approved software only ran on Windows computers, and I had a Mac.) But in November 2013, I by chance found someone who tweeted about how had managed to get his son’s data off the CGM in real-time, and he was willing to share his code with me. And this changed everything.

Taking a photo of a CGM screen and printing it out is not very efficient for reviewing BG data.(At the time, my continuous glucose monitor only had FDA-approved software that could be used on a Windows computer. Since I had a Mac, when my endocrinologist asked for diabetes data, I took a picture with my iPhone and pasted the images into Excel, and printed it out for him. Data access is an ongoing struggle.)

My design “ah-ha” became a series of “wow, what if” statements. At every stage, it was very easy to see what I wanted to do next and how to iterate, despite the fact that I am not a designer and I am not a traditional engineer. I had no idea that within a year I would progress from making those louder alarms to building a full hybrid closed loop artificial pancreas (one that would auto-adjust the levels on my insulin pump overnight).

Once I had my CGM data, I originally wanted to be able to send my data to Scott (my then-boyfriend and now husband, who lived 20 miles away at the time) to see, but I didn’t want him to get alarms any time I was merely one point above or below my target threshold. What was important for him to know was if I wasn’t responding to alarms. We set up the system so that Scott could see whether or not  I was taking action on a low reading, which I signaled by pressing a button. If the system alerted to Scott that I was not responding to a low reading, he could call and check on me, drive 20 miles to see me, or call 911 if necessary. (Luckily, he never needed to call 911 or come over, but within a week of building the first version of the system, he called me when my blood sugar was below 60 and I hadn’t woken up yet to the alarms.)

DIYPS prototype with Pebble

I realized next that if I was already pushing a button on the web interface (pictured), I might as well add three buttons and show him what action I was taking (more insulin, less insulin, or eating carbohydrates) in case I accidentally did the wrong thing in my sleep. I also customized the system so that I could log exactly how much insulin I was taking or how much I was eating.

Because I was entering every action I took (insulin given, any food eaten), we realized that this data could fuel real-time predictions and give precise estimates of where my blood sugar would be 30, 60, or 90 minutes in the future. As a result, I could see where my blood glucose level would be if I didn’t take action, and make sure I didn’t overcorrect when I did decide to take action. This was helpful during the day, too. The CGM has alarm thresholds that notify you if you cross the line; but #DIYPS will predict ahead of time that I am likely to go out of range, and will recommend action to help prevent me from crossing the threshold.

The system worked great and generated many alarms that woke me up at night. (Ironically, we generated so many alarms that Scott would periodically change the sound of the alarm without telling me, because my body would get used to ignoring the same sound over time!) The next step was deciding to get a smart watch (in my case, a Pebble) so I could see my data on my watch, and reduce the amount of time I spent pulling my CGM receiver out of my pocket and pressing the button to turn the screen on. With a watch, it was also easier to see real-time push alerts that the system would send me to tell me to take action. As a result, I was able to begin to spend less time throughout the day worrying about my blood sugar, and more time living my life while the system ran in the background, updating every few minutes and alerting me as to when I needed to pay attention when something changed.

We called this system the “Do It Yourself Pancreas System”, or #DIYPS, and we developed it completely in our “free time” on nights and weekends.

People often ask what my health care provider thinks. He didn’t appear very interested in hearing about this system when I first mentioned it, but he was glad to hear I was having positive outcomes with it.

More significantly, I had a lot of other people with diabetes interested in it and wanting to know how they could get it.

As a patient, I can only design tools and technology for myself; but because it would be seen by the FDA as a class III medical device (and making dosing recommendations from a CGM rather than a blood glucose meter, which the CGM is not approved for), I can not distribute it to other people to use as it would have to first be reviewed and regulated by the FDA.

With this in mind, Scott and I were both also working with the Nightscout project (another community-developed DIY tool that helps you share or more easily view your diabetes data). We were able to incorporate some of the key features we had built in #DIYPS, like the visualization predicting where the blood glucose would be based on carbohydrates and insulin activity.

We also kept iterating on #DIYPS and the algorithms I use to predict when my blood sugar is going to end up high or low. By the time we made it to November of 2014, we realized that we had a well-tested system that did an excellent job giving precise recommendations of adjusting insulin levels. If only we had a way to talk to my insulin pump, we theorized that we could turn it into a fully closed loop artificial pancreas – meaning that instead of only allowing my insulin pump to give me a pre-determined amount of insulin throughout the night, a closed loop system would instead take into account my blood sugar and make the automatic needed adjustments to give me more or less insulin as needed to keep me in range.

Components of an #OpenAPS implementation: pump; CGM; Raspberry Pi with battery and a radio communication deviceWith the help of Ben West, another developer we met while working on Nightscout, who has spent years working on tools to communicate with diabetes devices, we were able to take a carelink USB stick and use it to communicate with my insulin pump. Plugged into a raspberry pi (a small, pocket sized computer), the carelink USB stick could pull from our algorithms, read from the pump, write commands (in the form of temporary basal rates for 30 minutes), read back the results, update the algorithm and generate new predictions and action items, and then do the same process over and over again.

And so, with the help of various community members, we had closed the loop with our artificial pancreas. And once I had it turned on, testing, and working, it was hard to convince me to take it off. This was December of 2014. More than a year and a half later, I’m still wearing and using it every day and night.

Dana BGs with OpenAPS

There are definitely challenges to having self-designed a device. There are usability issues, such as the burden of keeping it powered and extra supplies to haul around. But as a patient, and as the designer, I can constantly iterate and make improvements to algorithms or the device setup itself and make it better as I go, all while having the benefit of this lifesaving technology (and more importantly, having the peace of mind to be able to go to sleep safely at night).

And, I have the ability to communicate and spread the word that this type of DIY technology is possible. I frequently talk with others who are interested in building their own artificial pancreas system as part of the OpenAPS movement. Like #DIYPS, I can’t give away an #OpenAPS implementation or build someone else an artificial pancreas. But through #OpenAPS, the community has collectively published a reference design, documentation and code, and established a community to support those who are choosing to do an n=1 implementation, following the reference design we have shared. As of the beginning of May 2016, there have been a total of 56+ people who have decided to close the loop by building individual OpenAPS implementations, with more in progress. (And today, you can see the latest community count of DIY closed loopers here.) You can read more here about the risks and how it is a personal decision to decide to build your own system; each person has to decide if the work to DIY and the risk is worth the potential reward.

For me, this definitely has been and is worth the time and effort. It’s worth noting that I am glad there are traditionally designed devices going into clinical trials and are in the pipeline to be made available to more people. But the timeline for this is years away (2017-2018), so I am also glad that the technology (including social media to enable our community to connect and design new tools together) is where it is today.

You don’t have to be an engineer, or formally trained, to spot a problem with disease management or quality of life and build a solution that works for you. Who knows – the solution that works for you may also work for other people. We can design the very tools we need to make our lives with diabetes, and other diseases, so much better – and we shouldn’t wait to do so.

The power of visualizing your data, your way

Sometimes, it’s the little things that make a big difference – even little glimpses of data, or little improvements to ways that you can control the way you access and view your data (and generate alarms).

For example, I recently had a conversation with a few people in the #WeAreNotWaiting community about the different watch faces that exist for displaying CGM data; and about how much I like my #DIYPS watch face. A few reasons why:

  • It’s a little more discreet than some watch faces showing BG data, so the average person won’t glance at my watch and see a large number.
  • It pulls from the #DIYPS interface, so I can see what I’m predicted to be, and any current recommendations (such as carbs, temp basal, or bolus needed).
DIYPS watchface showing Dana M. Lewis's OpenAPS data

It’s data-heavy, but I like having all this information without having to pull my CGM out and run calculations in my head; or pull out my phone and pull up a web page to #DIYPS; etc.

One of the many cool things about the #WeAreNotWaiting community is how together we have learned and created so many new ways to visualize our data, on various devices (tablets, phones, smart watches) and various size screens. And so when I hear that someone’s not wanting a smart watch, or isn’t using it for diabetes related things, sometimes I think it’s a matter of them finding the right tools to build their own display that works for them. Several times a week I hear about various people working on new, interesting DIY diabetes projects, and it’s awesome that we have tech to improve the tools we have – and excellent social media channels to communicate about these projects.

Related to that, I wanted to share an update – recently Milos, Jason, and others have done some really amazing work to visualize basal rates in Nightscout. (If you use Nightscout, you can get this in the 0.8.2 release – see here for more details.) This means it also can pull in temporary basal rates that are used in #OpenAPS, so you can get a nice visual showing the adjusted basal rate compared to normal scheduled basal rates – and see why it might be needed – on top of display of BG data and everything else that Nightscout offers.

Showing a fake drop in CGM glucose data that is a compression drop

In this example, it also shows how OpenAPS deals with compression drops, or how it might react to other flukey data. Remember, we designed OpenAPS to only enact 30 minute temporary basal rates in a way that is the safest possible thing to do, even if it loses communication. But if it keeps communication, and the system sees a drop and a return to the normal pattern from before (see visual), it can counteract a low temp with higher temp, or vice versa.

The visualization of temp basals in Nightscout (another example here) is an excellent improvement over how I previously used to check and see what OpenAPS had been doing. I have a watchface (similar to the above #DIYPS one) that shows me what the loop is doing currently, but when I wake up in the morning, I was mostly using a basic screen like the below to see the positive, negative, and net temp basal rates on an hourly basis and comparing that to my CGM graph to get an understanding of what happened.

Less insulin needed and OpenAPS reduced accordingly

Visualizing basal rates in Nightscout is a seemingly minor change, but every time we make a change like this that allows me to contextualize all of my data in one place (on a single glanceable watchface; or on the Nightscout screen); it saves a few seconds or minutes that add up to a lot of time saved every day, week, month, and additional year that I’m dealing with diabetes – a big win.

Building diabetes technology is like building a mountain bike

I’ve had the opportunity to meet some fantastic people through our work with #DIYPS and #OpenAPS, one of whom is Eric Von Hippel, an MIT professor and researcher who work on user innovation. He shared a great example of user innovation that I was previously unfamiliar with, but is an awesome parallel for what we in the diabetes community are doing.

History: bike manufacturers used to make bikes for riding on flat surfaces. Some people wanted to ride their bikes down mountains, but existing bikes weren’t too comfortable (they didn’t have spring-based seats – ouch!). So, bikers started customizing and modifying the bikes they had. Eventually, bike manufacturers saw the demand and started building mountain bikes with the same features that the original mountain bikers had used. (And if you don’t like my paraphrased version of this story, Wikipedia is always your friend!)

The parallels:

We in the diabetes community have seen a series of needs that are not being met with our existing, FDA approved medical devices that are out on the market. From not-loud-enough alarms to not enabling us to track critical information like temporary basal rate history on the pump itself, these are the needs that drove me (and Scott) to first build #DIYPS and then to close the loop. At the same time, the need for remote data access is what drove John Costik and then the other Nightscout founders and developers to build an amazing, community-based open source tool to enable real-time remote data sharing.

Are there commercial products coming to market or are in the market that meet some of these needs now? Sure. But remember, I’ve had diabetes since 2002. In 2013, when Scott and I first started working to solve my need for louder alarms, there was NO commercial solution available for either remote data access or alarm customization. Thus the need for #DIYPS, which we built in 2013, and Nightscout, which blossomed in early 2014. And even though tools like Dexcom SHARE and MiniMed Connect have come to market (and in some cases, more quickly with help from the community communicating to the FDA about the critical importance of these tools), they came in 2015, which is a long time to wait for new tools when you’re dealing with diabetes 24/7/365. And when we managed to close the loop, again with help from the amazing #wearenotwaiting community, in December of 2014? Well, it’s now nearing the end of a year (and with amazing continued results from #OpenAPS not just for me, but for 13 additional people and potentially more to come soon), and we are AT LEAST a year and a half, if not more, away from any commercial device to reach the market. Not to mention: I’m not sure that the first generation of closed loops commercially available will be good enough for me.

The commercial entities are getting there. And, I always want to give them credit – I have a closed loop, but I can’t have one without a solidly working insulin pump and an excellent CGM system. They are, for the most part (with the exception of some missing features), making good, solid safe products for me to use.

The manufacturers are also starting to be open to more conversations. Not just “listening”, which they’ve sort-of/maybe done in drips over the past, but actual two-way conversations where we can share the needs that we know of in the community, and discuss what can be incorporated into their commercial product pipeline more quickly. This is progress starting to be made, and I’m excited to see more of it. It seems like there is a refreshed mindset and energy in the industry, as well as an understanding that we all care deeply about safety and that we’re all in this together to make life with diabetes less of a burden – like riding downhill on a mountain bike rather than a road bike.

Does the FDA care more about safety than people with diabetes do?

Today my inbox was suddenly flooded with links to a video with some commentary about artificial pancreas technology at a conference by a representative of the U.S. FDA. The implication many people are getting after watching the video clip is that this FDA representative is implying that people are being unsafe by building their own artificial pancreas. He mentions it is consumer prerogative to build an artificial pancreas – which is correct. The implication of his analogy is that changing your car and killing yourself is similar to a DIY artificial pancreas effort.

The scary takeaway from the video, in my opinion, as well as other public comments in the past, is the implication that the FDA cares more about the potential harms of taking action than the almost certain harms of inaction. And it’s increasingly frustrating that the FDA appears to imply publicly that those of us in the #wearenotwaiting community are doing things unsafely as a result of taking action.

Safety is what drives the #wearenotwaiting movement. In my case, I refuse to sleep another night with the fear that I won’t wake up in the morning because there’s not an FDA-approved system on the market that will wake me up if my life is in danger, let alone a system that can take action and change the situation to be more safe. So I built my own (#DIYPS), because the current FDA-approved CGM devices were not (and still are not) loud enough to wake me up at night, putting me at risk of dying in my sleep. And yes, it ultimately turned into an artificial pancreas – with the same goal of ensuring I wake up every morning, safely (alive). That is my prerogative for sure.

But I fail to see why the FDA, which collectively has no particular knowledge of these systems (especially as they have no jurisdiction, acknowledged on all fronts, over what I do myself – it’s my prerogative), is making public statements implying that these types of systems are categorically unsafe.

As a matter of fact, every DIY system I’ve seen is safer than the FDA-approved standard of care available for people with diabetes. The thousands of people using Nightscout, which is currently a DIY remote view-only monitoring system? Provides more safety and security for people with diabetes, not to mention it is helping achieve better outcomes for people with diabetes than they were able to achieve before with the standard of diabetes care as it exists today. (This was originally for the most part because of restricted access to data, although while that has improved there’s still interoperability issues getting access to real-time data in the same place from the 3+ average devices a person with diabetes uses…unless they have Nightscout or another DIY tool running.) The dozens of people working on their DIY version of an artificial pancreas system (many of whom are collaborating and sharing data in the #OpenAPS community)? These systems are safer than the standard of care, which is to let an insulin pump continue to overdose you if you are dangerously low while you sleep.

(You can see some of my personal data from #DIYPS, before we closed the loop, here and more about outcomes after we closed the loop and had #OpenAPS here. My closed loop artificial pancreas system continues to work excellently nine plus months in, and you can continue to watch my outcomes as I post them to Twitter regularly using the #DIYPS and #OpenAPS hashtags. I’ve also shared the other powerful lessons that DIY tech has helped me learn about diabetes care that helps all people with diabetes, regardless of technology.)

Are there risks to DIY efforts? Yes. But there’s risks to living with diabetes regardless. And as a person with diabetes, I am well aware of the risks that I choose to take. Diabetes is a disease in which you carry around large amounts of a lethal drug in your pocket that you are supposed to inject daily in order to save your life. As a person with diabetes, we are nothing but aware of the multitude of risks of living with this chronic disease 24/7/365.

In fact, even without a DIY artificial pancreas system, I am at risk every day simply from using my FDA-approved insulin pump that does not accurately track how much insulin I am given. (Read more here about how most insulin pumps on the market calculate IOB only from boluses, and often do not provide a record let alone incorporate any temporary adjustments to your basal rates and do not in any case track the impact of suspending your pump completely.)

And as someone who has founded the #OpenAPS movement, with the goal of an open and transparent effort to make safe and effective basic Artificial Pancreas System (APS) technology widely available to more quickly improve and save as many lives as possible and reduce the burden of type 1 diabetes…..we approach it with safety first in mind, and is a big part of why the DIY part is critical and is a part of our number one priority of safety.

Not everyone will choose to go the DIY route. In fact, most people do not and I am told all the time “Oh, I would never do that.” And that’s fine! Everyone can choose what they want for themselves.

But technology has made it increasingly feasible for those of us who want to improve our own safety to do so, because the industry and the FDA are not moving quickly enough to meet our needs.

That, indeed, is our prerogative – to increase our own safety.