Two New Children’s Books – And How I Illustrated Them Without Being An Illustrator

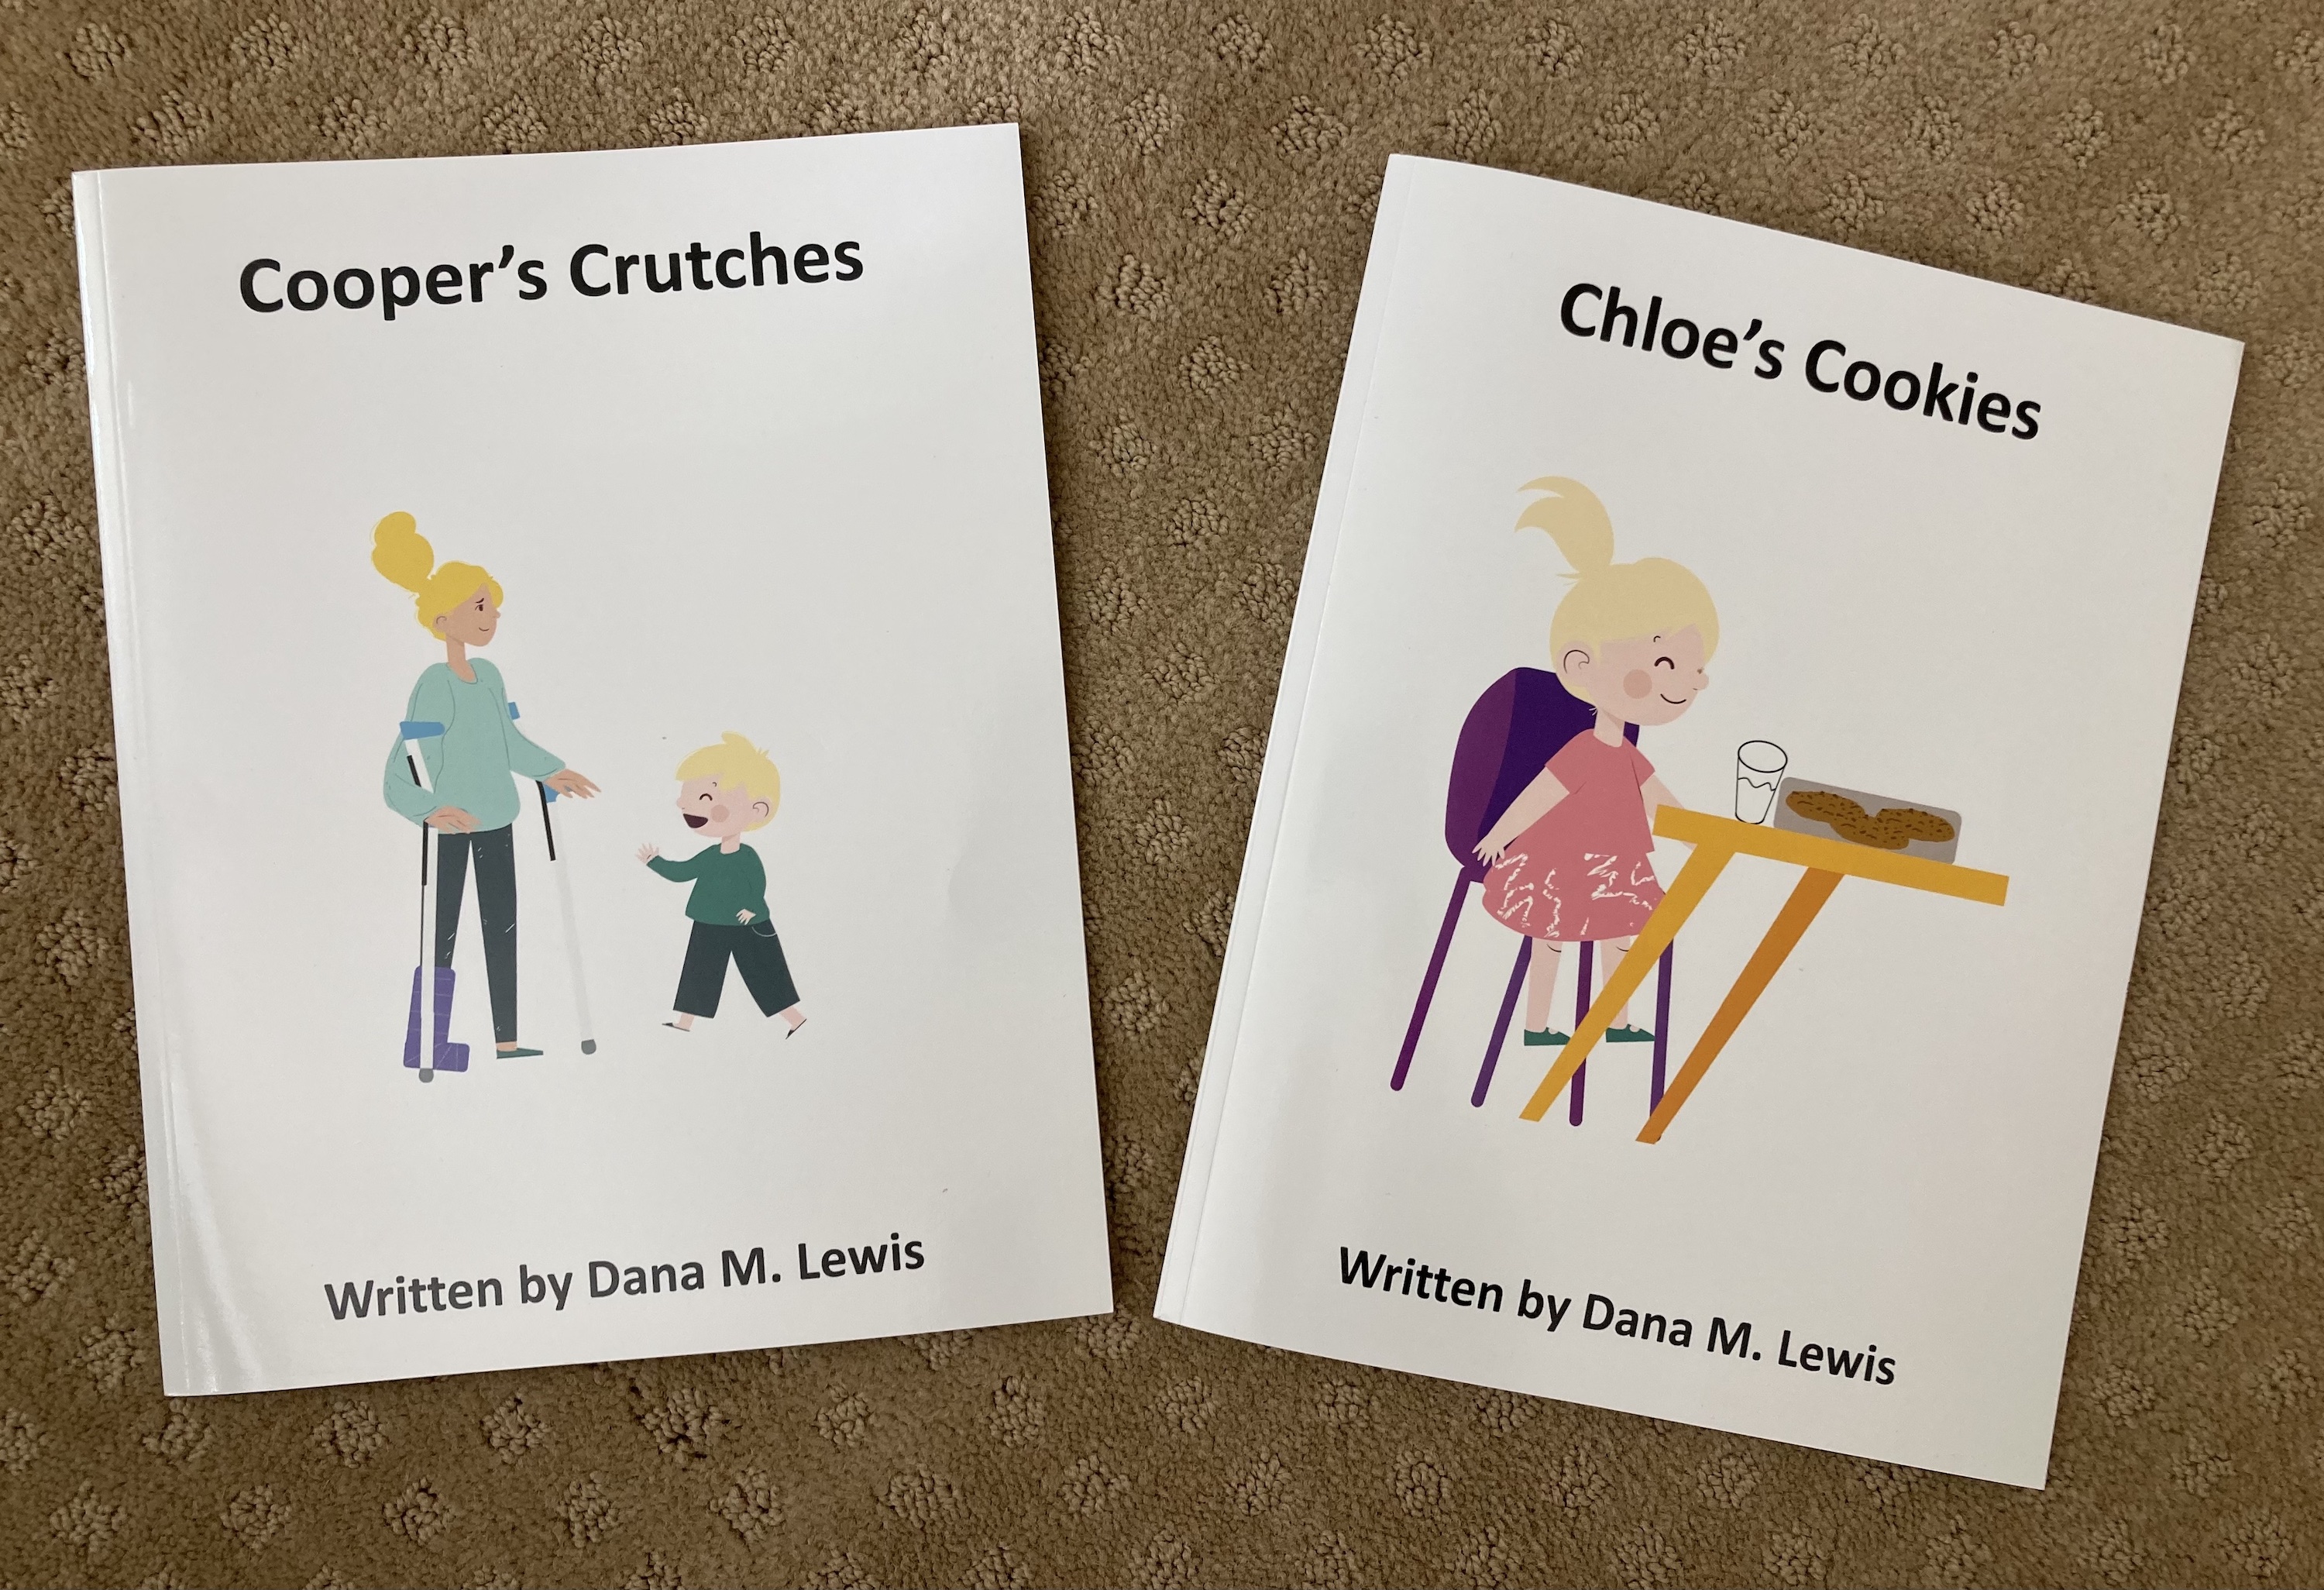
I wrote two new books! You can find “Cooper’s Crutches” and “Chloe’s Cookies” on Amazon in paperback and Kindle formats.

Two children's books lay on the carpet: Cooper's Crutches and Chloe's Cookies, both written by Dana M. Lewis

One of these books I wrote years ago, about a month or so after I broke my ankle, inspired by the initial reactions from one of my nephews about me being on crutches. This new book is called Cooper’s Crutches.

I let it sit for several years, though, because I didn’t have illustrations for it. I’ve used a different illustrator or artist for each of my books so far.

A few weeks ago, though, I started thinking about experimenting with AI-driven illustrations for various projects, including wondering whether I could illustrate a children’s book or other projects with it.

The answer is: not yet. It’s hard to create a character who persists throughout image generation for enough scenes that can fit a two-dozen page storyline, although it would probably work for one or two images! (Especially if you managed to AI-illustrate a character that you could then place in various AI-illustrated scenes. The challenge is also having different poses for the same character, to illustrate a story.)

It then occurred to me to search around and I stumbled across a library of free, open source illustrations. Woohoo! Maybe those would work. Actually, I couldn’t even download that one due to a bug in their site, so I started searching (now that I knew to look for it) and found several other sets of illustrations. I even found a site called Blush that had a series of illustrations by various artists, and a web interface (GUI) that allowed you to modify images slightly then download them.

It’s like paper dolls, but digital – you can adjust the coloring of the hair, hair style, accessories, etc to modify the illustrated character.

I gave it a try, building some illustrations and downloading them. I then did some DIY-ing again in PowerPoint to modify them to help illustrate the full story in my children’s book. I printed a proof copy, but the versions I had downloaded for free were too low resolution and were fuzzy. However, the idea as a whole had worked great! I signed up for a free trial of the “Pro” version of Blush which enabled me to download both high-resolution PNG (image) files as well as SVG files.

Having SVG files theoretically would enable me to further modify and customize these, but as a non-illustrator even though I could load them in Figma and modify them, I still struggled to export them as high-enough resolution to work for printing in a book. I gave up and went back to DIY-ing the modifications in PowerPoint. They’re not perfect, but for the use case of my books (for a very small, niche audience), I doubt they care that they’re not perfect.

Here’s a selection of a few of the pages (not in order) in Cooper’s Crutches:

Excerpt images from Cooper's Crutches by Dana M. Lewis

At the same time that I started playing with these illustrations, I wondered whether I had any more ideas for books that I could illustrate at the same time with the same methods. I had had Cooper’s book written and waiting to illustrate; I now had a method to illustrate, but I wasn’t sure what story to illustrate.

But like all of my children’s books, inspiration again struck based on a situation and conversation I had with one of my nieces. She’s newly lactose intolerant and is taking lactase any time she has milk, like with milk and cookies for a bedtime snack. Lactase is an enzyme…and I’ve been taking enzymes of another sort this year, for exocrine pancreatic insufficiency.

Thus the next book, Chloe’s Cookies, was created!

Here’s a selection of a few of the pages (not in order) in the book:

Excerpt images from Chloe's Cookies, by Dana M. Lewis

Both Cooper’s Crutches and Chloe’s Cookies are illustrated with illustrations from a variety of artists who make their work available on Blush, including: Veronica Iezzi; Susana Salas; Pau Barbaro; Ivan Mesaroš; Mariana Gonzalez Vega; Deivid Saenz; and Cezar Berje.

The neat thing about Blush is their license: you can use the illustrations in any way, including commercial products, and you can modify or combine it with other works (like I did, modifying the images and combining illustrations from various artists) however you like.

I think I’ve likely maximized my use of Blush between these two books; unless other collections get uploaded in the future. But if you need a handful of illustrations that you can customize, definitely check it out!

And if you have ideas for other cool illustration libraries that I could use for future books, please let me know! (Or if you’re an artist who would like to contribute to one of my future books. :) )

TLDR:

I have two new children’s books, and you can find “Cooper’s Crutches” and “Chloe’s Cookies” on Amazon in paperback and Kindle formats.

Illustrating Children's Books without being an illustrator, plus introducting two new children's books by Dana M. Lewis

Everything I did wrong (but did anyway) training for a marathon after a broken ankle and marathon running with type 1 diabetes

This is another one of those posts for a niche audience. If you found this post, you’re likely looking for information about:

  • Running after a broken ankle (or are coming from my “tips for returning to weight bearing” and looking for an update from me, two years after my trimalleolar ankle fracture)
  • Running with the “Galloway method”, also known as run-walk or run/walk methods for marathon or similar long distances – but with information about run-walking for slow runners.
  • Running a marathon with type 1 diabetes, or running an ultra with type 1 diabetes
  • Running a marathon and training for a marathon and going without fuel or less fuel
    *Update: also running an ultramarathon with the same methods (less fuel than typical)!

There’s a bit of all of this in the post! (But TLDR – I ran my marathon (finally), successfully, despite having a previously broken ankle. And despite running it with type 1 diabetes, I had no issues managing my blood sugars during even the longest training runs, even with significantly less fuel than is typically used by marathon runners. I also ran a 50k ultra using the same methods!)

running a marathon after a broken ankle and with type 1 diabetes

First up, some context that explains why I chose run-walking as my method of running a marathon (as that also influences fueling choices) and what it is like to be a slow marathon runner (6 hour marathon ish). I broke my ankle in January 2019 and began running very tiny amounts (literally down the block to start) in summer 2019. I progressed, doing a short run interval followed by a walk interval, increasing the total numbers of intervals, and then slowly progressing to extend the length (distance and/or time) of the running intervals. In early fall 2019, I was attempting a couch-to-5k type program where I would extend my running intervals even longer, but I still had subsequent injuries (a very stubborn big toe joint, then intermetatarsal bursitis in TWO spots (argh)) that made this not work well. Eventually, I went back to running 30 seconds and walking 30 seconds, then keeping those “short” intervals and extending my run. I focused on time at first: going from 5 to 10 to 15 to 20 etc minutes, rather than focusing on distance. Once I built up to about 30 minutes of run-walking (30:30, meaning running 30 seconds and walking 30 seconds), I switched to adding a quarter or half mile each time depending on how I was feeling. But doing 30:30 seemed to work really well for me in terms of the physical impact to my feet, even with long miles, and also mentally, so I stuck with it. (You can go read about the Galloway run-walk-run method for more about run-walking; most people build up to running more, say 5 minutes or 8 minutes followed by a minute of walking, or maybe run 1 mile and then walk for a minute, or walk through the aid stations, but I found that 30:30 is what I liked and stuck with it or 60:30 as my longest intervals.)

This worked so well for me that I did not think about my right ankle a single time during or after my marathon! It took days to even remember that I had previously broken my ankle and it could’ve been problematic or weaker than my other ankle during my marathon. It took a long time to get to this point – I never thought I’d be forgetting even for a few days about my broken ankle! But two years later, I did.)

When COVID-19 struck, and as someone who paid attention early (beginning late January 2020), I knew my marathon would not be taking place in July 2020 and would be postponed until 2021. So I focused on keeping my feet healthy and building up a running “base” of trying to stay healthy feet-wise running twice a week into fall 2020, which worked fairly well. At the start of 2021, I bumped up to three runs a week consistently, and eventually began making one run every other a week longer. My schedule looked something like this:

Monday – 3 miles  Wednesday – 3 miles   Friday – 3 miles

Monday – 4 miles  Wednesday – 3 miles   Friday – 3 miles

Monday – 5 miles  Wednesday – 3 miles   Friday – 3 miles

Monday – 6 miles  Wednesday – 3 miles   Friday – 3 miles

Monday – (back to) 3 miles  Wednesday – 3 miles   Friday – 3 miles

Monday – 8 miles  Wednesday – 3 miles   Friday – 3 miles

Monday – (back to) 3  miles  Wednesday – 5 miles   Friday – 4 miles

Monday – 10 miles  Wednesday – 3 miles   Friday – 3 miles

Note that these runs I refer to were all technically run-walks, where I ran 30 seconds and walked 30 seconds (aka 30:30) until I covered the miles. I was running slow and easy, focusing on keeping my heart rate below its maximum and not worrying about speed, so between that and run-walking I was often doing 15m30s miles. Yes, I’m slow. This all enabled me to build up to safely be able to run 3 runs weekly at first, and then eventually progressed to adding a fourth run. When I added a fourth run, I was very conservative and started with only 1 mile for two weeks in a row, then 2 miles, then up to 3 miles. Eventually, later in my training, I had some of my other runs in the week be a bit longer (4-5 miles) in addition to my “long” run.

But, because I’m so slow, this means it takes a lot of time to run my long runs. If you estimate a 15-minute mile for easy math, that means an 8 mile “long” run would take at least 2 hours. With marathon training (and my goal to train up to multiple 22-24 mile runs before the marathon), that took A LOT of time. And, because of my broken ankle and intermetatarsal experiences from 2019, I was very cautious and conservative about taking care of my feet during training. So instead of following the usual progression of long runs increasing 2-3 weeks in a row, followed by a “cutback” long week, after I hit two hours of long running (essentially 8 miles, for me), I started doing long runs every other week. The other week was a “cutback” long run, which was usually 8 miles, 10 miles (for several weeks), up to eventually 12-14. In terms of “time on feet”, this meant 2-3 hours “cutback” long runs, which according to many people is the max you should be running for marathon training. That doesn’t quite work for slow runners such as myself where you might be doing a 6-hour marathon or 7-hour marathon or thereabouts. (The standard advice also maybe doesn’t apply when you are doing run-walking for your marathon training.)

I had ~6 months to build up to my marathon (from January to the end of July), so I had time to do this, which gave me a buffer in my overall training schedule in case of scheduling conflicts (which happened twice) and in case of injury (which thankfully didn’t happen). I ended up scheduling training long runs all the way to full marathon distance (26ish miles), because I wanted to practice my fueling (especially important for type 1 diabetes marathon runners, which I’ll talk about next) as well as get my feet used to that many hours of run-walking. I did my long runs without care for speed, so some of them were closer to 16-minute mile averages, some were around 15-minute mile averages for the entire run, and the day I ran the full marathon course for training I ended up doing 16+ minute miles and felt fabulous at the end.

I ended up doing a few “faster” “shorter” long runs (on my cutback weeks), where I would do a half marathon-ish distance on the actual marathon course (a public trail), and try to go faster than my super slow long run pace. I had several successful runs where I was at or near marathon pace (which for me would be around 13m30s). So yes, you can train slow and run fast for a marathon, even without much speed work, and even if you are doing a run-walk method, and even if you’re as slow as I am. Running ~15-minute miles took forever but kept my feet and body healthy and happy through marathon training, and I was still able to achieve my sub-6 hour marathon goal (running 13:41 average pace for 26.2+ miles) on race day.

Now let’s talk about fueling, and in particular fueling for people with type 1 diabetes and for people wondering if the internet is right about what fueling requirements are for marathon runners.

I previously wrote (for a T1D audience) about running when fasted, because then you don’t have to deal with insulin on board at the start of a run. That’s one approach, and another approach is to have a smaller meal or snack with fewer carbs before the run, and time your run so that you don’t need to bolus or inject for that meal before you start your run. That’s what I chose for most of my marathon training, especially for longer runs.

On a typical non-running day, I would eat breakfast (½ cup pecans, ¼ cup cranberries, and a few sticks of cheese), my OpenAPS rig would take care of insulin dosing (or I could bolus for it myself), and my BGs would be well managed. However, that would mean I had a lot of insulin on board (IOB) if I tried to run within an hour of that. So instead, during marathon training, I ended up experimenting with eating a smaller amount of pecans (¼ cup) and no cranberries, not bolusing or letting OpenAPS bolus, and running an hour later. I had a small BG rise from the protein (e.g. would go from 100 mg/dL flat overnight to 120-130 mg/dL), and then running would balance out the rest of it.

I generally would choose to target my blood sugar to 130 mg/dL at the start of long runs, because I prefer to have a little bit of buffer for if/when my blood sugar began to drop. I also figured out that if I wasn’t having IOB from breakfast, I did not need to reduce my insulin much in advance of the run, but do it during the duration of the run. Therefore, I would set a higher temporary target in my OpenAPS rig, and if I was doing things manually, I would set a temporary basal rate on my insulin pump to about ⅓ of my usual hourly rate for the duration of the run. That worked well because by the time the beginning of my run (30-45 minutes) brought my BG down a little bit from the start with the protein breakfast bump (up to 130 mg/dL or so), that’d also be when the reduced insulin effect would be noticeable, and I would generally stay flat instead of having a drop at the beginning or first hour of my run.

After my first hour or so, I just kept an eye periodically on my blood sugars. My rule of thumb was that if my BG drifted down below 120 mg/dL, I would eat a small amount of carbs. My carb of choice was an individually wrapped peppermint (I stuffed a bunch in my pocket for the run) that was 3-4g of carb. If I kept drifting down or hadn’t come back up to 120 mg/dL 10-15 minutes later, I would do another. Obviously, if I was dropping fast I would do more, but 75% of the time I only needed one peppermint (3-4g of carb) to pause a drift down. If you have a lot of insulin on board, it would take more carbs, but my method of not having IOB at the start of long runs worked well for me. Sometimes, I would run my entire long run with no carbs and no fuel (other than water, and eventually electrolyte pills). Part of this is likely due to the fact that I was run-walking at such low intensity (remember 15-ish minute miles), but part of this is also due to figuring out the right amount of insulin I needed for endurance running and making sure I didn’t have excess insulin on board. On my faster runs (my half marathon distance fast training runs, that were 2+ minutes/mile faster than my slow long runs) and my marathon itself, I ended up needing more carbs than a super slow run – but it ended up being about 30 grams of carbohydrate TOTAL.

Why am I emphasizing this?

Well, the internet says (and most coaches, training plans, etc) that you need 30g of carbs PER HOUR. And that you need to train your stomach to tolerate that many carbs, because your muscles and brain need it. And without that much fuel, you will ‘hit the wall’.

My hypothesis, which may be nuanced by having type 1 diabetes and wearing a CGM and being able to track my data closely and manage it not only by carbs but also titrating insulin levels (which someone without diabetes obviously can’t do), is that you don’t necessarily need that many carbs, even for endurance running or marathon running.

I’m wondering if there’s a correlation between people who max out their long runs around 16-20 miles and who then “hit the wall” around mile 20 of a marathon. Perhaps some of it is muscle fatigue because they haven’t trained for the distance and some of it is psychological of feeling the brain fatigue.

During my marathon, in which I ran 2+ min/mi faster than most of my training runs, I did not ever experience hypoglycemia, and I did not “hit the wall”. Everything hurt, but I didn’t “hit the wall” as most people talk about. Those might be related, or it might be influenced by the fact that I had done a 20, 22, 24, 26, and another 21 mile run as part of my training, so my legs were “used” to the 20+ mile distance?

So again – some of my decreased fueling needs may be because I was already reducing my insulin and balancing my blood sugars (really well), and if my blood sugar was low (hypoglycemia), I would’ve needed more carbs. Or you can argue my lower fueling needs are because I’m so slow (15-16 minute mile training runs, or a 13m40s marathon pace). But in any case, I wanted to point out that if the fueling advice you’re getting or reading online seems like it’s “too much” per hour, there are people who are successful in hitting their time goals and don’t hit the wall on lower fueling amounts, too. You don’t necessarily have to fuel for the sake of fueling.

Note that I am not doing “low carb” or “keto” or anything particular diet-wise (other than eating gluten-free, because I also have celiac disease) outside of my running fuel choices. This was a successful strategy for me, and I eat what might be considered a moderate carb diet outside of running fuel choices.

Ps – if you don’t fuel (carbs or other nutrients) during your runs, don’t forget about your electrolytes. I decided to keep drinking water out of a Camelbak in a running pack, rather than filling it with Gatorade or a similar electrolyte drink, but I’m pretty electrolyte sensitive so I needed to do something to replace them. I got electrolyte pills and would take them every 30 minutes or so on long training runs when it was hotter. Play around with timing on those: if you don’t sweat a lot or aren’t a salty sweater, you may not need as many as often. I ended up doing the bulk of my long runs on hot days, and I sweat a lot, so every 30 minutes was about right for me. On cooler runs, one per hour was sufficient for me. (I tried these chewable tabs in lemon-lime but didn’t like the salt feeling directly in my mouth; I ended up buying these to swallow instead: I didn’t have any digestion issues or side effects from them, and they successfully kept my electrolytes to manageable levels. The package says not to take more than 10 within a 24 hour period, but I ended up taking 12 for my longest training run and the marathon itself and suffered no ill effects. It’s probably set to max 10 because of the amount of salt compared to the typical daily amount needed..but obviously, if you’re doing endurance running you need more than the daily amount of salt you would need on a regular day. But I’m not a doctor and this isn’t medical advice, of course – I’m just telling you what I chose to do).

In terms of training, here’s everything the internet told me to do for marathon training and everything I did “wrong” according to the typical advice:

  • Your long run should be 20-30% of your overall weekly mileageWhat I did: Sometimes my long runs got up to 70% of my weekly mileage, because I was only running 3 and then 4 days a week, and not doing very long mid-week runs.
  • Have longer mid-week runs, and build those up in addition to your true long runWhat I did: I did build up to a few 5-6 mile mid-week runs, but I chose consistency of my 4 runs per week rather than overdoing it with mid-week medium runs
  • Run 5-6 days a weekWhat I did: Only run 4 times a week, because I wanted a rest day after each run, and wanted a rest day prior to my longest run. I ran Monday, Wednesday, Friday, then added Saturday short runs. Monday was my long run (because I have the benefit of a flexible schedule for work).
  • Get high mileage (start from a base of 30-40 miles a week and build up to 50-60 miles!)What I did: I started with a “base” of 10 miles a week with two runs that I was very proud of. I went to three runs a week, and then 4. My biggest running week during training was 40.55 miles, although they were all 20+ mile weeks (long or cutback weeks) after the first two months of training.
  • Do progressively longer long runs for two or three weeks in a row and then do one cutback week, then continue the progressionWhat I did: Because of the time on my feet cost of being a slower runner, I did an every-other-week long-run progression alternating with a shorter cutback week.
  • Long run, tempo run, speed work, etc. plus easy runs! All the things each week!What I did: a long run per week, then the rest of my runs were usually easy runs. I tried a handful of times to do some “speed” work, but I often time was trying to keep my feet from being injured and it felt like running faster caused my feet to be sore or have other niggles in my legs, so I didn’t do much of that, other than doing some “cutback” long runs (around half marathon distance, as well as my last 21-mile run) at close to marathon pace to get a feel for how it felt to run at that pace for longer.

TLDR, again:

I signed up for a marathon in fall 2018 planning to run it in July 2019 but was thwarted by a broken ankle in January 2019 and COVID-19(/20) for 2020, so I ultimately trained for and ran it in July 2021. I am a slow runner, and I was able to achieve my sub-6 hour marathon goal using run-walk and without causing additional injury to my feet. And, because of my “slow” or less intense running, I needed a lot less fuel than is typically recommended for marathoners, and still managed my blood glucose levels within my ideal target ranges despite 5, 6, and even 7 hours run on my feet. Yes, you can run marathons with type 1 diabetes. And yes, you can run any length endurance runs with type 1 diabetes! I also ran a 50k ultramarathon using the same methods.

Tips and tricks for real life and living with an ankle fracture

As I wrote in a previous post with much more detail (see here), I fell off a mountain and broke my ankle in three places, then managed to break a bone in my 5th toe on the other foot. This meant that my right ankle was in a hard cast for 6 weeks and I was 100% non-weight bearing…but this was challenging because the foot meant to be my stable base for crutching or knee scootering was often pretty wobbly and in a lot of pain.

This post is a follow up with more detailed tips and lessons learned of things that were helpful in living with a leg cast, as well as what the return to weight bearing was really like. I couldn’t find a lot of good information about the transition to weight bearing was really like, so this is my take on information I was looking for and would have appreciated before and during the weight bearing progression process. (And if you’re looking for diabetes-specific stuff, it’s in the last section!)
Tips_weight_bearing_DanaMLewis
Dealing with lack of energy and fatigue

First, it’s worth noting something major about a fractured bone, and *especially* true if it’s a big bone fracture like some of mine were: it takes a lot of healing, which means a lot of energy going to the healing and not much energy left for every day living. I was constantly exhausted – and surprised by this fatigue – pretty much throughout this process. It made sense in the early days (say weeks 1-2 after fracture), but was frustrating to me how little I had energy to do even in the 4-6 weeks after my fracture.

But, then it got worse. Returning to weight bearing took *even more* energy. For example, on the first day of partial weight bearing, I was tasked with putting 25 lbs of weight on my foot in the walking boot. First by placing my foot on the scale and getting reliable with being able to put the right amount of weight on the boot; then by standing and repeating with the scale; then taking a few steps (with the crutches taking the rest of my weight) and re-calibrating with the scale until I was confident in that weight. With weight bearing progression, you’re supposed to spend up to an hour a day working on this.

I took to heart what my ortho said about not progressing fast if you only do 5-10 minute chunks, so after the first day, I tried to always do 10-15 minute chunks at a minimum, with a longer chunk wherever possible as permitted by pain and my energy levels.

But the first few days were really, really tough. It was hard to switch to a new weight every two days – because this meant readjusting how I was stepping/walking, and how much weight and where I placed my crutches. I started with a blister on my right palm, which turned into a squished nerve that made my right hand go numb, and ultimately damaged some tendons in my right wrist, too. This made it painful to use the crutches or even drive my knee scooter when I wasn’t focusing on weight bearing. So I had a lot of pain and suffering in the WB progression process that probably contributed to how fatigued I was overall.

So one of my biggest pieces of advice for anyone with broken bones is to expect your energy to take a(nother) dip for the first few weeks after you start returning to weight-bearing (or return to normal activity outside your cast). It’s a *lot* of work to regain strength in atrophied muscles while still also doing the internal healing on the broken bones!

Tips to deal with so much fatigue as you return to weight bearing:

Some of the tips and things I figured out for being non-weight bearing and sitting around with a hard cast came in handy for the weight-bearing progression fatigue, too.

  • I got a shower bench (this is the one I got) so that it was easy to sit down on and swing my legs over into the shower/bathtub. Once I was out of my hard cast, I still can’t weight bear without the boot, so I still need a sitting shower/bath solution while I return to weight bearing. I also removed the back after a while, so it was easier to sit in either direction depending on preference (washing hair/not) without having to ask Scott to remove the back and re-attach it on the other side.
  • Speaking of showers, I put a toothbrush and toothpaste in the shower so I can also brush my teeth there while seated.
  • I still keep most of my toiletries in the bedside table (or you could have a caddy by the bedside) so I can brush my hair, take my contacts out or put them in, wipe my face (facewipes instead of having to stand at the sink to wash my face), etc. from the bed.
  • I am taking ibuprofen 4x a day, and I get tired of opening the bottle. So I dumped a pile of ibuprofen on my bedside table to make it easy to reach and remember to take first thing in the morning or at night. (There are no kids or pets in my household; keep safety in mind if you have kids etc in your household – this solution may not work for you).
  • The one time I tended to forget to proactively take my medication was mid-day, so I added a recurring calendar event to my calendar saying “take ibuprofen if you haven’t 2x a day” around 2pm, which would be the latest I would take my second round, even if I woke up later in the day and my first dose was later in the morning. This has helped me remember multiple times, especially on weekends or times when I’m away from my desk or bed where I would have the meds visible as a reminder.
  • Pre-mix protein powder (this is what I chose) into the beverage of choice in advance, and keep it in individual containers so it’s easy to get and take (and if I’m really tired, round tupperware containers that have measurement lines make it easy to measure liquid into, put the lid on to shake it up, and drink out of without having to find another cup). I had Scott do this several days in advance when he went on a trip, and we kept doing it in advance even after he got home.
  • I kept using my portable desk for working, taking video calls propped up in the bed with pillows behind me, and also laying the surface flat to eat meals from when I was too tired to get out of the bed.

Other advice for the return to weight-bearing:

If you’re like me, you’ll switch back to weight-bearing accompanied by getting out of your hard cast and getting a walking boot of some sort. If you can, ask your ortho/doc in advance what kind of boot they’ll put you in. It’s often cheaper to get the boot yourself. Perfect example: my ortho didn’t tell me what kind of boot I would need, and I looked at various boots online and saw they ranged $50-100 on Amazon. At my appointment he asked if I brought a boot and since I didn’t, they’d provide one..and the paperwork I signed stated the price would be $427 (::choking::) if the insurance didn’t cover it. Insurance negotiated down to $152 for me to pay out of pocket for since I haven’t hit my deductible…which is still 2-3x more than retail cost. UGH. So, if you can, buy your walking boot via retail. (Same goes for purchasing a knee scooter (here’s the one I got) – it may be cheaper to buy it new through Amazon/elsewhere than getting a medical purchase that goes through insurance and/or trying to do a rental.)

  • You’ll also probably end up with a boot with lots of velcro straps. When you undo your boot, fold back the strap on itself so it doesn’t stick to the boot, another strap, your clothes, etc.
Other equipment that has come in handy:
  • Get multiple ankle braces. I had a slightly structured ankle brace with hard sides that made me feel safer the first few nights sleeping out of the cast, and it was often easier to go from the bed to the bathroom on my knee scooter or crutches with the ankle brace(s) instead of re-putting on my walking boot and taking it off again for a shower. (I transitioned to sleeping in a lighter ankle brace after a week or so, but still used the structured brace inside the waterproof cast bag for swimming laps to help protect my ankle.)
  • An ice pack with a strap to put around your ankle/broken joint. I had gotten this ice pack for my knee last fall, and strap it and another ice pack to my ankle to get full joint coverage.
  • Wide leg athletic pants…ideally ones that you can put on/off without having to take your boot off. (Women should note I found better athletic pants for this purpose in the men’s athletic section at Target..but be aware a lot of the modern men’s style have tapered legs so make sure to watch out for those and have enough width to get over your boot). Taking off the boot is exhausting with so many velcro straps, so any time I can get dressed or undressed without having to remove the boot if I am not otherwise removing the boot is a win.
  • Look online for your state’s rules for a temporary handicap parking pass, and take the paperwork to your first ortho appointment to get filled out. Also, make sure to note where the places are that you can drop off the paperwork in person (in Seattle it was not the same as the DMV offices!), or otherwise be aware of the time frame for mailing those in and receiving the pass. The handicap parking placard has been helpful for encouraging me to get out of the house more to go to the store or go to a restaurant when otherwise I’m too exhausted to do anything.
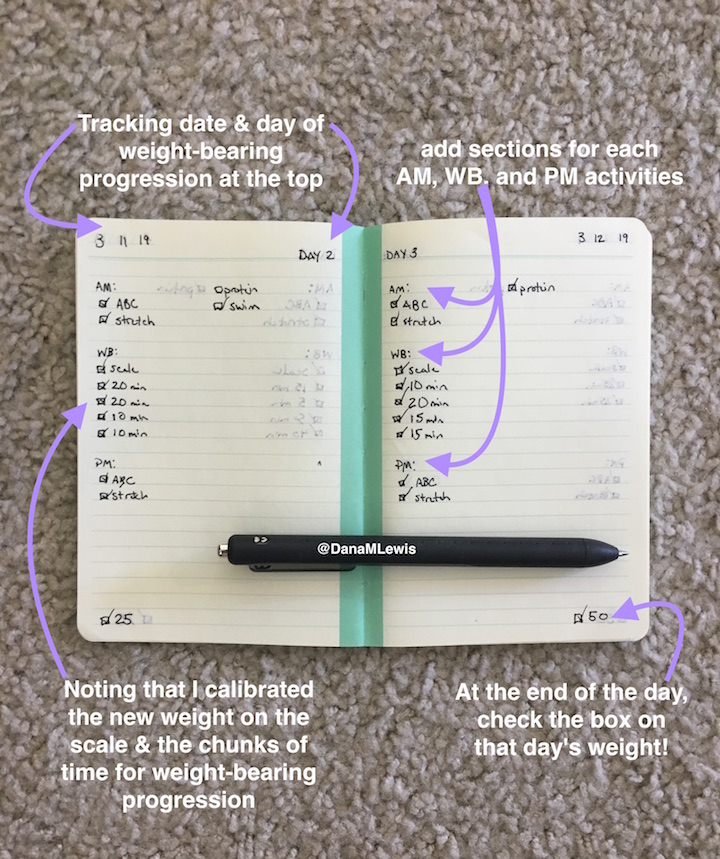
  • A new shiny notebook for writing down your daily activities and what you did. If you’re not a notebook type person, use an app or note on your phone. But despite being mostly digital, I liked having a small notebook by the bed to list my daily activities and check the box on them to emphasize the activities I was doing and the progress I was making. At the beginning, it was helpful for keeping track of all the new things I needed to do; in the middle, it was useful for emphasizing the progress I was making; and at the end it felt really good to see the light of the end of the tunnel of a few pages/days left toward being fully weight bearing.
Weightbearing_notebook_DanaMLewis

Other tips for getting used to a walking boot and transitioning to weight bearing:

  • Don’t be surprised if you have pain in new areas when you move from a hard cast to a walking boot. (Remember you’ll be moving your leg or limbs in different ways than they’ve been accustomed to).
  • My ortho told me the goal of weight bearing progression is to understand the difference between discomfort (lasts a few minutes) and pain (lasts a few hours). You’re likely going to be in discomfort when doing weight bearing progression – that’s normal. Pain (i.e. sharp pain) is not normal, and you should take a break or back down to a previous weight (follow your protocol) if you have it. I was lucky – the only few times I had pain was from trying to press down forcefully on the scale when seated, rather than standing on the scale and naturally letting my weight on my leg. I didn’t end up plateauing at any weight, and was able to follow my protocol of 25lb weight bearing added every 2 days and get to full weight bearing with no delays.
  • If you have a watch with a stopwatch feature, use it. It’s hard to keep track of actual time spent walking (especially at first when 90 seconds feels like 6 minutes) with just a normal watch/clock. You could also use your smartphone’s timer feature. But tracking the time and pausing when you pause or take a break helps make sure you’re accurately tracking toward your hour of walking.
  • The process wasn’t without discomfort – physical and emotional. Putting weight on my leg was scary, and every new weight day was hard as I dealt with the fear and processing of the discomfort, as well as learning how to step and walk and do my crutches in a new way yet again.
  • But what I learned is that the first 5 minutes of every new weight day ALWAYS sucked. Once I recognized this, I set the goal to always tough out a 15 minute session after I calibrated on the scale by walking slowly around my apartment. (I put my headphones in to listen to music while I did it). As long as there was only discomfort and not pain, I didn’t stop until after 15 minutes of slow walking with that weight and also re-calibrated on the scale during and after to make sure I was in the right ballpark.
  • I had to spend the first half hour or so working on my weight bearing by myself. I couldn’t talk on the phone or talk with Scott while I did it; it required a lot of concentration. (The only thing I could do is listen to music, because I’m used to running with music). So distractions did not help when I got started, but toward the end of the hour I could handle and appreciate distractions. Same for day 2 of a weight – having distractions or a task to do (e.g. walk from A to B, or walking while my nephew was on his scooter) helped pass the time and get me to complete my hour or more of weight-bearing work.
  • Be careful with your hands and wrists. Blisters are common, and I managed to both squish a nerve (which caused me to have a numb side of my hand and be unable to type for several days) and also pull or damage tendons on both sides of my wrists. I was torn between choosing to delay my weight bearing progression work, but also recognizing that the sooner I got to full weight bearing the sooner I could completely ditch my crutches and be done hurting my hands. So I chose to continue, but in some cases shortened my chunks of WB walking down to 15 minutes wherever possible to reduce the pain and pressure on my hands.
You’ll likely also be doing range of motion exercises. At first, it’s scary how jerky your motions may be and how little your muscles and tendons respond to your brain’s commands. One thing I did was take a video on day 1 showing me pointing and stretching my ankle, and doing my ABC’s with my foot. Then every week or so when I was feeling down and frustrated about how my ankle wasn’t fully mobile yet, I’d take another video and watch the old one to compare. I was able to see progress every few days in terms of being able to point my foot more, and wider motions for doing the ABC’s with my foot.
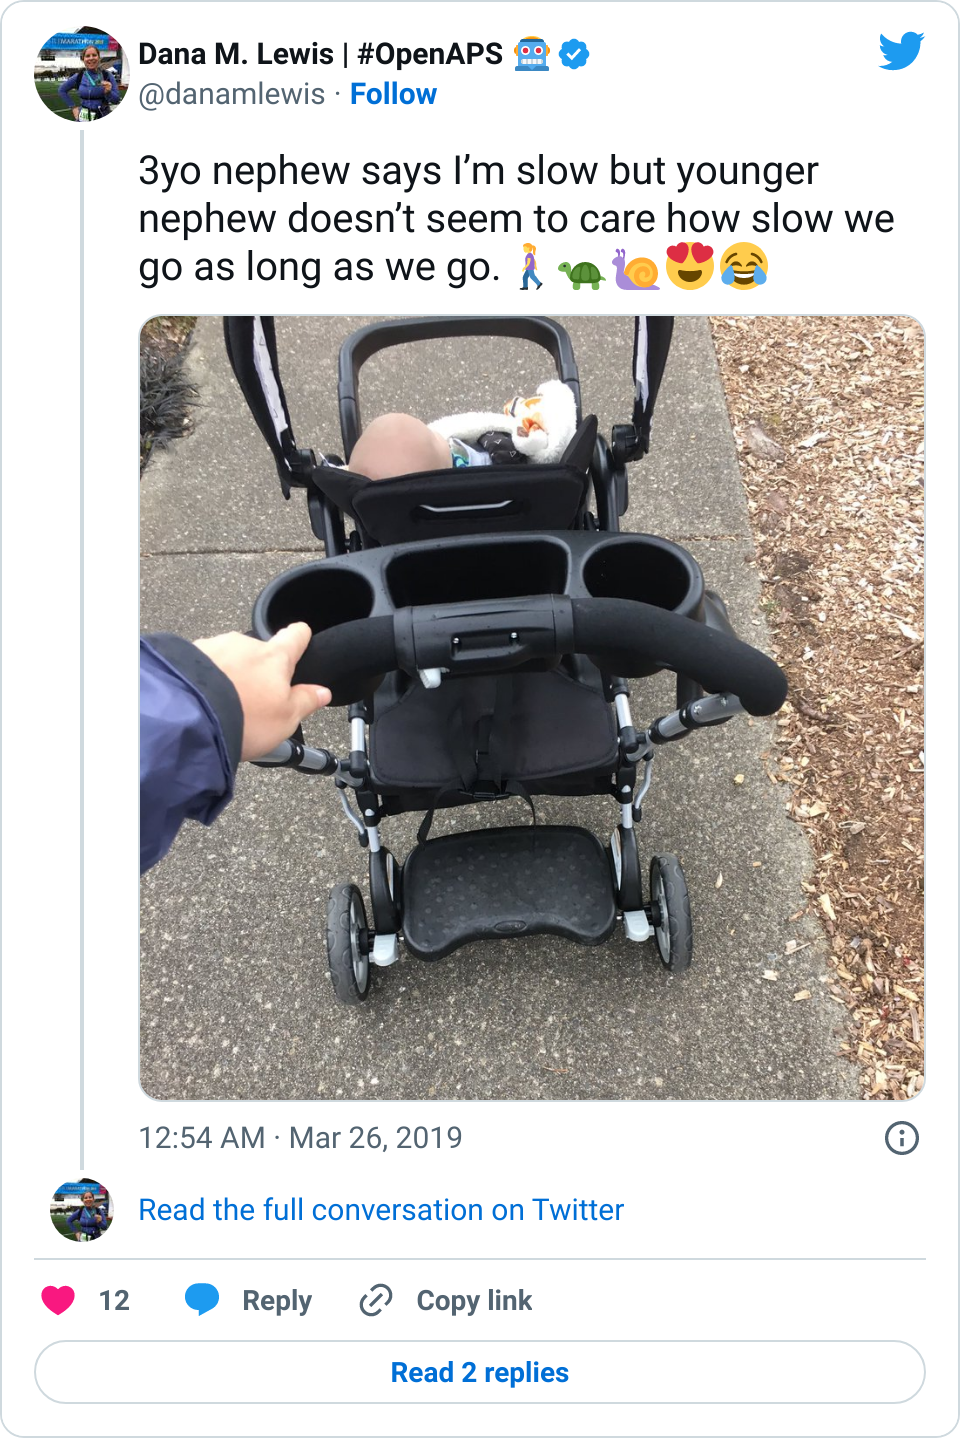
Also remember, once you’re weight bearing and working toward getting rid of your crutches, you can use things like strollers or grocery carts to help you balance (and also kill some of your weight bearing time!) without crutches. The practice will make it easier for re-learning your posture and gaining confidence in walking without crutches.

Using my nephew's stroller to support me walking in a boot after my ankle fracture as I returned to weight bearing

Don’t you usually talk about diabetes stuff on this blog? 😉

(If anyone finds this post in the future mainly for ankle fracture and weight bearing transition/progression tips, you can ignore this part!)

Diabetes-wise, I’ve had a pretty consistent experience as to what I articulated in the last post about actually breaking bones.

  • It was common for my first few days of progressive weight bearing to have a small pain/stress rise in my BGs. It wasn’t much, but 20-30 points was an obvious stress response as I did the first few 15 minutes of weight bearing practice. The following days didn’t see this, so my body was obviously getting used to the stress of weight bearing again.
  • However, on the flip side, the first week of weight bearing progression also caused several lows. The hour of walking was the equivalent of any new activity where I usually have several hours later delayed sensitivity to insulin out of nowhere, and my blood sugars “go whoosh” – dropping far more than they normally would. I had two nights in a row in the first week where I woke up 2-3 hours after I went to sleep and needed to eat some carbs. This normally happens maybe once every few months (if that) now as an OpenAPS user, so it was obviously associated with this new surge of physical activity and hard work that I was doing for the weight bearing.
  • Overall, while I was 100% non-weight bearing, I was eating slightly (but not much) lower carb and slightly less processed food than I usually do. But not always. One day I ended up having 205+ grams of carbs for me (quite a bit more than my average). However, thanks to #OpenAPS, I still managed to have a 100% in range day (80-150 mg/dL). Similarly on a travel day soon after, I ate a lot less (<50g carb) and also had a great day where OpenAPS took care of any surges and dips automatically – and more importantly, without any extra work and energy on my part. Having OpenAPS during the broken bone recovery has been a HUGE benefit, not only for keeping my BGs in range so much of the time for optimal healing, but also for significantly reducing the amount of work and cognitive burden it takes to stay alive with type 1 diabetes in general. I barely had energy to eat and do my hour of weight bearing each day, let alone anything else. Thankfully good BGs didn’t fall by the wayside, but without this tech it certainly would have.

And finally the pep talk I gave myself every day during weight bearing progression work:

This is short-term and necessary discomfort and suffering on the way to weight bearing. It sucks, but you can and will do it. You have to do it. If you need to take a break, take a break. If you need to do something else to get yourself pumped up and motivated to do your weight bearing, it’s ok to do that. But you’ll get there. Slowly, but surely. You’ve got this!

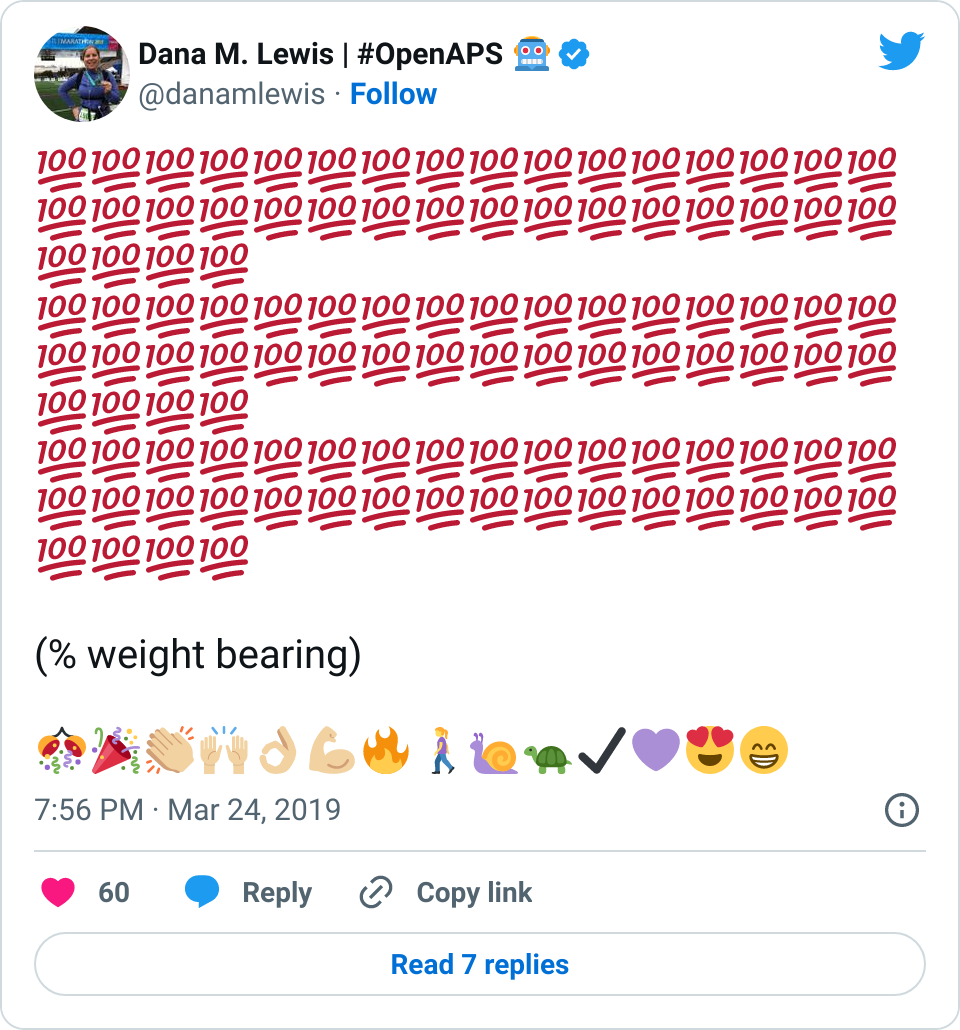
Proof that I did get there:

Lots of 100 emojis celebrating 100% weight bearing after my broken ankle

Best of luck and lots of support and encouragement to anyone who’s working their way to weight bearing after an injury, and many thanks to everyone who’s supported me and cheered me on virtually along the way!

2021 update – see this post about (finally) running the marathon that I had signed up for before I broke my ankle!

Broken bones (trimalleolar ankle fracture), type 1 diabetes, and #OpenAPS

In January, Scott and I planned and went on a three day hiking trip in New Zealand. NZ is famous for “tramping” and “trekking”, and since we were in the country for a conference (you can see my talk at LinuxConfAU here!), we decided to give it a try. This was my first true “backpacking” type trip where you carry all your stuff on your back; and the first multi-day hiking experience. You could either rent a cot in a hut and carry all your food and cooking utensils and bedding on your back; or you could pay to hike with a company who has a lodge you can stay at (with hot showers and amazing food) and also has guides who hike with your pack. They had me at “gluten free food” and “hot showers”, so I convinced Scott that was the way we should do our Routeburn Track hike!

I planned ahead well for the hike; they gave us a packing list of recommended things to carry and bring. I learned from a friend in NZ, Martin, who had gone trekking a few weeks prior: his pack went over a cliff and was lost – yikes! Therefore, I planned one set of supplies in baggies and put them in both Scott & my pack just in case something happened to one of our packs, we’d still be completely covered.

Day 1 of the hike was awesome – it was overcast and felt like hiking in Seattle, but the scenery and wildlife were still great to experience. Since it was raining off and on, the waterfalls were spectacular.

Day 2 also started awesome – it was a breathtakingly clear morning with blue skies and sunshine as we hiked up above the tree line and over a mountain ridge, along the valley, and onward toward the lunch spot. I was feeling great and enjoying my hike – this was one of my all-time favorite places to hike in terms of the view of the valley and lake that we hiked from; and the mountain views on the other side of the ridge once we topped the mountain and crossed over.

However, about 30 min from the lunch shelter (and about 300 feet of elevation to go), I noticed the lady hiking in front of us decided to sit and slide down a particularly large and angled rock on the trail. I approached the rock planning to stop and assess my plan before continuing on. Before I even decided what to do, I somehow slipped and vaulted (for lack of a better word) left and off the trail…and down the slope. I flipped over multiple times and knew I had to grab something to stop my flight and be able to save myself from going all the way off the mountain slope. I amazingly only ended up about 10 feet off the trail, clinging to a giant bush/fern-like plant.

I had to be pulled back up to the trail by Scott and another hiker who came running after hearing my yell for help as I went down the mountain. (Scott came down off the trail few feet, and had to hold onto the hand of another hiker with one hand while pulling me up with the other, just like in the movies. It’s not a lot of fun to be at the end of the human chain, though!) At that point, I knew I had injured my right ankle and could only use my left foot/leg and right knee to try to climb back up to the trail while they pulled on my backpack. We got me back on to the trail and over to a rock to rest. We waited a few minutes for the back-of-the-pack guides who showed up and taped around my ankle and boot to see if I could walk on it – they thought it was sprained. I could flex, but couldn’t really put weight on it without excruciatingly sharp pain on the right side. I’d never sprained my foot before or broken any bones in my life, so I was frustrated by how painful the ‘sprain’ was. I had an overwhelming wave of nausea that I knew was in response to the pain, too, so at one point I had to sit there and lean back with my eyes closed while everyone else talked around me.

The guides wanted to see if we could get to a nearby river to ice my leg in. I used my poles as pseudo-crutches in front of me, with my arms bent at 90 degree angles, and with Scott behind me to check my balance, would crutch and hop on one leg. It wasn’t like regular crutching, though, where you can press your weight down on your arms and hands. It was really an act of placing the poles slightly forward for balance and then hopping up and forward, pressing off my left leg. My left leg was quickly exhausted and cramping from the effort of hopping forward with my entire body weight. It was also complicated by the rain making things more slippery; and of course; this is a mountain trail with rocks and boulders of different sizes. What I didn’t even notice walking normally on two feet became incredibly frustrating for figuring out when and how to jump up onto a small rock; or around to the side; etc.

“Lucky” for me (eye roll), we happened to be in an ascending section of the trail with quite a few large rocky sections, and there was no way I could hop up the uneven rocks on foot. So instead, I chose to crawl up and over those sections on my hands and knees. Then I would get up at the top and hop again through the “flatter” gravel and rock sections, then crawl again. It was slow and exhausting, and painful when I would get up one one leg again and start hopping again. I was in the most physical pain I’d ever been in my life.

After about a very slow and painful quarter of a mile, and as rain was dripping down more steadily, the guides decided I wouldn’t make it the remaining 300ft of elevation/30 minute (normal) hike to the lunch spot. They radioed for a medevac helicopter to come pick me up. I was incredibly upset and disappointed that I had ruined our hike… but also knew I absolutely wouldn’t even make it to the lunch shelter. I remember saying “I feel so stupid!” to Scott.

The helicopter came in a surprisingly quick amount of time, and they let out one of the EMT’s nearby and then flew over to a hill across from the trail. The EMT saw that I was decently clothed and covered (I had 3/4 length running pants on; a rain jacket and hood; and had a second rain jacket to cover my legs against the rain and wind) and did a verbal status check to confirm I was decent enough for them to lift me off the mountain. They weren’t able to land safely anywhere nearby on the trail because it was so steep and narrow; so they put me in a “sack” that went around my back and looped over my arms and between my legs, and was hooked on to the EMT’s harness. Scott and the guide stood back, while the helicopter came back and lowered the winch. I was winched up from there. However, the EMT had told me once we got up to the helicopter that the team inside would pull me straight back. And that didn’t happen, which was slightly more terrifying because we started flying away from the mountain while still *outside* the helicopter. It turns out the helicopter had unloaded a stretcher and supplies on the nearby hill, and so we were lowered down – with me and the EMT still perched outside the skids – to the hillside there, so the team could then gather the supplies & then load me in so I could sit on the stretcher.

The other terrifying factor about being evacuated off the mountain was that due to the weather that was blowing in hours ahead of schedule, and the “we have to winch you off the mountain” aspect: they couldn’t take Scott with us. So I had to start making plans & preparing myself for going to the hospital by myself in a foreign country. I was terrified about my BGs & diabetes & how I know hospitals don’t always know what to do with people with T1D, let alone someone on a (DIY) closed loop. I tried to tamp down on my worries & make some plans while we waited for the helicopter, so Scott would know I was okay-ish and worry slightly less about me. But at that point, we knew he would have to finish the day’s hike (another 3-4 hours); spend the night; and hike down the next day as planned in order to meet up with me at the hospital.

As we lifted off in the helicopter, I handed the EMT my phone, where I had made a note with my name, age, medical information (T1D & celiac), and the situation about my ankle. He loved it, because he could just write down my information on the accident forms without yelling over the headset. Once he gave me my phone back, a few minutes later we passed back into an area with signal, and I was able to send text messages for the first time in 2 days.

I sent one to my mom, as carefully worded as I could possibly do:

“Slipped off the trail. Hurt ankle. BGs ok. In a helicopter to the hospital in Queenstown. Just got signal in helicopter. Don’t freak out. Will text or call later. Love you”

It had all the key information – something happened; here’s where I’m heading; BGs are fine; pleeeeeeeease don’t freak out.

I also sent a text to Scott’s dad, Howard, who’s an ER doc, with a tad different description:

“Slipped and flipped off the trail. Possible ankle fracture or serious sprain. Being medevac’d off in a helicopter. BGs are fine. But please stand by for any calls in case I need medical advice. Just got signal in the chopper. Scott is still on the trail until tomorrow so I am solo.”

I was quite nervous when we arrived at the hospital. I haven’t been in an ER since high school (when I was dehydrated from a virus). I’ve heard horror stories about T1D & hospitals. However, most of my fears related to T1D were completely unfounded. When I arrived, the EMT did some more paperwork, I talked briefly to a nurse, and then was left alone for quite a while (maybe an hour). Other than mentioning T1D (and that my BGs were fine) and celiac to the nurse, no one ever asked about my BGs throughout the rest of the time in the ER. Which was fine with me. What my BGs had actually done was rise steadily from about 120 up to 160, then stayed there flat. That’s a bit high, but given I was trying to manage pain and sort out my situation, I was comfortable being slightly elevated in case I crashed/dropped later when the adrenaline came down. I just let OpenAPS keep plugging away.

The first thing that was done in the ER about an hour after I arrived was wheeling me to go get an x-ray. It was quick and not too painful. I remember vividly that the radiologist came back out and and said “yes, your ankle is definitely broken. In two places.” I started at her and thought an expletive or two. But for some reason, that made me feel a lot better: my pain and the experience I had on the mountain was not totally disproportionate to the injury. I relaxed a lot then, and could feel a lot of the stress ebbing away. My BGs started a slow sloping drop down almost immediately, and ended up going from 160 down to 90 where I leveled out nicely and stayed for the next few hours.

After I was wheeled back to my area of the ER, the ER doc showed up. He started asking, “So I heard you hopped and climbed off the mountain?” and then followed up by saying yes, my ankle was broken…in three places.

Me: “WHAT? Did you say ::three::?”

The ER doc said he had already consulted ortho who confirmed I would need surgery. However, it didn’t have to be that night (halleluljah), and they usually waited ’til swelling went down to operate, so I had a choice of doing it in NZ or going home and doing it there. He asked when I was planning to leave: this was Sunday evening now; and we planned to fly out Wednesday morning. I asked if there were any downsides to waiting to do surgery at home; any risk to my long-term health? He said no, because they usually wait ~10 days for the swelling to go down to operate. So I could wait in NZ (me: uhhh, no) or fly home and see someone locally. I was absolutely thrilled I wouldn’t need to operate then and there, and without Scott. I asked for more details so I could get my FIL’s opinion (he concurred, coming home was reasonable), and then confirmed that I liked the plan to cast me; send me on my way; and let me get surgery at home.

It took them another 2 hours to get me to the procedure room and start my cast. This was a small, 6-bed ER. When they finally started my cast, the ER doc had his hands on my ankle holding it up…and another nurse rushed in warning that a critical patient was in route, 5 minutes out. The ER doc and the other nurse looked at each other, said “we can do this by then”, and literally casted me in 2 minutes and were wheeling me out in the third minute! It was a tad amusing. I was taken back to x-ray where they confirmed that the cast was done with my ankle in a good position. After that, I just needed my cast to be split so I could accommodate swelling for the long plane rides home; get my prescriptions for pain med; get crutches; and go home.

All that sounds fast, but due to the critical patient that had come in, it took another two hours. They finally came and split my cast (which is done by using the cast cutter to cut a line, then another line, then pull out the strip in between), sold me my crutches, and wrote my prescriptions. The ER doc handed me my script, and I asked if the first rx had acetaminophen (because it would mess up my G4). He said it did, so he scribbled that out and prescribed ibuprofen instead. The nurse then got & apologized for “having to sell me” crutches. New Zealand has a public health policy where they cover everything in an accident for foreigners: I didn’t have to pay for the medevac (!!), the ER visit (!!), the x-rays (!!), the cast …nothing. Just the crutches (which they normally lend for free to NZ but obviously I was taking these home). Then I was on my way.

Thankfully, the company we hiked with had of course radioed into Queenstown, and the operations manager had called the ER and left a message to give to me with his phone number. A few hours prior, when I found out I’d be casted & released that night, I had been texting my mom & had her call the hotel Scott & I were staying at the next (Monday) night to see if they had a room that (Sunday) night that I could check into. The hiking company guy offered to drive me wherever, so he came to pick me up. I had texted him to keep him posted on my progress/timeline of release (nice and vague and unhelpful for the most part). But I also asked as soon as we got in contact if he could radio a message to the lodge & tell Scott that: a) my ankle was broken; b) I was ok; c) I’d be at the hotel when he got in the next day and not to rush, I was ok. The guy said he could do me one better: when he came to pick me up, he’d bring the phone so I could ::call: and talk to Scott directly. (I almost cried with relief, there, at the idea of getting to talk to Scott so he wouldn’t be beside himself worrying for 22 hours). I did get to talk to Scott for about a minute and tell him everything directly, and convince him not to hike out himself in the morning, but stick with the group and the normal transport method back to Queenstown, and just come meet me at the hotel when he got back around 4pm the next day. He agreed.

(What I didn’t find out until later is that Scott had considered doing the rest of the hike completely that night. Two things ended up dissuading him: one was the fact that a guide would have had to go with him and then hike all the way back to the lodge that night. The other was the fact that he talked to me and I would be out of the hospital by the time he arrived; so since I said I was fine alone at the hotel, he’d wait until the next day.)

So, I was taken to the hotel and got help getting up to the hotel room and had ice delivered along with extra pillows to prop up, and our bags brought in. Thankfully, on the mountain, the EMT had agreed to winch my backpack up with me. This was huge, because I noted earlier, I had a full set of supplies in my backpack, and all we had to do on the mountain was grab an extra international adapter and my charger cords out of Scott’s bag and toss it into mine. That made it easy to just pull what I needed that night (my rig; charger cords & adapter; a snack) out of the top of my bag from my perch on the bed. I plugged in my rig; made sure I was looping, took my pain meds, and went to sleep.
Broken_bones_type_1_diabetes_trimalleolar_fracture_OpenAPS_DanaMLewisAmazingly, although you’re probably not any more surprised than I am at this point, my BGs stayed perfectly in range all night. Seriously: after that lowering from 160 once I relaxed and let some of the stress go? No lows. No highs. Perfectly in range. The pain/inflammation and my lack of eating didn’t throw me out of range at all. The day of the fall, all I ate was breakfast (8am); didn’t eat lunch and didn’t bother doing anything until 11pm when I had a beef jerky stick for some protein and half a granola bar (10g carbs). For the next two and a half weeks now, I’ve had no lows, and very few highs.

The one other high BG I really had was on Sunday after we got home (we got back on Wednesday). It happened after my crutch hit the door coming back to my bedroom from the bathroom, and I did such a good job hopping on my left foot and protecting my casted right foot, that I managed to break the smallest toe on my left foot. I pretty immediately knew that it was broken based on the pain; then my BG slowly rose from 110 up to 160; and then I started to have the same “shadow” bruising spread around my foot from the base of the toe. Scott wasn’t sure; when I had fallen off the trail I had yelled “help!” and “I think I broke my foot!”. I didn’t say it out loud this time; just thought it. Again, after some ibuprofen and icing and resting, within an hour my BG started coming back down slowly to below 100 mg/dL.

On Tuesday, I went to the orthopedic surgeon and confirmed: my left toe is definitely broken. My right ankle is definitely broken: the trimalleolar fracture diagnosis from NZ was confirmed. However, given that none of the ligaments were damaged, and the ankle was in a decent position, the ortho said there’s a good chance I can avoid surgery and heal in place inside a cast. The plan was to take off my split, plaster-based cast they did in NZ and give me a proper cast. We’d follow up in 10 days and confirm via x-ray that everything was going well. I asked how likely surgery would still be with this plan; and he said 20%. Well, given that I was assuming 100% before, that was huge progress! He also told me I shouldn’t travel within 4 weeks of the injury, which unfortunately means I had to cancel my trip to Berlin for ATTD later in February. It may or may not mean I have to cancel another trip; I’ll have to wait and see after the next follow up appointment, depending on whether or not I need surgery.

Up until this point, I had been fairly quiet (for me) on social media. I hadn’t posted the pictures of our hike; I didn’t talk about my fall or the trip home. One friend had texted and said “I wondered if you fell off the face of the earth!” to which I responded “uhhh…well…about that…I ::only:: fell off a mountain! Not earth!” Ha. Part of the reason was not knowing whether or not I would be able to travel as planned, and wanting to be courteous to informing the conferences who invited me to speak about the situation & what it meant for me being able to attend/not. Once I had done that, I was able to start posting & sharing with everyone what had happened.

To be perfectly honest, it’s one thing to have a broken limb and a cast and have to use crutches. It’s an entirely other ball of wax to have a broken toe on the foot that’s supposed to be your source of strength & balance. The ortho gave me a post-op surgical shoe to wear on my left foot to try to help, but it hurt so bad that I can’t use my knee scooter to move easily without my left foot burning from the pain. Thankfully, Scott’s parents’ neighbor also had a motorized sit-scooter that we borrowed. However, due to the snowpocalypse that hit Seattle, I’ve not been able to leave the house since Thursday. We haven’t been able to drive anywhere, or walk/scooter anywhere, in days. I’m not quite stir crazy yet; but; I’ll be really looking forward to the sidewalks being snow-free and hopefully lake-free (from all the melting snow) later in the week so I can get out again. I also picked up a cold somewhere, so I for the most part have been stationary in bed for the last week, propping up my feet and using endless boxes of Kleenex.

OpenAPS, as you can see, has done an excellent job responding to the changes in my insulin needs from being 100% sedentary. (Really – think trips to the bathroom and that’s it.)  In addition to the increased resistance from my cold and being sedentary, there’s one other new factor I’ve been dealing with. I asked my ortho about nutrition, and he wants me to get 1g of protein per kg of body weight, plus 1000mg/day of calcium. He suggested getting the extra protein via a powder, instead of calories (e.g. eating extra food). I found a zero-carb, gluten free powder that’s 25g of protein per scoop, and have been trying it with chocolate milk (which is 13g of carb and 10g of protein).

I’ve been drinking that 2x a day. Interestingly, previous to my injury, unless I was eating a 100% no carb meal (such as eggs and bacon for breakfast), I didn’t need to bolus/account for protein. However, even though I’m entering carbs for chocolate milk (15), I was seeing a spike up to 150 mg/dL after drinking it. I tried entering 30g for the next time (13g of milk; plus about 50% for the 25+10g worth of protein), and that worked better and only resulted in a 10 mg/dL rise in response to it. But even a handful of nuts’ worth of protein, especially on days where I’m hardly eating anything, have a much stronger effect on my BGs. This could be because my body is adjusting to me eating a lot less (I don’t have much appetite); adjusting to the much-higher-protein diet overall; and/or responding to the 100% sedentary pattern of my body now.

Thankfully, it’s not been a big deal, and OpenAPS does such a good job tamping down on the other noise-based factors: it’s nice that my biggest problems are brief rises to 160 or 170 mg/dL (that then come back down on their own). My 7-day and 30-day BG averages have stayed the same; and my % time in range for 80-160 has stayed the same, even with what feels like a few extra protein-related blips, and even when some days I eat hardly anything and some days I manage 2-3 meals.

So to summarize a ridiculously long post:

  • When I break bones, my BGs rise up (due to inflammation and/or the stress/other hormonal reaction) up to 160 mg/dL until I relax, when they’ll come back down. Otherwise, broken bones don’t really phase OpenAPS.
  • Ditto for lack of movement and changes in activity patterns not phasing OpenAPS.
  • The biggest “challenge” has been adjusting to the 3x amount of protein I’m getting as a dietary change.
  • I have a trimalleolar fracture; and that’s about 7% of ankle fractures. I read a lot of blog posts about people needing surgery & the recovery from it taking a long time. I’m not sure I won’t need surgery; but I’m hoping I won’t need it. If so, here’s one data point for a trimalleolar fracture being non-surgical  – I’ll update more later with full recovery timelines & details. Also, here is a Twitter thread where I’m tracking some of the most helpful things for life with crutches.
  • Don’t break your littlest toe – it can hurt more than larger fractures if you have to walk on it!

A huge thank you goes to my parents and Scott’s parents; our siblings on both sides for being incredibly supportive and helpful as well; and Scott himself who has been waiting on me (literally hand and foot) and taking most excellent care of me.

And thank you as well to anyone who read this & for everyone who’s been sending positive thoughts and love and support. Thank you!